Getting a box’s measurements seems simple enough, but in the world of logistics and warehousing, it’s a foundational skill that can make or break your budget. The magic formula is always length, width, and height, in that exact order. Grab a reliable tape measure, and let’s dive into why getting these three numbers right is so critical.
Why Accurate Box Measurement Is a Non-Negotiable Skill
For any manager or buyer coordinating logistics, knowing how to measure box dimensions is a core competency that directly impacts the company’s bottom line. A tiny error, even just an inch, can set off a costly domino effect.
Suddenly you’re hit with unexpected carrier fees, you’re wasting precious storage space, and you might even be compromising the safety of the products inside. Inaccurate measurements are one of the most common and most preventable sources of friction in the supply chain.
Nailing the numbers right from the start is your best defense against these headaches. Precision ensures every subsequent calculation, from dimensional weight charges to how you configure a pallet, is built on solid ground. A miscalculation doesn’t just mess up one shipment; it can throw off inventory counts, lead to disastrously inefficient use of expensive racking, and gum up your entire fulfillment process.
The Tools of the Trade
Before you start measuring, you need the right gear. A flimsy ruler you found in a desk drawer might work in a pinch, but a professional environment demands tools that deliver consistent, accurate results every single time. Having the right equipment on hand not only speeds things up but also drastically cuts down on human error.
Here’s a breakdown of the essential tools we recommend for any serious logistics or warehouse operation.
Essential Tools for Accurate Box Measurement
Investing in quality measuring tools is a small upfront cost that pays for itself almost immediately. A good set of tools standardizes your process, ensuring everyone on your team gets the same measurements every time.
| Tool | Best For | Accuracy Level | MH-USA Recommendation |
|---|---|---|---|
| Retractable Tape Measure | General-purpose measuring of standard corrugated boxes and pallets. | Good | A durable, locking tape measure is an absolute must-have for every warehouse. |
| Yardstick or Straight Edge | Measuring large, flat, or unassembled boxes quickly and easily. | Good | Perfect for inbound quality control checks before boxes are ever assembled. |
| Digital Calipers | High-precision measurements of small components or box wall thickness. | Excellent | Crucial for engineering, product design, and developing custom packaging solutions. |
| Laser Distance Measurer | Quickly measuring large objects, pallet stacks, or warehouse spaces. | Very Good | This is a massive time-saver for facility planning and layout design. |
Ultimately, having a few reliable tools on hand makes a world of difference. When you’re dealing with tight margins and even tighter spaces, precision is everything.
Accurate measurements are the bedrock of efficient logistics. They empower managers to make informed decisions that optimize space, control shipping expenditures, and protect assets throughout the supply chain.
With the demand for warehouse space soaring and shipping costs always on the rise, there’s simply no room for error. By making precision a priority, you can sidestep unnecessary delays and ensure your operational planning is as sharp and effective as possible.
Need help designing a more efficient warehouse layout based on your inventory’s dimensions? Our experts provide free layouts and designs with no obligation. Request a Quote or call us at (800) 326-4403 to get started.
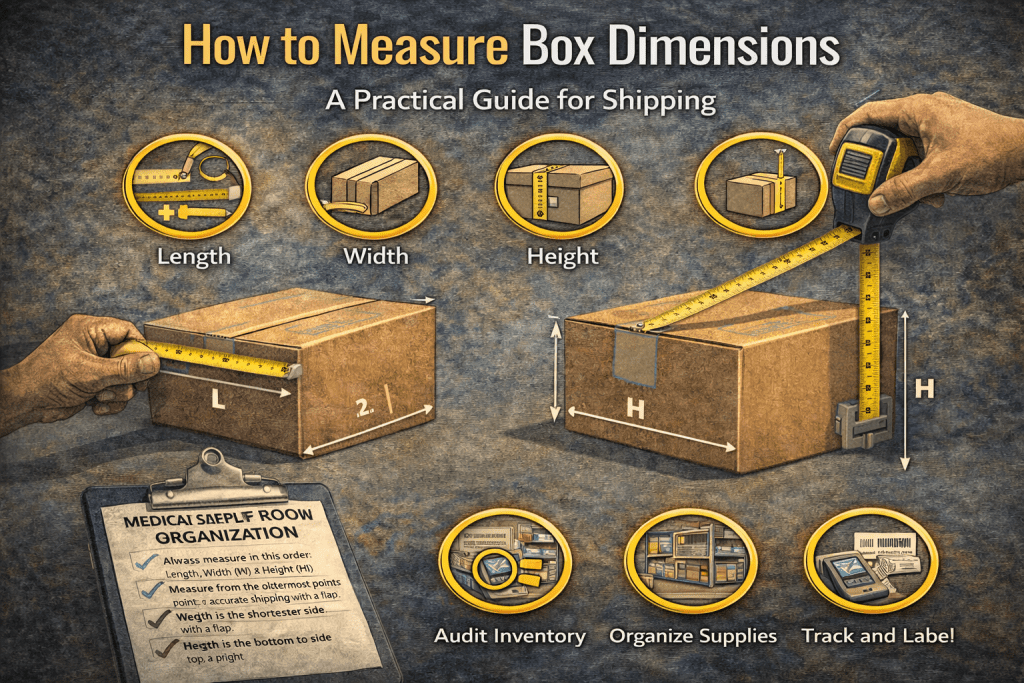
How to Measure a Standard Corrugated Box the Right Way
When it comes to measuring a standard box, the formula everyone knows is Length x Width x Height (L x W x H). It sounds simple enough, but the details are what separate a smooth-running warehouse from one constantly hit with surprise fees and wasted space. Nailing this process standardizes your operations and builds consistency from the receiving dock all the way to the shipping station.
There’s an industry-standard way to identify each side. The Length is always the longest side of the box that has a major flap. Next up, the Width is the shorter side that also has a major flap. Finally, the Height (sometimes called Depth) is simply how tall the box is when it’s assembled and standing up.
The Critical Difference: Inside vs. Outside Dimensions
One of the most common hangups is confusion over internal versus external dimensions. The one you need depends entirely on your goal at that moment.
- Internal Dimensions: This is the measurement of the usable space inside the box. You absolutely need this number to know if your product, plus any protective dunnage like foam or bubble wrap, will fit properly.
- External Dimensions: This is the measurement of the outside of the box. Carriers use this number to calculate dimensional weight, and your team will use it for planning pallet loads and optimizing warehouse shelving.
A box made from thick, double-wall corrugated cardboard can have a pretty significant difference between its internal and external measurements. Forgetting to account for the thickness of the cardboard itself is an easy mistake to make, but it often leads to ordering boxes that are just a hair too small for your products.
This graphic breaks down the standard L x W x H measurement process for any regular slotted carton.
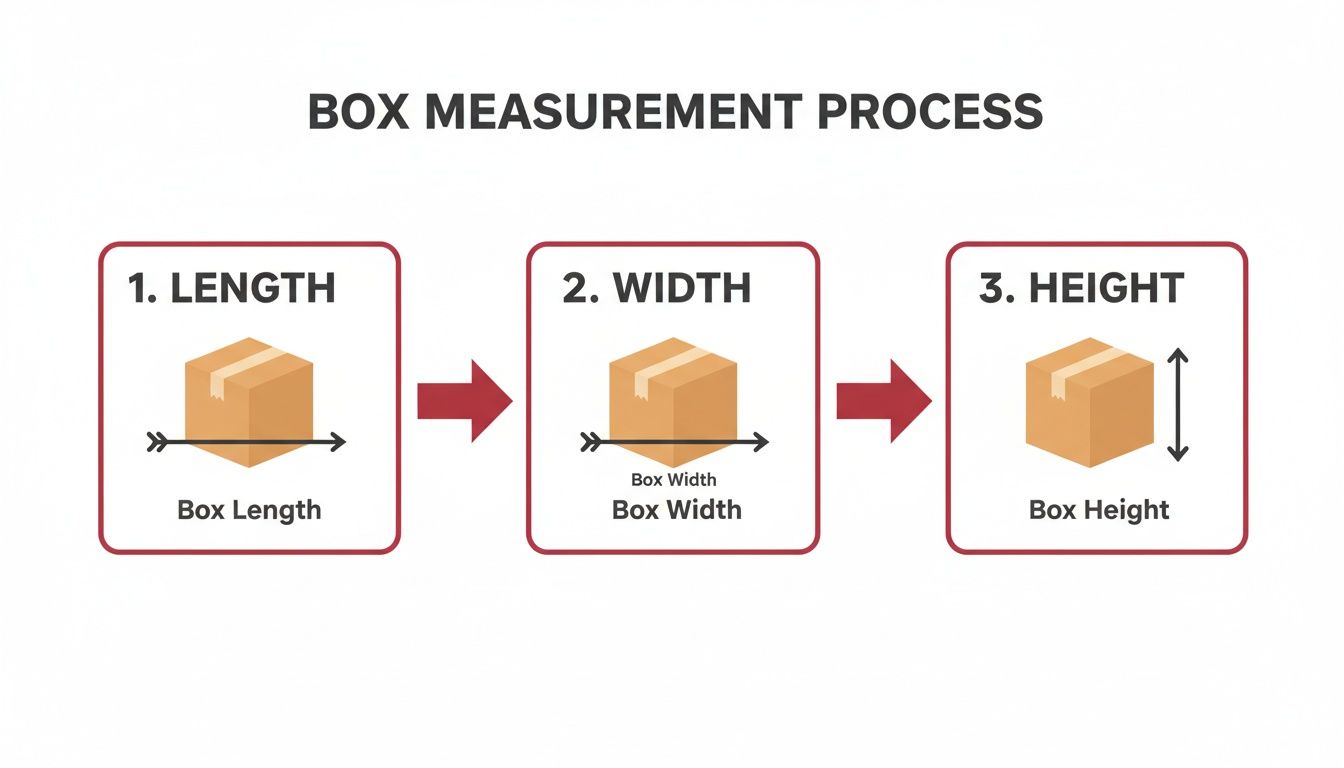
Visualizing how you move from length to width to height helps lock in the correct order. Getting that sequence right is crucial for accurate data entry into your Warehouse Management System (WMS).
A Real-World Measurement Scenario
Let’s walk through a practical situation on the warehouse floor. Say you have a product that is exactly 11.5 inches long. You might grab a box with an external length of 12 inches and assume you’re good to go.
But if that box has walls that are 0.25 inches thick on each side, the internal length is only 11.5 inches (12 – 0.25 – 0.25). You’ve left zero room for error, let alone any padding. Your product is going to be jammed in there, dramatically increasing the risk of damage during transit.
Always measure your product first, add the dimensions of your protective packaging, and then find a box with internal dimensions that can comfortably hold everything.
This little bit of foresight prevents costly product damage and makes for a much better unboxing experience for your customer. For a deeper look at choosing the right materials, check out our guide on wholesale corrugated boxes and bulk shipping solutions.
Mastering this basic process is non-negotiable. The accuracy of your first measurement ripples through everything—inventory tracking, space utilization, and especially shipping cost calculations. Businesses that put standardized measurement protocols in place consistently see fewer shipping errors and a much smoother overall workflow. As warehouse space gets more expensive, these small efficiencies add up to a major operational advantage.
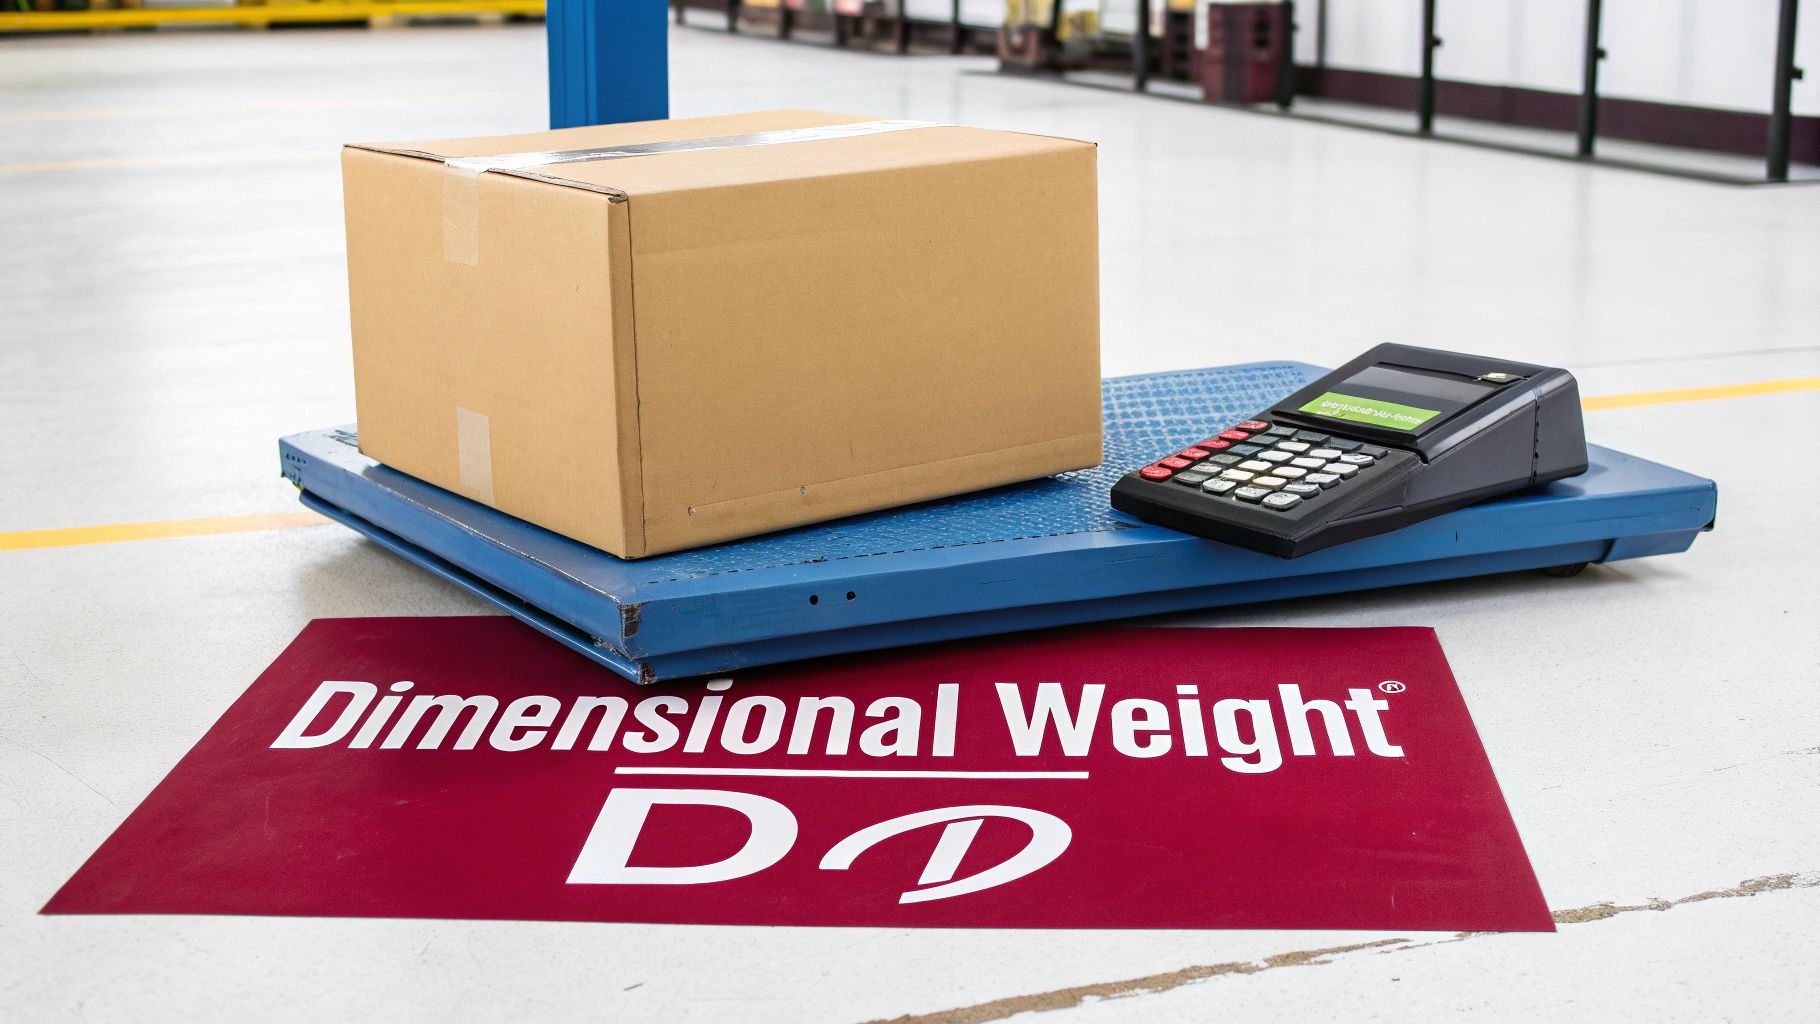
How Dimensional Weight Can Wreck Your Shipping Budget
This is exactly where a small measurement mistake balloons into a big financial problem. Carriers like UPS, FedEx, and others don’t just throw your package on a scale; they measure it, too. They use a system called dimensional weight—or DIM weight—to figure out your shipping costs, and it catches a lot of businesses completely off guard.
The whole idea is that a big, lightweight box full of pillows takes up just as much precious room on a truck or plane as a small, heavy box of machine parts. Carriers bill you for the space your package occupies, not just what it weighs. If you’re shipping anything bulky but light, getting a handle on DIM weight is non-negotiable for keeping your costs in check.
Cracking the DIM Weight Formula
Carriers use a pretty straightforward formula to calculate DIM weight. The trick is knowing which “divisor” they’re using, as it can vary.
The formula looks like this: (Length x Width x Height) / DIM Divisor = DIM Weight
That DIM Divisor is a number set by each carrier. It can, and does, change, so it’s always smart to check their current standards before you ship. Once they calculate the DIM weight, they compare it to the actual weight of the package on the scale. You get billed for whichever number is higher. That final number is known as the billed weight.
Your billed weight is always the greater of two numbers: the actual scale weight or the calculated dimensional weight. This is a non-negotiable part of modern shipping logistics.
The financial stakes here are huge. Sloppy box measurements can contribute to significant shipping damages and overcharges. With e-commerce booming, carriers are cracking down, billing extra for mismeasured boxes that can add up to millions in preventable overcharges across the industry.
A Practical DIM Weight Comparison
Let’s walk through a real-world example. Say you have a package that weighs exactly 10 pounds on the scale.
Scenario A: The Oversized Box
Your product fits, but there’s a lot of empty space.
- Actual Weight: 10 lbs
- Box Dimensions: 20″ x 16″ x 12″
- Carrier DIM Divisor: 139
- DIM Calculation: (20 x 16 x 12) / 139 = 3840 / 139 = 27.6 lbs
- Billed Weight: 28 lbs (carriers round up)
Just like that, you’re paying to ship a 28-pound package, even though it only weighs 10 pounds. That’s a massive difference.
Scenario B: The Right-Sized Box
Now let’s use a box that fits the product snugly.
- Actual Weight: 10 lbs
- Box Dimensions: 12″ x 10″ x 8″
- Carrier DIM Divisor: 139
- DIM Calculation: (12 x 10 x 8) / 139 = 960 / 139 = 6.9 lbs
- Billed Weight: 10 lbs
By simply choosing a smaller box, your billed weight becomes the actual weight of 10 pounds, since it’s now higher than the 7-pound DIM weight. On one package, you just saved the cost of shipping an extra 18 pounds. You can run different scenarios yourself with our internal shipping calculator to see the potential savings.
This is how taking control of your measurements puts you back in control of your budget. Choosing the right-sized box isn’t just about protecting what’s inside; it’s a strategic move that directly boosts your bottom line.
Techniques for Irregular and Cylindrical Shapes
Not everything that lands on your receiving dock fits neatly into a standard box. From industrial parts to rolls of blueprints, dealing with oddly shaped items is just part of the job for any logistics manager. Knowing how to measure these irregular and cylindrical packages the right way is critical for getting accurate shipping quotes and planning your warehouse space.
The good news? It’s a lot simpler than it looks. Carriers don’t have a separate, complicated rulebook for these items. Instead, they just need the dimensions of the smallest imaginary box that the item could fit inside perfectly. We call this the “bounding box.”

Measuring Irregularly Shaped Items
For any product that isn’t a simple rectangle, the goal is to find its three maximum dimensions. Think of it like this: place the item on a flat table. You’re going to measure its longest, widest, and tallest points, no matter how it’s oriented.
Here’s the practical breakdown:
- Find the Length: Measure the item from end to end at its absolute longest point.
- Find the Width: Now, find the absolute widest point, rotating the item or your tape measure as needed.
- Find the Height: Finally, measure from the table surface up to its absolute tallest point.
Those three numbers—your L x W x H—give you the dimensions for the item’s bounding box. This is the exact set of dimensions you’ll plug in for calculating dimensional weight and for slotting it in your warehouse.
Converting Cylindrical Measurements for Carriers
Things like tubes, drums, and canisters need a slightly different, but still simple, approach. You’ll still take physical measurements, but you have to translate them into the L x W x H format every single shipping carrier uses.
For any cylinder, just follow these two steps:
- Measure the Height: This one’s easy. Measure the cylinder from one flat end to the other. This number becomes your Height (H).
- Measure the Diameter: Find the widest point across one of the circular ends. This single measurement acts as both the Length (L) and the Width (W).
For example, a shipping tube that is 36 inches tall with a diameter of 6 inches will have shipping dimensions of 6″ L x 6″ W x 36″ H. Carriers will use these exact figures to calculate the DIM weight.
Mastering these quick techniques means you can confidently handle anything that comes off the truck, avoiding the frustrating delays and surprise fees that incorrect measurements always cause. As more uniquely shaped products flow through the supply chain, having a solid process for every item type gives your operation a real edge.
Planning your facility’s layout around a diverse inventory can be complex. For a free, no-obligation design that optimizes your space for any product shape, Contact Us today or call our experts at (800) 326-4403.
Making Your Measurements Work for the Warehouse
Getting good at measuring boxes is one thing, but turning that simple task into a genuine strategic advantage for your entire facility is another level entirely. The best operations don’t just measure boxes; they weave that data into every single decision, from the moment a shipment hits the loading dock to the final scan at the packing station. This is how a simple tape measure stops being just a tool and starts driving major business goals.
It all starts with getting everyone on the same page. You need consistent, facility-wide best practices. That means using properly calibrated tools and sticking to the specific rounding rules your primary shipping carriers demand. Once you have a steady, reliable stream of accurate dimensional data, the magic happens when you plug it directly into your Warehouse Management System (WMS).
From Measurement to Management
Feeding precise dimensions into your WMS is the linchpin for unlocking serious operational gains. Suddenly, that data becomes the bedrock for automating critical processes that used to be slow, manual, and full of human error.
Once integrated, your WMS can get a lot smarter. For instance, it can now:
- Optimize Storage Slotting: Automatically direct inventory to the most efficient shelf, bin, or pallet rack location based on its exact size. This alone maximizes your existing storage footprint without adding a single new rack.
- Automate Shipping Calculations: Instantly figure out dimensional weight and spit out accurate shipping quotes without anyone touching a calculator. This massively speeds up the entire fulfillment process.
- Improve Inventory Accuracy: Use dimensional data to double-check cycle counts. You can ensure that what the system thinks is in a location actually matches the physical space it should be taking up.
This is how basic numbers transform into actionable intelligence. For our customers in manufacturing, getting box dimensions right can slash pallet racking waste significantly, a huge deal for the standard 40×48-inch GMA pallets used to move the majority of all U.S. goods.
Here’s a pro tip straight from the floor: Always measure outside dimensions for shipping and inside dimensions for capacity planning. And don’t just measure once—take three separate measurements and find the average. This simple habit can drop errors substantially in high-volume operations.
Ultimately, this level of precision allows you to boost your space utilization by double-digit percentages. The data you gather from accurate measurements directly informs smarter warehouse layouts and more effective picking and packing solutions. As warehouse capacity gets tighter and more expensive, the businesses that have already done this groundwork will be in the best position to adapt without facing costly delays or expansions.
For a free, no-obligation layout design that puts these principles to work, Request a Quote or give our team a call at (800) 326-4403.
Make Precise Measurements Your Competitive Edge
We’ve walked through the essentials of measuring boxes and decoding DIM weight, but this isn’t just about avoiding shipping penalties. It’s about building a smarter, more profitable logistics strategy from the ground up. Businesses that get serious about how they measure boxes gain a massive advantage through lower costs, fewer mistakes, and happier customers. Now, it’s time to put these skills to work in your own facility.
From Theory to Action
Knowing this stuff is one thing; applying it is where you’ll see the real payoff. When you standardize your measurement process and plug that data directly into your Warehouse Management System (WMS), a simple task becomes a powerful operational weapon. This simple shift ensures every decision—from how you stack a pallet to where you slot inventory—is based on solid, reliable information.
The immediate benefits are impossible to ignore:
- Slash Shipping Costs: Stop guessing and start saving. Eliminating dimensional weight overcharges is the fastest way to protect your bottom line.
- Optimize Every Square Foot: Accurate data lets you maximize your existing warehouse space, pushing off the enormous cost of expansion.
- Drastically Reduce Damaged Goods: When you choose the right box based on precise internal dimensions, you minimize product movement and the transit damage that comes with it.
- Boost Your Throughput: With automated calculations and smarter slotting, your entire fulfillment process gets faster and more dependable.
Mastering box measurements is one of the highest ROI activities a warehouse can undertake. It’s a low-cost, high-impact process improvement that pays dividends on every single shipment that leaves your facility.
Get Ready for Growth
As demand for warehouse space and shipping services keeps climbing, having these fundamental processes locked down means you’re prepared for whatever comes next. The businesses implementing these practices today are the ones who will handle future volume surges without the operational bottlenecks that crush their competitors. Taking control of your measurements is a direct investment in your company’s future stability and scalability.
Start optimizing your operations now by partnering with an expert who lives and breathes warehouse efficiency. Our team provides free quotes and no-obligation design consultations to help you build a more profitable and resilient logistics framework. The planning you do today directly impacts your ability to meet tomorrow’s demands without costly delays.
For a partner that offers competitive pricing and the fastest shipping in the industry, Contact Us or call our experts at (800) 326-4403.
A Few Common Questions About Measuring Boxes
When it comes to measuring boxes for shipping and storage, a few questions pop up time and time again. Getting these details right from the start is the key to preventing some seriously expensive mistakes and keeping your whole logistics workflow running smoothly.
Should I Use Internal or External Box Dimensions?
This is a big one, and the answer is simple: it completely depends on what you’re trying to do.
Think of it this way: you always want to use the internal dimensions—the actual usable space inside the box—to make sure your product fits. This is non-negotiable if you want to account for padding and prevent damage.
On the flip side, you absolutely must use external dimensions for anything related to shipping costs or storage planning. Carrier systems scan the outside of the box to calculate dimensional weight, and your WMS needs that external measurement to figure out pallet stacking and warehouse shelving.
What Is the Correct Order to List Box Dimensions?
The industry standard is ironclad on this: it’s always Length x Width x Height (L x W x H).
Just remember, the Length is always the longest side that has a flap. The Width is the shorter side with a flap. And the Height is simply the measurement from top to bottom when the box is assembled. Sticking to this order prevents a world of hurt from data entry errors in your WMS, which can lead to bad shipping charges and totally inefficient warehouse slotting.
How Do I Account for Box Bulges When Measuring?
If you’ve packed a box and it’s bulging, you have to measure it at its absolute widest, longest, and tallest points. Don’t be tempted to squish it down for the measurement! The laser scanning systems the carriers use will catch the bulge every time and calculate the final billed weight based on those maximum dimensions.
This is probably one of the most common reasons for getting hit with unexpected carrier fees. The best practice is just to pick the right size box from the beginning so you don’t have to worry about it.
At Material Handling USA, we’ve seen it all. We provide the quality materials and practical guidance you need to get your measurements right every single time. From tough corrugated boxes to full-scale warehouse design, we’re your partner in making your operations more efficient.
For a free, no-obligation quote and layout design, Contact Us or give our team a call at (800) 326-4403 today.