A lot of warehouses look bright enough at first glance. The floor is visible. Forklifts can move. The lights turn on every day. But managers still deal with picking errors, eye strain, dark rack faces, near misses, and utility bills that feel out of line with the results.
That gap matters. Good warehouse lighting isn't about adding more fixtures and hoping for the best. It's about putting the right light in the right zone, at the right level, with the right controls. When the layout is wrong, teams feel it fast. Labels are harder to read, shadows hide pallet damage, and glare pulls attention away from moving traffic.
For buyers and facility teams researching warehouse lighting design for safety and productivity, the challenge lies in achieving balance. You need a system that supports compliance, helps people work accurately, controls long term operating cost, and fits the building you already have. New construction and retrofits both come with trade-offs, especially in tall racked spaces where floor light and rack-face light are not the same thing.
Introduction Beyond Brightness The True Cost of Poor Warehouse Lighting
Poor lighting usually shows up as an operations problem before anyone calls it a lighting problem. A supervisor sees more scan failures in one aisle. A maintenance lead notices older fixtures creating dim pockets. An operations director hears repeated complaints about glare at the end of a shift. None of those issues happen in isolation.
Inadequate or poorly designed warehouse lighting is a documented factor in nearly 20% of all warehouse-related incidents according to PacLights' review of low-glare warehouse design. The same source notes that workers in high-glare conditions report up to 30% more visual discomfort than those in well-lit, low-glare settings. That's a direct hit to focus, comfort, and consistency.
A common mistake is treating compliance as the finish line. It isn't. A building can meet the minimum legal threshold and still be hard to work in. That's especially true in active pick areas, quality checks, and high-rack aisles where precision matters more than basic visibility.
Practical rule: If workers can see the floor but still struggle to read labels quickly, the design target is probably too low or aimed at the wrong surface.
Lighting also affects budget in two directions. Bad designs waste electricity and create expensive rework later. Better designs can lower energy use, reduce lift rentals for maintenance, and make future layout changes easier to support.
The Foundation Key Lighting Metrics and Standards
The fastest way to make a poor lighting decision is to compare fixtures by wattage alone. Warehouse lighting should be judged by what reaches the work area and how evenly it gets there.

What the main metrics mean
Foot-candles measure how much light lands on a surface. In a warehouse, that surface might be the floor, a packing bench, or the face of a pallet location.
Uniformity ratio shows how even the light is across a zone. A space can have a good average light level and still have unsafe dark spots if the spread is uneven. Professional layouts should generally land between a 1.5:1 and 3.0:1 max-to-min ratio, with stricter targets of 1.5:1 to 2.0:1 in active picking aisles and packing stations, according to Hyperlite's warehouse uniformity guide.
CRI, or Color Rendering Index, describes how accurately light reveals color. In areas where workers inspect products, packaging, or labels, better color rendering supports cleaner decisions.
Glare is the brightness that distracts rather than helps. In forklift aisles and scan-intensive zones, glare is one of the most overlooked reasons a space feels fatiguing even when it looks bright on paper.
The gap between minimum code and practical design
OSHA sets a baseline. Operations need more than a baseline. For indoor warehouses, OSHA 29 CFR 1926.56 requires a minimum of 5 foot-candles for general indoor warehouse and storage areas, and 3 foot-candles for active picking zones and loading platforms, as summarized in this OSHA 1926.56 warehouse lighting guide.
Professional design guidance is higher. For active tasks, IES RP-7-21 recommends 15 to 30 foot-candles, a point explained in the earlier PacLights source. That difference is why many code-compliant spaces still feel underlit in real use. If you're reviewing broader layout decisions, this guide to OSHA-compliant warehouse design is a useful complement to lighting planning.
Warehouse lighting recommendations by zone
| Warehouse Zone | Recommended Illuminance (Foot-Candles) | Uniformity Ratio (Max/Min) | Key Considerations |
|---|---|---|---|
| General indoor warehouse and storage | 5 fc minimum for OSHA compliance | Up to 3.0:1 for bulk storage areas | Legal baseline, but often too low for active work |
| Active warehouse tasks | 15 to 30 fc | Target even coverage that avoids dark pockets | Better fit for working conditions than bare code minimum |
| General warehouse aisles | 20 to 30 fc | Prefer tighter control where traffic is constant | Helps navigation and routine handling tasks |
| Active picking zones | 30 to 50 fc | Prefer 1.5:1 to 2.0:1 in task-heavy aisles | Supports faster picking and better label visibility |
| Quality control and packaging | 30 to 50 fc with CRI of 90 or higher recommended | Tight, even lighting | Helps color accuracy and inspection work |
Why rack faces matter as much as floors
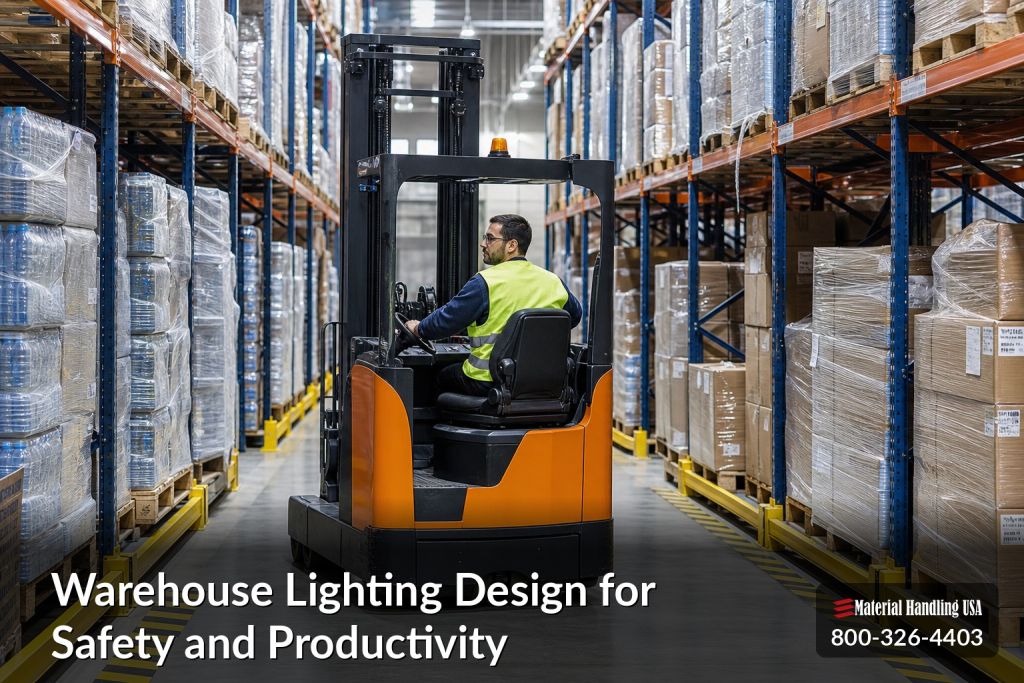
Most warehouse checks focus on horizontal light at the floor. Real work often depends on vertical light on the rack face. If the floor looks fine but pallet labels are dim, workers slow down and scan errors rise.
Good warehouse lighting design for safety and productivity starts with task surfaces, not fixture counts.
A Step-by-Step Guide to Warehouse Lighting Design
A solid plan starts with operations, not products. Before choosing a fixture family, break the building into work zones and traffic patterns.

1. Map the building by task
Start with a simple zone list. Separate bulk storage, active picking aisles, staging, loading, packing, inspection, battery charging, and office-adjacent work areas. Each area has a different visual demand.
This step also helps define who will use the space and how often. A low-traffic reserve aisle can tolerate a different control strategy than a pick module with constant movement.
2. Choose fixture types that match the space
Wide open floor areas often work well with UFO high bay fixtures. Long rack aisles usually need linear aisle lights or optics that push light down the aisle instead of across the tops of racks.
Color temperature also matters. For warehouses, 4000K to 5000K promotes alertness and accurate color rendering, and a CRI of 90 or higher is recommended for quality control and packaging areas, according to Luminate Lighting Group's warehouse lighting checklist.
A basic fixture checklist should include:
- Optics: Narrow or aisle-focused distributions help tall racking.
- Durability: Choose commercial-grade fixtures built for dust and long operating hours.
- Dimming compatibility: Important if the control plan includes occupancy or schedule-based changes.
- Serviceability: Drivers and components should be practical to maintain at height.
3. Build the layout around aisles, not just square footage
Many projects go sideways in this aspect. A common pitfall is mounting fixtures directly over racks instead of centering them over aisles. That creates the “cave effect,” or dark spots between lights, and weakens vertical visibility on safety labels. Positioning fixtures over aisles with 90° or 60° optics drives light deeper into the floor for high-rack aisles, as discussed in ECM's warehouse lighting design article.
4. Check maintenance factors before finalizing the plan
A new system should not be designed to hit the minimum only on day one. Professional practice applies a maintenance factor of 0.70 to 0.80 so aging and dust don't drag the system below its intended performance, according to the same ECM source.
If a plan doesn't show what the space will look like after the fixtures age, it's incomplete.
5. Use a photometric layout before buying
A photometric plan is the difference between informed purchasing and guesswork. It shows average levels, minimum levels, uniformity, and where shadows are likely to form. That matters even more when rack heights vary or aisles are irregular.
Integrating Smart Controls and Emergency Lighting
Controls can save real energy, but only when they respect how the warehouse works.

Where smart controls help most
Occupancy sensors and dimming are useful in reserve storage, secondary aisles, and other areas with intermittent use. In those locations, controls can reduce waste without interrupting flow.
For active zones, the strategy has to be tighter. Recent 12-month data showed that operators using 0 to 10V dimming with motion sensors achieved 30 to 50% energy savings only when paired with a minimum 20 fc baseline in active zones, according to PacLights' aisle visibility and safety article. The same source notes that aggressive dimming below that point in high-traffic aisles raises errors and slows workers.
That's the trade-off many generic buyer guides miss. Sensors are not the problem. Poor dimming thresholds are.
Emergency lighting is not optional
Normal operation and emergency operation should be planned together. During a power issue, egress routes, exits, and critical safety paths still need to support movement out of the building. That means emergency fixtures, backup power strategy, and control integration all need to line up with the overall floor plan.
Warehouses that are adding controls often also rethink broader systems at the same time. If automation, guided traffic, or smart zoning are part of the future plan, this article on future-proofing warehouse automation design adds useful context.
A practical control strategy
| Area Type | Control Approach | Why It Works |
|---|---|---|
| Active pick aisles | Maintain a baseline light level, then brighten with motion | Protects speed and accuracy |
| Secondary aisles | More aggressive dimming is usually acceptable | Cuts waste in low-use areas |
| Open storage | Zoning and scheduling can help | Matches lighting to occupancy patterns |
| Packing and quality work | Stable task lighting | Avoids variation during detailed work |
Common Design Pitfalls and How to Avoid Them
A warehouse can pass a basic light check and still create daily friction on the floor. I see this most often after a retrofit that was priced around fixture count instead of task visibility. The result is a building that meets a minimum reading in open floor areas but slows picking, increases misreads, and leaves supervisors chasing complaints aisle by aisle.

Ignoring vertical illumination
Floor foot-candles do not tell the whole story. Pickers read labels on pallet faces, not on the concrete. A design can satisfy a minimum OSHA expectation for general visibility and still leave rack labels, location markers, and safety signage too dim to read quickly.
IES guidance for warehouses puts the focus on the visual task, which is the right way to approach aisle design. In practice, that means checking vertical light at the rack face and at common scan heights, not just average horizontal light on the floor. For active picking aisles, higher vertical illuminance is usually worth the added fixture and aiming effort because it supports faster confirmation and fewer pauses.
Designing to the minimum with no light-loss buffer
New fixtures are the brightest they will ever be. Dust buildup, lens depreciation, and normal lumen loss all reduce delivered light over time. If the initial design only barely reaches the target, the building starts falling short long before the fixtures fail.
The Illuminating Engineering Society explains this through light loss factors in maintained illuminance calculations, not just initial output. See the IES definition of light loss factor. A practical approach is to set maintained targets by zone, then select fixtures and spacing that still hit those levels after depreciation. That costs a little more up front and usually avoids the expensive fix of adding fixtures later.
Treating all zones the same
Uniform fixture spacing across the whole building is one of the fastest ways to waste money. Storage aisles, active pick paths, docks, battery charging areas, packing stations, and quality benches have different visual demands. They should not share one target, one optic, and one control response.
This is the gap between compliance and performance. OSHA minimums help establish a floor for safety. They are not a productivity plan.
A better method is to assign higher targets to areas where people read labels, verify counts, inspect cartons, or move quickly around equipment. Reserve storage can often run at lower levels. Packing and QA usually need steadier, higher light with better color rendering. That zoning approach improves labor performance without over-lighting the entire building.
Floor compliance does not equal operational visibility.
Skipping field verification after install
A photometric plan is a prediction. Forklift traffic, rack heights, product mix, and even carton color can change how the space feels to the crew.
Commission the system on the floor, not just on paper. Check visibility at eye level, confirm scan performance in active aisles, and review glare from normal travel paths. Small changes in aiming, output, or sensor settings often solve complaints without changing fixtures.
Implementation and maintenance checklist
- Check rack-face visibility: Review pallet labels, location tags, and safety markings at actual working height.
- Confirm maintained levels: Validate the design against expected light loss, not day-one output alone.
- Review uniformity: Do not approve a layout based only on average foot-candles.
- Match zones to tasks: Use different targets and fixture distributions for picking, storage, packing, and docks.
- Plan for cleaning cycles: Dirt on fixtures and lenses changes performance.
- Verify control settings in live operation: Test occupancy delays, light levels, and overrides with real traffic patterns.
- Review emergency paths: Make sure egress routes remain visible during outages.
Calculating ROI Budgeting for a Lighting Upgrade
Lighting upgrades usually win approval or die on the math. In a warehouse, the actual return does not come from watts alone. It comes from reducing energy use, cutting relamping labor in hard-to-reach areas, and giving pickers, lift drivers, and QA staff better visibility than the legal minimum.
That last point matters. A design that only clears OSHA can still leave money on the table if workers are slowing down to confirm labels, rescan barcodes, or compensate for glare at rack faces.
Where the return actually comes from
Start with the savings you can measure with confidence. The U.S. Department of Energy notes that LEDs use much less energy than legacy lighting and typically have far longer service life, which lowers both utility costs and maintenance burden in commercial facilities, especially where fixtures are mounted high and access is expensive to schedule (U.S. Department of Energy LED lighting resources).
The labor side takes more discipline to estimate, but it is often the bigger operational gain. I usually model it by zone instead of applying one blanket productivity number to the whole building. Active pick aisles, packing, and inspection areas tend to justify higher target light levels because small visibility delays repeat thousands of times per shift. Bulk storage usually does not. That approach gives finance teams a cleaner forecast and keeps the project from getting overloaded with light where it will not pay back.
Budget items to expect
A realistic warehouse lighting budget usually includes five cost groups:
- Fixtures: High bays, aisle optics, and any dedicated emergency units
- Controls: Occupancy sensors, dimming drivers, zoning, and commissioning time
- Installation: Lifts, electrical labor, off-hours work, and phasing around operations
- Design and verification: Photometric layouts, site review, and post-install light checks
- Electrical upgrades: Circuit changes, controls wiring, or panel work in older buildings
Installation cost often swings more than fixture cost. A straightforward swap in an open warehouse is one budget. A phased retrofit over active shipping lanes on night shift is another.
Buyers who are also evaluating site visibility problems during the same capital cycle may find this guide on addressing parking lot lighting failures useful.
A practical way to build the ROI case
Use a simple three-part model.
First, compare current and proposed energy use by operating hours and control strategy. Second, estimate maintenance savings based on fixture life, lift rental, and labor required to service high-bay lighting. Third, assign labor value only to the zones where better visibility changes the work. Picking accuracy, scan speed, and visual inspection are easier to defend than broad claims about the entire facility.
That is usually enough to separate a code-minimum replacement from a performance-focused upgrade.
Tax treatment can also improve the payback window. If the project is part of a larger facility improvement plan, review the Section 179 tax deduction for warehouse equipment with your finance team before final approval.
Warehouse Lighting Design FAQ
What light level works best for high-pick aisles
For active picking, the strongest published target in the source set is 30 to 50 foot-candles. In tall rack systems, that level needs to reach both the floor and the rack face, not just the floor.
Is meeting OSHA enough for a productive warehouse
Usually not. OSHA gives the legal floor. Productive picking, scanning, and inspection often need higher design targets and better uniformity than minimum compliance alone.
What color temperature should most warehouses use
4000K to 5000K is a practical range for most warehouse spaces because it supports alertness and color visibility. Detailed inspection and packaging areas also benefit from stronger color rendering.
Should every aisle get motion sensors
No. Sensors are useful, but they should be applied by zone. In active pick aisles, the dimming floor matters. In low-use secondary aisles, deeper setbacks are usually more practical.
Can I reuse my existing fixture locations
Sometimes, but not always. Existing locations may have been designed around older fixture types or outdated rack layouts. A photometric review usually shows whether the current pattern supports today's tasks.
What tools and materials are usually needed for an upgrade
Most projects need new fixtures, mounting hardware, controls, emergency components, lifts for installation, and a photometric layout. Some projects also need updated wiring or control zoning.
When should I hire a professional instead of doing it in-house
Hire a professional when the building has high racks, mixed-use zones, active picking, glare complaints, uneven fixture spacing, or compliance concerns. Those are the projects where small layout mistakes create long-term operating problems.
How do I know if poor lighting is hurting performance
Look for recurring scan issues, employee complaints about glare, slow picking in specific aisles, inconsistent label visibility, and dark zones near rack faces or end caps. Those signs usually appear before a formal lighting audit.
Conclusion Your Next Step to a Safer, More Productive Warehouse
The best warehouse lighting plans do more than pass inspection. They support faster work, clearer visibility, lower maintenance burden, and safer movement through every aisle. That only happens when the design matches the task, not just the square footage.
For most facilities, the key opportunity is closing the gap between minimum code and practical performance. That means setting zone-based targets, choosing the right optics, protecting uniformity, and using controls carefully instead of applying one rule everywhere.
If your project also involves electrical coordination, phased installation, or a larger retrofit, it may help to review what a qualified commercial lighting contractor typically handles so scopes stay clear across teams. Better planning usually leads to better fixture lead times, smoother installs, and fewer delays when demand is high.
The sooner a layout is reviewed, the easier it is to align lighting with racking, traffic flow, and future changes.
Material Handling USA can help you move from rough ideas to a practical lighting plan with free layouts and designs with no obligation, free quotes, competitive pricing, and fast shipping on quality industrial products. To discuss your project, Contact Us for a free consultation, Request a Quote, or Call (800) 326-4403. If you're ready to source equipment online, you can also Buy Online through the MH-USA catalog.