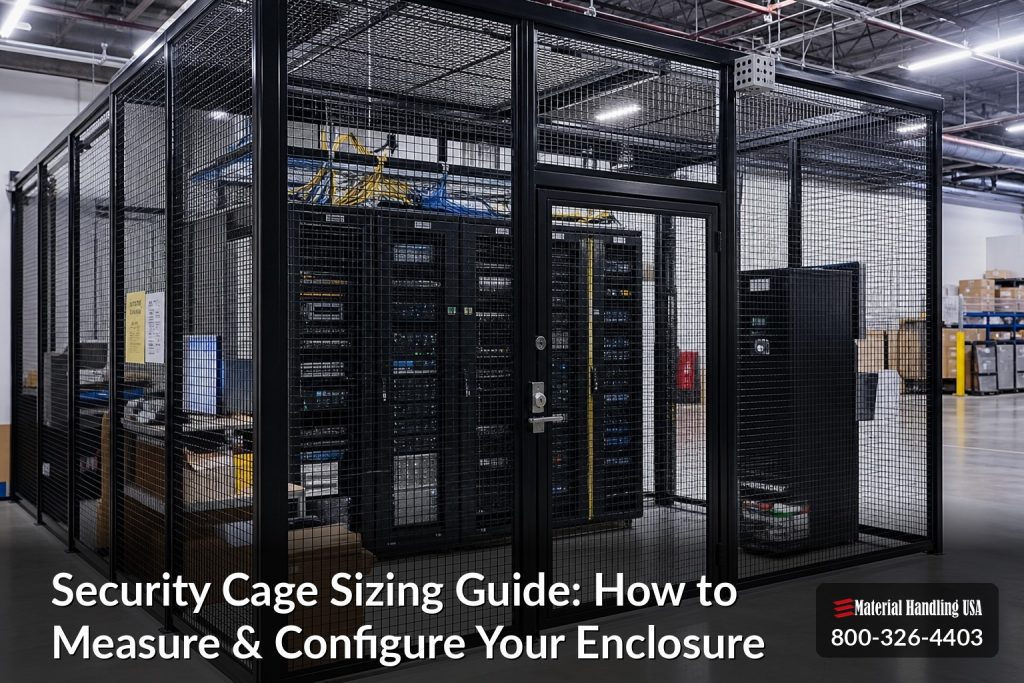
Getting the right security cage size isn’t just about measuring a room. It’s about understanding workflow, growth, code requirements, and how people interact with the space every day. An undersized cage creates bottlenecks. An oversized one wastes expensive floor space. This guide walks you through measuring, planning, and configuring a custom security cage that fits your operation perfectly.
Step 1: Define Your Requirements
Before measuring anything, answer these questions:
- What are you storing? Inventory, tools, servers, evidence, controlled substances — each has different density and access patterns
- How many people need access? A tool crib serving 50 machinists needs different door configurations than a DEA vault with 2 authorized users
- How often is it accessed? Constant in/out traffic vs. occasional access changes door style and lock selection
- What’s your growth projection? Plan for 2–3 years of growth minimum
- What codes apply? DEA, IAPE, fire code, ADA — each impacts layout
Step 2: Measure Your Space
What to Measure
- Floor dimensions: Length × width of the available area
- Ceiling height: Floor to lowest obstruction (sprinklers, ductwork, beams)
- Column locations: Structural columns within or near the cage area — panels work around them
- Door clearances: How much swing or slide room is available for cage doors
- Utility locations: Electrical panels, fire extinguishers, sprinkler heads — none can be enclosed without access
Measuring Tips
- Use a laser measure for accuracy (tape measures sag on long runs)
- Measure at floor level AND at 4′ height — walls aren’t always plumb
- Note floor levelness — more than ½” of slope over the cage length requires shimming
- Photograph the space from multiple angles for your cage designer
Step 3: Plan the Layout
Storage Density Calculation
Calculate how much you need to store inside the cage:
- Shelving/racking footprint: Measure your current storage systems and add 20% for growth
- Aisle space: Minimum 36″ for personnel, 60″ for carts, 96–120″ for forklifts
- Work area: If people work inside the cage (tool cribs, parts rooms), add a workstation zone
- Staging area: Space near the door for picking, packing, or inspecting items
Common Configurations
| Application | Typical Size | Key Features |
|---|---|---|
| Tool Crib | 12′ x 16′ to 20′ x 30′ | Service window, Dutch door, shelving walls |
| Server Cage | 8′ x 10′ to 20′ x 40′ | Precision sizing, airflow mesh, ceiling |
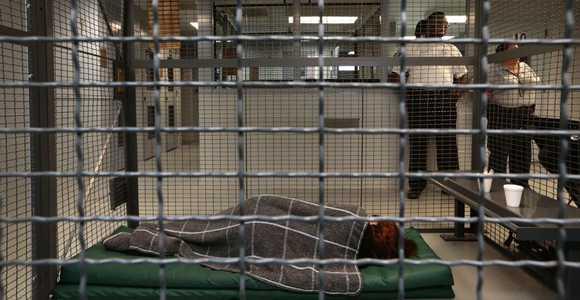
| DEA Vault | 8′ x 8′ to 12′ x 16′ | Full ceiling, double locks, steel kickplate |
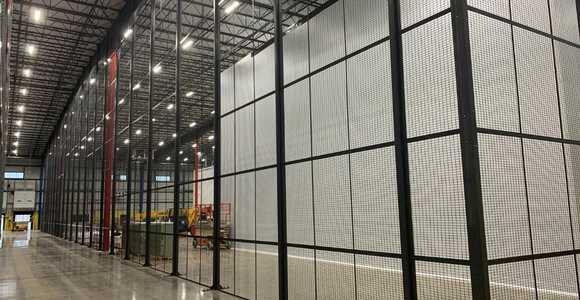
| Warehouse Enclosure | 20′ x 30′ to 50′ x 100’+ | Sliding doors, multiple access points |
| Tenant Lockers | 4′ x 4′ to 4′ x 8′ each | Individual locks, numbered units |
| Driver Access Cage | 10′ x 12′ to 16′ x 20′ | Pass-through window, loading dock adjacent |
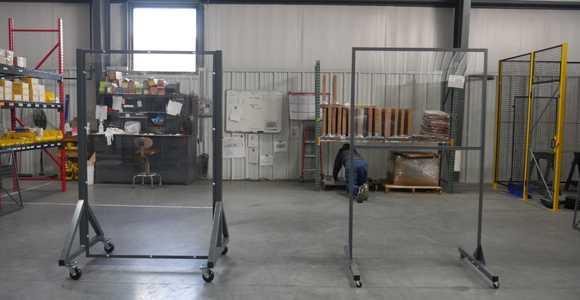
Step 4: Choose Your Components
Panel Options
Wire mesh panels come in different security levels:
- Standard (10-gauge, 2″ x 1″ mesh): Suitable for most warehouse, tool crib, and storage applications
- Heavy-duty (6-gauge): For high-security applications like DEA vaults or high-value inventory
- Woven wire: Maximum airflow for data center cages
- Expanded metal: Smallest opening size for maximum restriction
Door Selection
Choosing the right cage door depends on traffic volume and what’s moving through it:
- Single hinged door (3′ wide): Personnel access, low-traffic areas
- Double hinged doors (6′ wide): Pallet jack and cart access
- Sliding door (4’–12′): When swing clearance is limited or for large openings
- Service window / Dutch door: For pass-through operations (tool cribs, parts rooms)
- Bi-parting sliding doors: Maximum opening for forklift access
Lock Systems
Match your lock system to your security requirements:
- Padlock hasp: Simple, tenant/user-managed
- Cylinder lock: Key-managed, master-keyable
- Combination lock: No key management, easy code changes
- Card reader / keypad: Audit trail, remote management, time-based access
- Biometric: Highest security — fingerprint or retinal
Step 5: Consider Future Flexibility
One of the biggest advantages of modular wire mesh cages is reconfigurability. Plan ahead:
- Expansion panels: Specify panels on at least one wall that can be removed to extend the cage later
- Extra post bases: Install floor anchors beyond the current cage footprint for future expansion
- Modular interior: Use freestanding shelving inside (not wall-mounted) so you can reconfigure without modifying the cage
- Standard panel sizes: Stick to standard widths (2′, 3′, 4′, 5′) so replacement or expansion panels are off-the-shelf
Common Sizing Mistakes
- ❌ Measuring to the wall and ordering that exact size — leave 2–3″ gap for post flanges
- ❌ Forgetting door swing clearance — a 3′ door needs 3′ of clear space in front
- ❌ Ignoring overhead obstructions — ductwork at 9′ means your 10′ panels won’t fit
- ❌ Not accounting for fire code setbacks — sprinkler heads need 18″ clearance below
- ❌ Sizing for today only — plan for at least 20% growth capacity
Get a Professional Layout
The easiest way to get your cage sized correctly is to let a professional do it. MH-USA provides free on-site measurements and CAD layout designs for security cage projects across the Western U.S. We’ll measure your space, understand your workflow, and deliver a layout optimized for your operation.
Free Security Cage Layout & Quote
Tell us what you need to secure, and we’ll design the right-sized solution. Includes on-site measurement, CAD layout, and professional installation.
Advanced Sizing & Configuration Techniques
Complex Layout Design
Simple rectangular cages are straightforward to size, but real-world installations often involve complex layouts. L-shaped cages work around building columns, mechanical rooms, or existing equipment. T-shaped layouts create separate wings for different security levels or departments. Multi-room configurations with shared walls and independent access reduce material costs while providing separate secure zones.
For complex layouts, we recommend creating a floor plan sketch with all dimensions, obstacle locations, and access requirements before contacting us. This sketch — even a hand-drawn version — dramatically speeds the CAD design process and ensures the first design iteration addresses all your requirements.
Height Selection Factors
Standard cage heights are 8′, 10′, and 12′. The right height depends on your storage requirements and building conditions. 8′ cages are adequate for most general storage and tenant locker applications. 10′ cages accommodate standard pallet rack configurations (two pallet levels plus top stock). 12′ cages are specified for high-bay storage, tall equipment enclosures, and industrial applications with overhead cranes.
Ceiling clearance above the cage is important for sprinkler coverage, lighting, and HVAC. Most fire codes require 18″ minimum clearance between the cage top and the nearest sprinkler deflector. If your ceiling height minus required clearances doesn’t align with standard panel heights, custom-height panels are available.
Door Sizing & Placement
Door sizing depends on what needs to pass through. Personnel-only access uses 3′ wide single doors. Pallet jack access requires minimum 4′ wide doors. Forklift access requires 8′ or wider double doors. Place doors to minimize travel distance from main traffic aisles and to avoid creating bottlenecks during peak access periods.
Consider traffic patterns: if the cage will be accessed 50+ times per day, multiple doors or wider doors reduce congestion. For tool cribs and parts distribution cages, service windows may handle 80% of transactions without opening the main door — reducing door wear and improving security.
Future Expansion Planning
Design your cage with expansion in mind. Leave one wall without permanent connections (use removable panels instead of wall-anchored connections) to allow future extension. Size floor anchors for the expanded configuration during initial installation — adding anchors later requires drilling in active storage areas. Specify a lock system with expansion capacity (additional keys, card reader credentials) to accommodate future growth.
Measurement Checklist
Before requesting a quote, measure and document: total length and width of the area to enclose, ceiling height at all corners (floors may not be level), location and size of all obstacles (columns, pipes, electrical panels, fire extinguishers), distance from nearest fire sprinkler head, floor type and condition (concrete thickness if known), power availability for electronic access control, and number and size of doors needed. Photographs from all angles complete the picture — our engineering team uses photos to identify details that measurements alone may miss.
Why Choose Material Handling USA for Security Cage Sizing Guide: How to Measure & Configure Your Enclosure
{
}
Material Handling USA brings over 30 years of experience to every security cage project. Our team has designed and installed thousands of security enclosures across warehouses, distribution centers, manufacturing plants, healthcare facilities, law enforcement agencies, and data centers throughout the Intermountain West and nationwide.
Our Process
Every project begins with a thorough understanding of your requirements. We conduct on-site assessments (or virtual consultations for initial planning), capture detailed measurements, and discuss your security objectives, workflow needs, and budget parameters. Our engineering team creates custom CAD layouts showing exactly how your cage system will look and function — you review and approve the design before we proceed.
{
}
We source panels, doors, locks, and accessories from WireCrafters and SpaceGuard Products — the industry’s most trusted manufacturers. Both offer comprehensive product lines with rapid availability and proven quality. Our bulk purchasing relationships deliver competitive pricing that individual buyers can’t achieve on their own.
Professional Installation & Support
Our trained installation crews handle every aspect of cage assembly — from floor anchoring to door hanging to access control integration. We work around your schedule to minimize operational disruption. Every installation concludes with a formal inspection and documentation package. Post-installation, we remain available for adjustments, expansion, and ongoing maintenance support.
{
}
Serving the Intermountain West & Beyond
Headquartered in Salt Lake City, Utah, Material Handling USA provides direct service throughout Utah, Idaho, Colorado, Nevada, Arizona, Wyoming, and Montana. Nationwide projects are supported through our network of installation partners and direct-ship capabilities. Wherever your facility is located, we deliver the same quality, attention to detail, and customer service that has built our reputation over three decades.
{

}
Request Your Free Quote
Ready to secure your facility? Contact Material Handling USA for a free, no-obligation consultation and quote. Our team responds within one business day with a preliminary assessment and next steps.
- Phone: (800) 759-7225 or (801) 328-8788
- Email: sales@mh-usa.com
- Online: Request a Quote
We look forward to helping you design the right security cage solution for your facility.
Frequently Asked Questions
How much do security cage sizing guide: how to measure & configure your enclosure cost?
Pricing depends on the size, configuration, wire gauge, door type, and accessories required for your specific application. Material Handling USA provides free, no-obligation quotes that include CAD layout design, material specifications, and professional installation costs. Contact us at (800) 759-7225 or email sales@mh-usa.com for a detailed estimate within 1–2 business days.
What is the installation timeline?
Most security cage projects follow a 2–3 week timeline from initial contact to completed installation. Week 1 covers site assessment and design. Week 2 handles order processing and material preparation. Week 3 is delivery and professional installation. Expedited timelines are available for urgent security needs — some projects can be completed in as little as 5 business days from initial contact.
Do you provide free site assessments?
Yes. Material Handling USA provides complimentary on-site measurements and CAD layout design for all security cage projects. Our assessment includes detailed measurements, obstacle identification, workflow analysis, and a complete proposal with pricing. For projects outside the Wasatch Front, we can conduct virtual assessments using photos and measurements you provide.
Can security cages be customized?
Absolutely. While standard panel sizes handle most configurations, our custom security cage capabilities include non-standard dimensions, angled walls, multiple door types, height transitions, and integration with existing structures. Custom powder coat colors, galvanized finishes, and specialized hardware are also available. Our engineering team designs custom solutions that meet your exact specifications.
What warranty do security cages carry?
All security cages from Material Handling USA include manufacturer warranties covering defects in materials and workmanship. WireCrafters and SpaceGuard Products both stand behind their products with comprehensive warranty programs. Our installation workmanship is warranted for one year, including a 90-day adjustment period where we return to tighten hardware and verify door alignment at no charge.
Do you serve locations outside Utah?
Yes. While headquartered in Salt Lake City, Material Handling USA serves the entire Intermountain West including Utah, Idaho, Colorado, Nevada, Arizona, Wyoming, and Montana with direct installation crews. Nationwide projects are supported through our installation partner network and direct-ship capabilities. Contact us to discuss your project location.