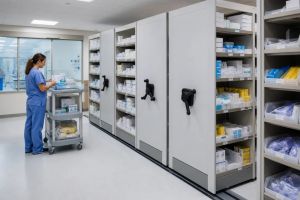
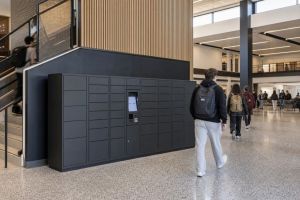
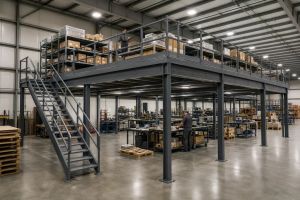
When an agency is running out of secure space, adding shelves rarely solves the problem. Effective evidence storage room design starts by forecasting evidence types and retention needs, then assigning zones for intake, drying, room-temperature storage, refrigeration, freezing, valuables, and restricted items. The finished room must preserve evidence in submitted condition while documenting every access and transfer.
This guide covers police evidence room design from the layout side: how to zone the room, where climate controlled evidence storage and evidence storage refrigerators belong, which shelves for an evidence room fit each zone, and what makes the finished space a secure evidence storage facility. If the room is already built and you need to fit more into it, read our companion article on public safety evidence room space saving storage ideas instead.
What Good Evidence Storage Room Design Must Achieve
A defensible evidence room does two jobs at once. It protects the physical condition of each item, and it supports a clear chain of custody from intake through disposition. Shelving, lockers, cages, refrigeration, and tracking systems should serve those two requirements rather than dictate the layout.
Facility-planning guidance identifies several distinct evidence-storage functions, including room-temperature storage, high-density mobile storage, refrigerated storage, frozen storage, valuables storage, and evidence drying spaces. These areas need controlled access appropriate to their use, not one universal room with identical shelves throughout. See the facility-planning overview of evidence room design for the zone-based approach.
Start with the workflow
Evidence typically moves through an intake point, temporary holding, processing or drying, permanent storage, retrieval, and release or disposition. A pass-through locker can separate the public or patrol side from the secure room. A custodian can then retrieve the item from inside without allowing an unauthorized person into the storage area.

The room also needs a location system that staff can use under pressure. Assign permanent identifiers to ranges, carriages, shelves, bins, refrigerators, freezers, and restricted enclosures. Record the location with the evidence record, then document each later movement.
Practical rule: Design around handoffs. Every unnecessary transfer creates another point that staff must explain and document.
Why one room standard fails
Biological evidence may need drying or cold storage. Firearms need stable, visible, restricted storage. Narcotics and valuables may require an additional enclosure and access record. Digital media needs protection from unsuitable environmental conditions and a controlled handling process.
Oversized property creates a separate planning issue. Bicycles, tools, doors, tires, and other large items need a route from the receiving point to their storage position. A room can have adequate floor area and still fail if the door, aisle, or turning path can't accommodate the largest item.
Material Handling USA approaches the layout as a systems problem. Product selection follows the room geometry, evidence categories, workflow, environmental requirements, and applicable local code review. That approach also makes it easier to compare static shelving, mobile shelving, lockers, cages, and specialized cabinets before a purchase decision.
How to Zone and Equip Your Evidence Room by Evidence Type
Evidence categories should determine the room map. General temperature-controlled storage is not a substitute for refrigeration, freezing, drying, or restricted storage when the evidence type requires something different.
For general controlled storage, commonly used benchmarks specify 60°F to 75°F, or 15.5°C to 24°C, with relative humidity below 60%. Refrigerated evidence is typically kept at 36°F to 46°F, or 2°C to 8°C, with humidity below 25%, as described in evidence storage condition guidance. Frozen evidence is commonly maintained at or below 14°F, or -10°C. Confirm the required condition for a specific item with the responsible laboratory and agency policy.
| Zone | Temperature and humidity target | Typical system | Access and security notes |
|---|---|---|---|
| General controlled storage | 60°F to 75°F, 15.5°C to 24°C, below 60% humidity | Steel shelving, bins, or mobile shelving | Restricted room access, location control, and documented retrieval |
| Refrigerated evidence | 36°F to 46°F, 2°C to 8°C, below 25% humidity | Lockable evidence refrigerator or refrigerated locker insert | Alarmed monitoring, access log, and separation from general storage |
| Frozen evidence | At or below 14°F, or -10°C | Evidence freezer | Restricted access, temperature logging, and alarm review |
| Drying area | Controlled airflow and drainable, cleanable surfaces | Drying cabinet or dedicated drying room | Controlled entry, contamination prevention, and documented handling |
| Firearms | Condition appropriate to the item and agency policy | Weapon rack or lockable cabinet | Restricted enclosure, visible identification, and separate ammunition control |
| Narcotics and valuables | Category-specific environmental control | Vault, cage, or locked cabinet | Additional lock layer, camera coverage, and access logging |
| Digital media | Stable controlled storage | Individual compartments, cabinets, or protected shelving | Restricted handling, inventory tracking, and controlled workbench access |
Keep biological evidence out of general storage
Wet or bloody items require a drying process before long-term packaging and storage. A dedicated drying area should include a way to hang items so air can reach every surface, a floor and wall finish that can be cleaned and disinfected, a water source for cleanup, and a refrigerated pass-through locker for items that need cold holding before they are fully dry, as described in the facility-design reference cited above. Confirm the exact fixtures, drainage, and clearances with the project engineer and the agency’s evidence procedures. These details are easy to omit when a buyer treats drying as an accessory instead of a dedicated function.
For a smaller intake operation, a filtered drying cabinet may fit better than a full drying room. Review forensic evidence drying cabinets when the project needs a dedicated drying solution within an existing footprint.
Separate restricted categories
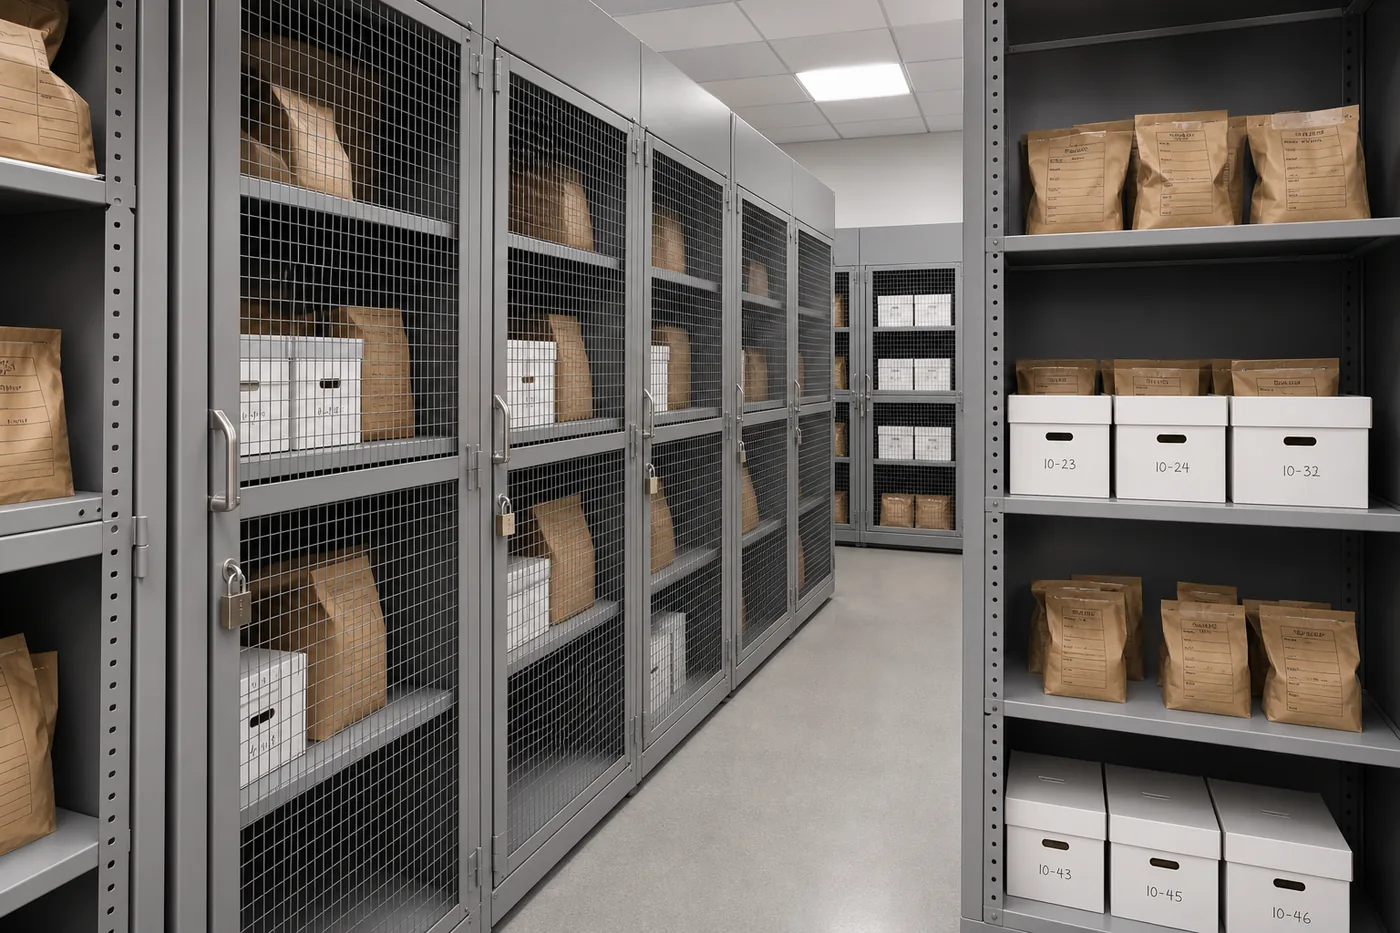
Firearms, controlled substances, valuables, and hazardous items shouldn't share an open general-shelving area. A secure cage or vault creates a second boundary inside the evidence room while keeping the contents visible for inspection and camera coverage.
For facilities handling remains or related property, the design should also account for controlled access, environmental conditions, cleaning, and documented handling. The Texas compliance resource for remains storage offers useful context for buyers reviewing those requirements.
Digital devices need their own handling logic. Provide individual locations, a controlled processing surface, and adequate power and data access. The exact security or shielding approach depends on agency procedures and laboratory requirements.
Secure Evidence Storage Facility Design: Four Layers of Protection
A secure evidence storage facility is not one locked door. In police evidence room design, security is built in layers, and the layout should show where each layer sits before equipment is chosen. Auditors and courts look at whether every layer is documented, not just whether the door was locked.

| Security layer | What it protects | Design decisions that belong on the drawing |
|---|---|---|
| 1. Building and perimeter | The evidence unit as a whole | Room placed away from public corridors and exterior walls where possible, no windows into storage, solid walls to the deck, camera coverage at every entry |
| 2. Room entry | Everything inside the room | One controlled staff door, card or key access with a log, pass-through lockers so officers never enter, alarm on the door and on the locker access side |
| 3. Enclosures inside the room | Firearms, narcotics, cash, jewelry, hazardous items | Wire mesh security cage or vault with its own lock and log, visible from the custodian position, sized so the largest item fits through the door |
| 4. Item and location control | Each package | Sealed packaging, permanent location codes on every shelf, bin, locker and cage, barcode or RFID scan at every move |
The second and third layers drive the floor plan. Put the custodian workstation where it can see the room door, the pass-through locker wall and the cage door at the same time. Run the cage wall to the ceiling or cap it with a mesh roof so the enclosure cannot be reached over the top. Size the enclosure door for the largest firearm case or bulk narcotics package you expect to store.
Mesh enclosures are usually the fastest layer to configure. Lay out the footprint, door swing and panel heights with the security cage designer for evidence rooms, then check the result against camera sightlines and the custodian position. For the operational side of access control, including who holds keys and how audits are run, see our secure evidence storage facility checklist in the space-saving article.
Need a layout that shows all four layers? Send your room dimensions and evidence category counts for a free evidence room design and quote. Call (800) 326-4403 or start with law enforcement evidence storage solutions.
Evidence Storage Refrigerators and Freezers: Where Cold Storage Fits
Evidence storage refrigerators are part of the layout, not an appliance that gets added later. Biological evidence, sexual assault kits, blood and urine samples and some food or liquid evidence need refrigerated or frozen holding. The design question is not only which unit to buy but where it sits in the workflow.

How to choose evidence storage refrigerators
Do not size cold storage from a catalog picture. Work through these decision points with the laboratory that receives the evidence:
- Refrigerated locker or open refrigerator: A refrigerated evidence locker has separate keyed or keypad compartments, so several officers can deposit without seeing each other’s evidence. An open refrigerator or freezer holds more volume but should sit inside the secure room where only the custodian has access.
- Pass-through or single-sided: A pass-through refrigerated locker is loaded from the intake side and emptied from inside the room. It removes an extra transfer and belongs on the wall between intake and secure storage.
- Refrigerator, freezer, or both: The lab tells you which items must be frozen and which must only be chilled. Many rooms need both. Do not plan on one unit doing both jobs.
- Lock and access record: The unit should lock, and the design should show how access to it is logged, either through the compartment lock or through the room access system.
- Temperature monitoring and alarm: Plan a continuous temperature record and an alarm that reaches someone after hours. Decide on the drawing who receives that alarm.
- Power and backup: Give cold storage a dedicated circuit, and confirm with the building engineer whether it is on emergency power. A weekend power failure can destroy years of casework.
- Cleanable finish: Stainless steel or coated steel interiors that can be disinfected are preferred where biological evidence is held.
Placement rules for cold storage
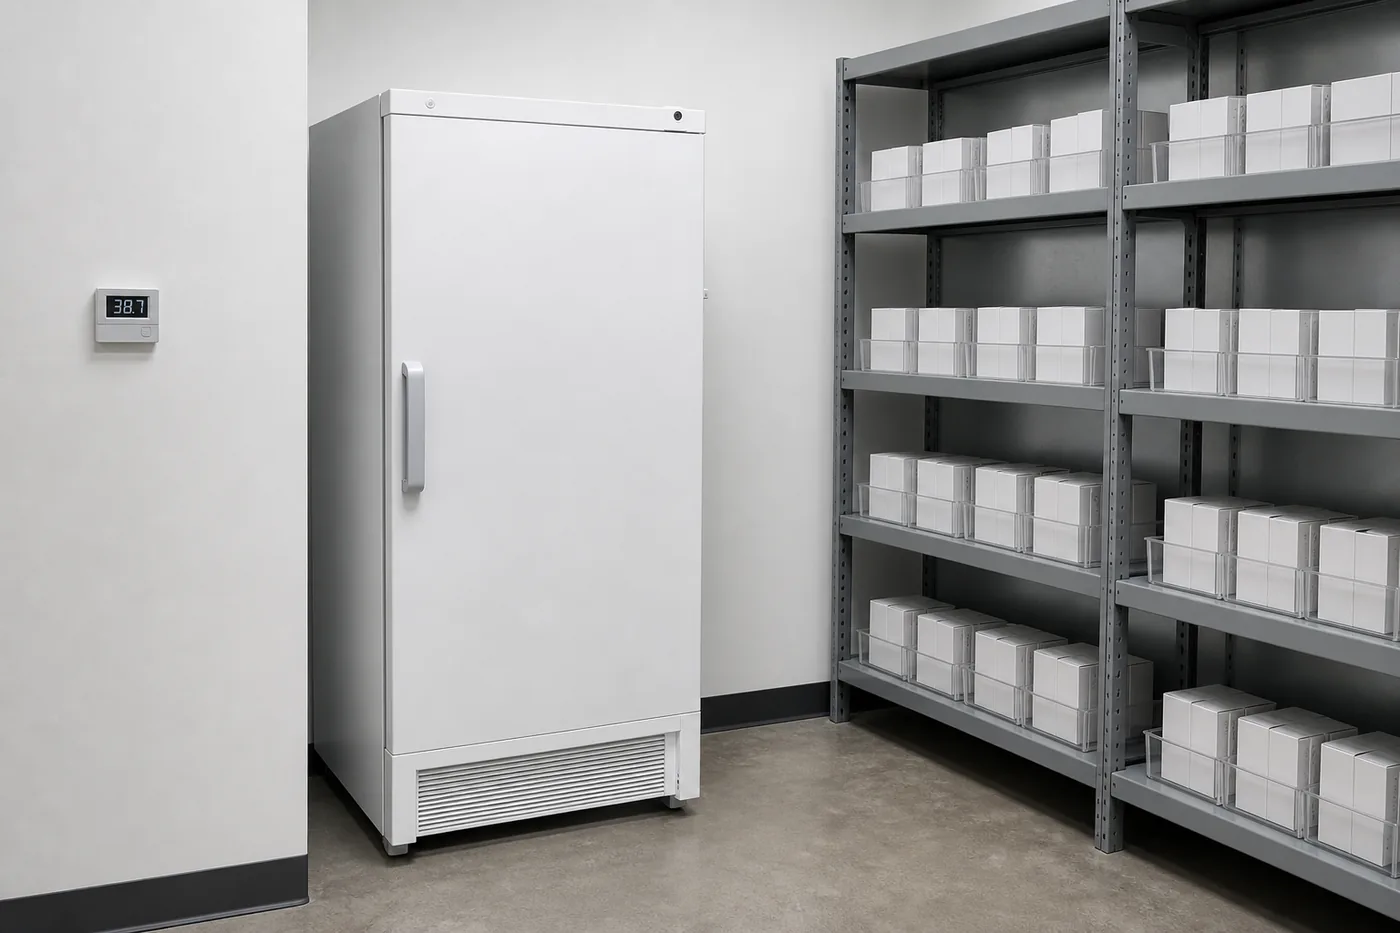
Keep refrigerators and freezers out of the drying area so heat from the compressor does not fight the drying airflow. Leave service clearance around each unit for airflow and repair. Place the units where the custodian can see the door from the workstation, and never in a corridor outside the secure room. If the room will grow, leave a second cold-storage position on the plan with power already stubbed in.
Wet items that need chilling before they are dry usually move through a refrigerated pass-through locker first, then to the drying cabinet or drying room, then to permanent packaging and shelving. Draw that path on the plan so each handoff is short and documented.
Climate Controlled Evidence Storage: HVAC, Monitoring and Zone Placement
Climate controlled evidence storage means the room itself, not only the refrigerators, holds a stable temperature and humidity. Paper, tapes, digital media, textiles and packaged biological evidence all degrade faster in heat, damp air or direct sunlight. The temperature and humidity targets are in the zoning table above, and the California POST recommendation for a stand-alone HVAC system is in the common mistakes section below. This section is about how climate control changes the layout.
Layout choices that make climate control work
- Own HVAC zone: Put the evidence room on its own thermostat and, where possible, its own air handler so the room does not swing with the rest of the building at night and on weekends.
- Keep supply and return clear: Tall shelving and mobile carriages can block diffusers and return grilles. Mark them on the drawing and leave the clearance the mechanical engineer asks for.
- Humidity control: In humid climates plan a dehumidifier or a dedicated dehumidification coil with a drain. In the dry Mountain West the problem is more often heat gain through exterior walls and roofs, so avoid placing the room under an unshaded roof or against a sun-facing wall.
- No windows into storage: Daylight adds heat and ultraviolet exposure. If an existing room has windows, block and insulate them.
- Monitoring: Install a temperature and humidity logger in the general room and a separate probe in each refrigerator and freezer. Records should be kept for the life of the evidence and be available for court.
- Separate the hot and wet zones: Drying rooms release moisture and refrigeration releases heat. Place both on the side of the room away from paper and digital media storage.
When the building cannot deliver a stable room, an insulated modular room or a controlled cabinet can create a smaller climate controlled zone inside a larger property room. That is often cheaper than upgrading the HVAC for the whole space.
Choosing Shelves for an Evidence Room
Shelves for an evidence room have to hold odd package sizes, stay organized for years and support location control. No single shelf type fits every zone. Match the shelf to the evidence category and to the space the zone has.

| Shelf type | Best evidence zone | Why it fits | Watch for |
|---|---|---|---|
| Steel shelving with dividers and bins | General packaged evidence | Adjustable openings, each bin becomes a location code, easy to relabel | Closed backs and sides keep bags from falling into the next range |
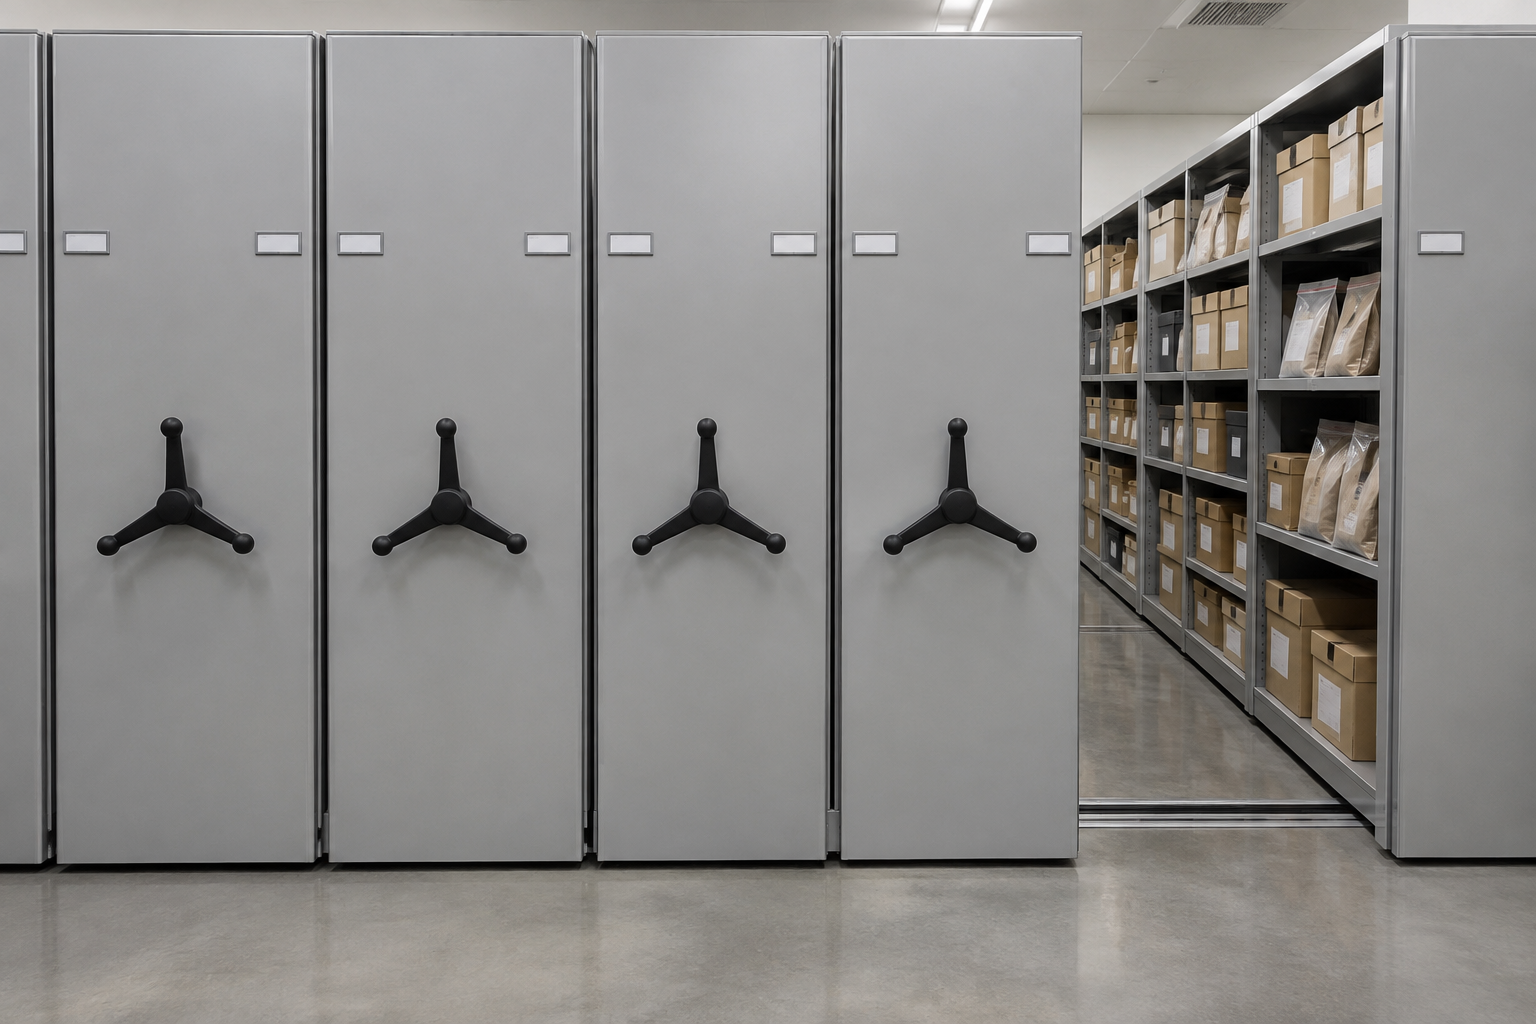
| High-density mobile shelving | Long-term general storage, records, kits | Removes redundant aisles and can add far more shelf footage in the same room | Floor load, rail height, seismic anchoring, aisle lock for restricted carriages |
| Wire mesh security cage shelving | Firearms, narcotics, valuables | Visible to cameras, own lock and log, second boundary inside the room | Door size for the largest item and a mesh roof so it cannot be reached over |
| Weapon racks and cabinets | Seized firearms | Holds long guns upright and visible, keeps ammunition separate | Place inside the cage or vault, not in the open room |
| Cantilever or bulk racks | Bicycles, doors, tires, bumpers | No front uprights, so long and odd shaped items load from the side | Route from the receiving door to the rack must fit the largest item |
| Refrigerated and pass-through lockers | Intake and cold holding | Individual locked compartments, deposit without entering the room | Power, alarm and the wall position between intake and secure storage |
For general zones, lay out shelf heights and bin counts with the evidence room shelving designer. When the room is short on floor area, compare that result against high-density mobile shelving for evidence rooms, which puts the same steel shelving on carriages. Two recent projects show the difference in practice: a sheriff evidence storage mobile shelving project in Colorado Springs and a crime lab evidence storage project in Missoula. Seized firearms have their own rules, covered in our guide to gun vault and weapons storage for law enforcement.
How to Size and Specify Your Evidence Storage Room
Square footage is only the starting point. A room with a large footprint can still lack capacity if the evidence mix, retention horizon, clearances, and workflow aren't mapped before equipment is selected.
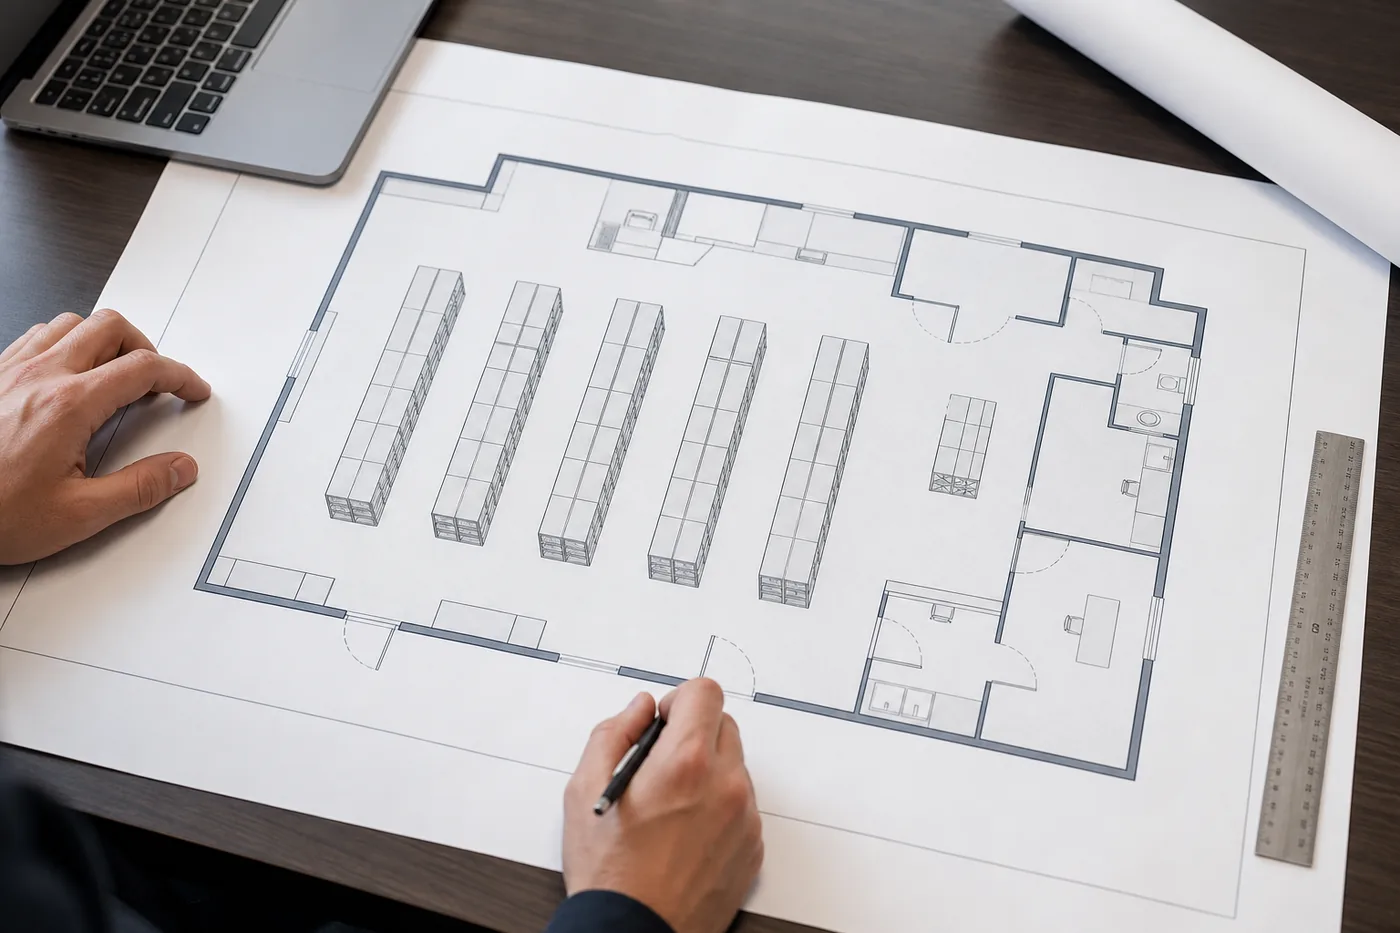
Collect the following information before requesting a layout:
-
Measure the room. Record length, width, ceiling height, columns, wall openings, door widths, and corridor access. Note sprinkler heads, lighting, ductwork, and other obstructions. Ceiling and sprinkler clearances must be checked before shelving height is set.
-
Document the floor. Confirm slab condition, levelness, and allowable floor load with the project engineer. Mobile shelving adds rail and carriage loads, so the floor must support the proposed system. Include seismic design requirements where applicable, particularly in the Mountain West.
-
Separate evidence categories. Count biological evidence, firearms, narcotics, digital media, valuables, hazardous items, general packages, and oversized property. Each category may need a different enclosure, environmental condition, or access level.
-
Measure inventory by linear feet. Record the current shelf footage by package type, then add the growth and retention assumptions approved by the agency. Don't size only from the number of rooms or cases. Boxes, bags, weapons, and bulky items consume space differently.
-
Map intake and disposition. Show the receiving point, temporary lockers, processing bench, drying area, cold storage, permanent storage, restricted zones, release staging, and exit path. The best arrangement reduces crossing between unsecured and secured areas.
-
Locate building services. Mark HVAC equipment, electrical panels, outlets, data points, drains, ventilation, and backup power provisions. Refrigerated and frozen equipment needs an appropriate power and alarm plan.
-
Confirm operating requirements. Ask who may deposit evidence, who may retrieve it, how after-hours intake works, and where staff scan or log each transfer. Access credentials, keys, logs, alarms, and surveillance should support the written procedure.
Capacity modeling can then compare fixed shelving with high-density mobile shelving. Static shelving offers direct access to every row, while mobile shelving removes redundant fixed aisles and creates a shared moving aisle. Mechanical-assist systems are often a practical middle option, while powered systems add controls and aisle lock-down features.
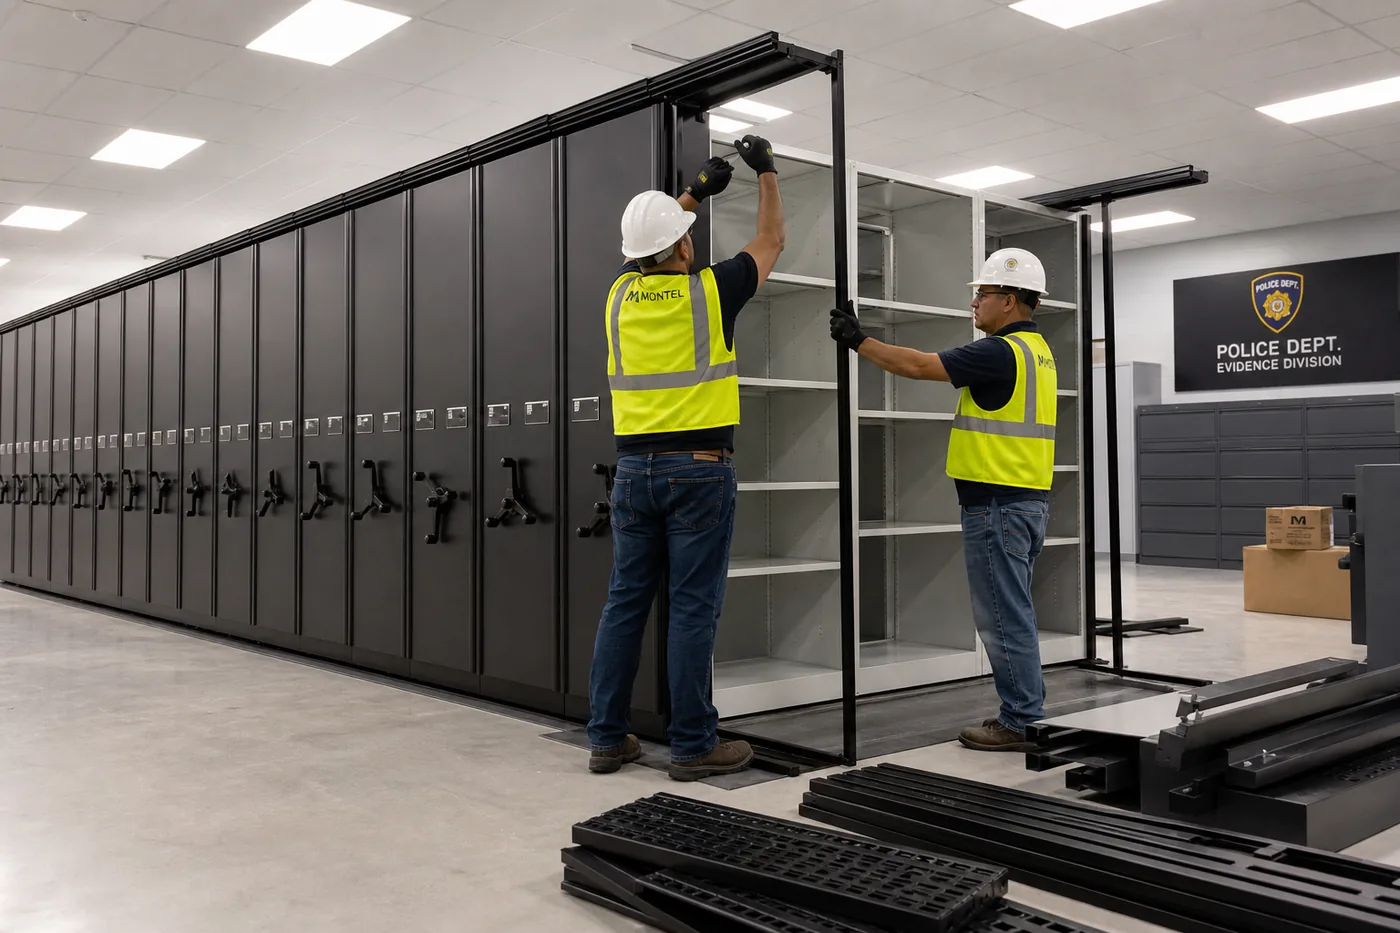
For tight footprints or tall rooms, test a vertical approach with the Automated Vertical Storage Designer. The final selection still needs review against evidence handling, fire protection, access, service, and maintenance requirements.
Costs Lead Times and What Drives Them
Evidence room budgets vary because the equipment package varies. A simple controlled-storage room with static shelving has different requirements from a project with mobile carriages, refrigerated storage, a freezer, drying equipment, restricted cages, access controls, and seismic engineering.
Main budget drivers
- Room size and zone mix: More floor area increases shelving and installation needs. Refrigerated, frozen, drying, and restricted zones add specialized equipment and building coordination.
- Static or mobile storage: Static shelving has a lower equipment complexity. Mobile systems add rails, carriages, leveling, and drive components, but they can improve density where fixed aisles consume valuable floor area.
- Finishes and utilities: Drying areas may require epoxy surfaces, drains, hose connections, stainless components, ventilation, and cleanable work surfaces. Cold storage adds power, monitoring, and alarm coordination.
- Security layers: Cages, vaults, door controls, access credentials, logging, cameras, and alarms affect both equipment scope and electrical or security integration.
- Site conditions: Retrofit work can involve demolition, evidence relocation, uneven floors, restricted working hours, difficult freight access, or changes to HVAC and power.
Schedule factors
Lead time depends on the selected system, manufacturer availability, engineering review, site preparation, freight, and installation access. Standard shelving may move through procurement more efficiently than custom lockers, mobile systems, refrigeration, or a room requiring stamped engineering.
Permits and inspections can also affect the schedule. Confirm fire protection, electrical, HVAC, accessibility, seismic, and building requirements with the responsible design professionals and authorities having jurisdiction. A layout that hasn't been validated against clearances can create change orders after the equipment arrives.
Budget discipline: Spend first on correct measurements, environmental control, workflow, and security. Optional accessories are easier to add than a misplaced wall, undersized cold zone, or unusable aisle.
Free layouts and quotes help buyers compare configurations before committing. Material Handling USA provides multi-manufacturer options, layout support, installation coordination, and competitive pricing, with fast shipping and delivery planning based on the selected equipment and site conditions. Request a quote after the room measurements and category counts are ready.
Common Mistakes to Avoid in Evidence Storage Room Design
The most expensive problems usually appear after installation starts. They come from treating evidence storage as ordinary shelving, then trying to correct the workflow or environmental requirements later.
Mistakes installers see repeatedly
Using general room storage for biological evidence: Warm, uncontrolled storage can accelerate degradation and create questions about preservation. Assign biological evidence to the required drying, refrigerated, or frozen process.
Skipping drying-room details: A room without a drainable floor, cleanable epoxy surfaces, hose access, or correctly placed stainless hanger rods may require costly rework. Put these requirements on the construction and equipment drawings.
Connecting evidence HVAC to general ducts: California POST guidance recommends a stand-alone evidence-room HVAC system and identifies a storage environment of about 60°F to 75°F with humidity below 60%. Review the California POST evidence and property management guidance with the project team.
Relying on one lock: A restricted door alone doesn't document every event. Layer key or card access with an access log, and evaluate alarms and 24-hour surveillance where agency policy requires them. The property evidence room security guidance describes this layered model.
Ignoring oversized access: A rack may fit on paper while the largest item can't reach it. Measure doors, corridors, turning areas, and staging space before selecting bulk storage.
Leaving clearances to the end: Shelving can conflict with sprinklers, lights, ductwork, or ceiling structure. Verify those conditions during the site measure, not after delivery.
Skipping an evidence relocation plan: During retrofit work, the agency still needs controlled access to active evidence. Phase the move, define temporary storage, and document responsibility for every transfer.
What Should Your Evidence Storage Room Design Include
A strong specification should describe the room as an operating system, not a list of products. It should identify the evidence categories, environmental targets, retention assumptions, access layers, tracking method, and the physical path from intake to disposition.
Use this review list before approval:
- Zoning: General, refrigerated, frozen, drying, valuables, firearms, narcotics, digital, and oversized areas are identified where applicable.
- Environment: Temperature and humidity targets are assigned by evidence type, with monitoring and alarm responsibilities defined.
- Workflow: Intake, temporary holding, processing, storage, retrieval, release, and disposition have clear locations.
- Capacity: Inventory is measured by linear feet and category, with retention schedules and future needs documented.
- Structure: Floor load, levelness, seismic requirements, doors, aisles, ceiling, sprinkler, and lighting clearances are verified.
- Security: Access credentials or keys, logs, alarms, surveillance, restricted enclosures, and visitor controls are coordinated.
- Installation: Delivery access, evidence relocation, site preparation, installation hours, and final training are included.
The room should also remain serviceable. Leave access for refrigeration maintenance, electrical panels, drains, monitoring devices, and emergency equipment. A dense layout that blocks service points can create operational problems even when it maximizes shelf capacity.
Frequently Asked Questions About Evidence Storage Room Design
What is the best layout for an evidence storage room?
The best layout follows a controlled path from intake to processing, storage, retrieval, and disposition. It separates evidence by type and environmental need, then adds restricted areas for categories such as firearms, narcotics, valuables, and hazardous items.
What temperature should an evidence storage room maintain?
General temperature-controlled storage is commonly specified at 60°F to 75°F, or 15.5°C to 24°C, with humidity below 60%. Refrigerated storage is commonly 36°F to 46°F, or 2°C to 8°C, with humidity below 25%. Confirm requirements with the responsible laboratory and agency policy.
What should I look for in evidence storage refrigerators?
Ask the receiving laboratory which items must be refrigerated and which must be frozen, then choose a locking unit for each. Refrigerated pass-through lockers suit after-hours intake. Open refrigerators and freezers belong inside the secure room. Every unit needs a temperature log, an alarm that reaches a person after hours, a dedicated circuit and a plan for backup power.
How do I size evidence shelving?
Measure the current inventory in linear feet by evidence category and package type. Add the approved retention horizon, special categories, oversized items, ceiling and sprinkler clearances, floor load, door widths, and aisle requirements.
Is mobile shelving suitable for evidence rooms?
Mobile shelving can suit long-term evidence storage when the floor, rail layout, clearances, access requirements, and workflow support it. Static shelving may be better where staff need immediate access to every row or where the room has simpler needs.
What security controls belong in an evidence room?
Use layered controls. A key or card system, access log, alarms, and surveillance can work together to restrict entry and document access. Restricted categories may need a second cage, vault, or locked cabinet.
Can an existing room be converted into an evidence room?
Often, but the site needs a proper review. Check the slab, floor level, ceiling, sprinkler positions, HVAC separation, electrical capacity, doors, corridors, security infrastructure, and a plan for relocating evidence during installation.
What does climate controlled evidence storage mean?
It means the whole room, not only the refrigerators, holds a stable temperature and humidity on its own HVAC zone, with a logger that records conditions and an alarm for excursions. Layout matters: keep shelving clear of supply and return grilles, block windows, and place drying and refrigeration equipment away from paper and digital media storage.
Plan Your Evidence Storage Room With a Free Design and Quote
A purchase-ready plan begins with zones by evidence type, not a shelf count. Set the environmental targets, document the retention horizon, measure the room and floor conditions, map intake through disposition, and specify the access layers that protect chain of custody.
Use the evidence storage room design resource to organize the project, or submit the measured requirements for a free layout. A mobile-shelving project can also begin through the mobile shelving quote request.
Material Handling USA serves the Mountain West and nationwide with multi-manufacturer recommendations, in-house installation crews, seismic and code-compliant engineering support, competitive pricing, free layouts and designs with no obligation, free quotes, and delivery planning. Starting the layout earlier gives the project team more time to resolve clearances, utilities, security integration, and procurement timing before installation is scheduled. Call (800) 326-4403 or email Sales@MH-USA.com to discuss the room.
Visit Material Handling USA to configure an evidence storage solution, request a free layout and quote, or review options for mobile shelving, lockers, drying equipment, cages, and restricted storage. Call (800) 326-4403 for a design consultation with no obligation.
Design it yourself, then get a quote
Use our free online design tools to configure the equipment this article describes, then send the configuration to our team for pricing:
- evidence storage solutions for law enforcement
- security cage designer for restricted firearms, narcotics, and valuables enclosures
- shelving designer for general controlled-storage zones