
Custom Lab Benches: Fit the Equipment, User and Workflow
A custom laboratory bench should solve a specific problem: an instrument needs more service space, an undercounter appliance does not fit, or a work process requires a different combination of storage and open access. The useful dimensions come from those requirements.
Material Handling USA can help turn equipment information and room measurements into a coordinated bench brief. This guide focuses on fit, clearances, services and acceptance so the finished bench supports the work it was designed for.

Begin with the task and the equipment envelope
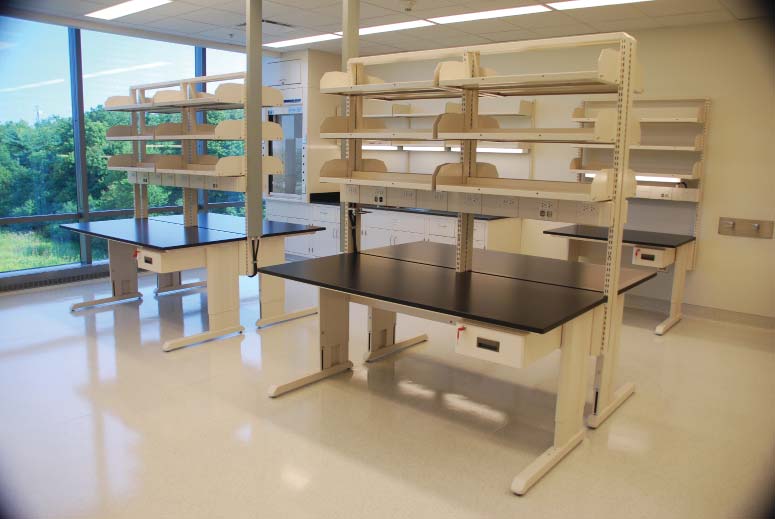
Describe what happens at the bench from the start of a task to cleanup. Identify the instrument, supplies, sample containers and any temporary items that occupy the surface. Include the operator's position and the way materials arrive and leave. This makes the bench a defined work area rather than an empty rectangle on a floor plan.
Record the equipment model and obtain its installation document. Measure the complete assembly, including handles, covers, trays and accessories. Distinguish the dimensions needed for ordinary operation from those needed to open a panel or remove a component for servicing. Both belong in the furniture review.
Show the equipment at its intended location on the bench. Centering a large instrument may leave two unusable strips of surface, while moving it toward one side may improve the task but change access or load distribution. Evaluate the arrangement with the supplier and the responsible laboratory team.
List known future changes without treating every hypothetical instrument as a requirement. A documented replacement plan can justify additional space or a modular detail. An undefined request to accommodate anything can make the bench larger and more costly without providing a measurable benefit.
For a room containing both cabinets and separate instrument positions, compare the casework and custom table planning guide. The distinction between a bench, a table and a cabinet-supported worktop should follow the task and the proposed construction.
Check undercounter equipment as a complete installation

An undercounter refrigerator or freezer needs more than an opening equal to its published height. Obtain the manufacturer's requirements for ventilation, leveling, door operation, connections and maintenance. Include those requirements when defining the clear opening beneath the bench.
Measure from the finished floor to the lowest part of the proposed structure, not simply to the top of the work surface. Aprons, braces, drawer units and service channels can reduce the available opening. Ask the furniture drawing to show these components so the appliance fit can be checked before fabrication.
The door must open through its required operating range. Adjacent cabinets, wall returns, handles and nearby stools can interfere. Include removal of internal drawers or shelves if the appliance requires additional door clearance for those tasks. A unit that slides into an opening may still be unusable there.
Plan the service route. Identify how the appliance can be moved out for maintenance without dismantling unrelated furniture or blocking essential laboratory operations. Coordinate cable and hose routing with the equipment requirements and the responsible trades. Do not use a generic clearance taken from a different appliance model.
| Interface | What the drawing should show |
|---|---|
| Height | Clear opening below the lowest obstruction |
| Width and depth | Usable space including connections and projections |
| Ventilation | Manufacturer-required openings and clearances |
| Door operation | Swing and access to internal components |
| Maintenance | Withdrawal path and connection access |
| Floor conditions | Leveling needs and the finished surface |
If the equipment model changes, review the opening again. Similar exterior dimensions do not establish equivalent ventilation or service needs. Keep the accepted appliance documentation with the bench specification so the reason for the custom dimensions remains clear.
Select the frame and working position

Choose the bench structure around its loads and intended use. An open frame may provide access below the surface, while a cabinet-supported arrangement provides more enclosed storage. The structural design, worktop and accessories need to be reviewed together rather than selected as unrelated parts.
Provide the weight and support-point locations of instruments. Include upper shelves, attached equipment and stored materials where they contribute to the load. Ask for confirmation of the complete proposed assembly and any limits on concentrated loads. A general family rating does not establish every custom configuration's capacity.
Working height should reflect the task, users and equipment. The height of the worktop alone does not describe where a person's hands or eyes will be during operation. A tall instrument placed on a standard surface may require a different arrangement from a low manual preparation task.
For adjustable-height furniture, define the adjustment method and the intended range of use. Review service connections and the permitted operating conditions with the manufacturer. Do not assume that every accessory, appliance or cable arrangement can travel with the bench.
Manufacturer bench systems provide specific construction options. Explore Labs USA laboratory furniture solutions includes table and workbench families that can inform the comparison. Obtain current product drawings and documentation for the selected system; photographs of a similar bench are not a substitute for the proposed assembly's details.
Where seating or an accessible work position is required, coordinate the complete layout with the responsible design team. Include approach, knee space, reach and the equipment actually occupying the work area. A nominal bench dimension by itself does not resolve those requirements.
Choose surfaces, shelves and storage for the process
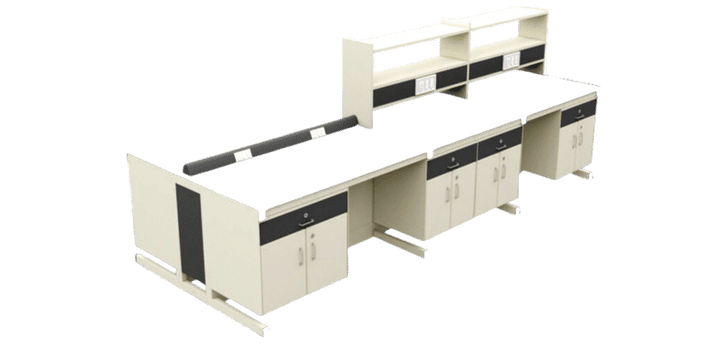
Specify the work surface from the laboratory's documented exposure and cleaning conditions. Identify the substances, contact patterns and procedures that matter. Ask for relevant product performance information and care instructions instead of relying on broad descriptions such as durable or chemical resistant.
Consider the complete surface detail. Seams, edges, penetrations and attached fixtures can affect cleaning and maintenance. Where an instrument or sink needs a cutout, use the accepted product dimensions and coordinate the supporting structure. Avoid treating cutouts as field decisions after the bench arrives.
Upper shelves can keep supplies near the task, but their depth and position affect visibility, reach and clearance above instruments. Include bottles and other stored items in the elevation drawing. Review their loads and the approved attachment arrangement with the furniture supplier.
Storage below the surface should not consume space reserved for an appliance, seated user or service access. Compare drawers, cabinets and movable storage against the specific inventory. A pedestal that fits under an empty bench may obstruct the intended workflow once the operator and equipment are present.
Use containers and labels that support the laboratory's inventory process. Frequently used consumables need an identified replenishment location, while items awaiting review should not be mixed into ordinary bench storage. Include cleaning supplies and waste handling in the plan through the laboratory's approved procedures.
For countertop comparisons, use the laboratory countertop materials guide. For a larger selection of room furniture, see premium laboratory furniture solutions.
Coordinate utilities and room constraints
Connections
Identify location and responsibility.
Room
Verify existing dimensions and constraints.
Access
Preserve operating and service space.
Mark every required service on the bench plan and elevation. Identify the connection location, the party supplying it and the access needed after installation. Include data and instrument connections as well as building utilities. A bench can fit physically while leaving its equipment impossible to connect as intended.
Review existing room conditions before final dimensions are approved. Wall irregularities, columns, floor changes and fixed equipment may affect placement. Document which measurements are verified and which remain provisional. Custom fabrication should be based on an agreed set of dimensions rather than several conflicting field sketches.
Check the bench in relation to neighboring work areas. Open drawers, appliance doors and occupied seating positions can affect shared circulation. Include the normal operating arrangement when reviewing the room, not just furniture outlines with every door closed.
Coordinate service work with qualified parties. The furniture supplier, instrument vendor and building trades may have different responsibilities, and those boundaries should be explicit. List who makes final connections, who verifies operation and what must be complete before the laboratory resumes work.
Think through future access to the room and the bench. A custom assembly may be larger than the route through which it must be delivered. Confirm whether it arrives assembled or in sections and how it will be protected during handling. These decisions can influence the design before fabrication begins.
If the project is part of a wider cabinet replacement, the casework renovation guide helps organize the transition and trade scope. Keep the bench's equipment interfaces visible within that larger project.
Review drawings and test the critical fit
Requirements
Record the actual equipment and work.
Interfaces
Coordinate furniture, surfaces and services.
Evidence
Retain approved product documents.
Use a drawing review to resolve the dimensions that make the bench custom. Highlight clear openings, overall size, worktop thickness, structural members, shelf positions and utility interfaces. Ask reviewers to check their own responsibilities rather than approving a drawing solely for its general appearance.
For a critical appliance opening, compare the drawing directly with the equipment installation document. Record the accepted model and required clearances. If a dimension is close or access is uncertain, a physical mockup or representative trial can help reveal practical issues before fabrication.
Test the operator's task where practical. A temporary layout using the instrument footprint, representative containers and a chair can reveal reach and visibility problems. Record what the trial established and what still requires engineering or manufacturer confirmation. A mockup does not establish structural capacity or material performance.
Control revisions. When the instrument model, work surface or service arrangement changes, identify which drawings and approvals are affected. Send the revised information to all relevant parties. A change that appears small to one supplier may alter another supplier's required opening or connection.
Compare quotations against the same accepted requirements. Ask each proposal to identify the frame, surface, storage, accessories and documentation. Clarify delivery, assembly, placement and service work. This makes it easier to distinguish a genuine alternative from an incomplete scope.
Agree on the acceptance conditions before the order is released. These should address the critical fit, supplied components and documented operating requirements. Keep the final approved package with the purchase record so later questions can be resolved against the same baseline.
Install, accept and document the bench
Fit
Compare openings with approved equipment.
Accept
Resolve discrepancies before normal use.
Record
Keep drawings and component references.
Prepare the work area before delivery. Coordinate removal of existing furniture, protection of instruments and any temporary work arrangements. Confirm who receives the shipment, inspects it and manages installation access. The schedule should include the laboratory's operational constraints and required readiness checks.
Inspect the delivered bench against the approved documents. Check dimensions, openings, supplied accessories and visible condition before equipment obscures the details. Record discrepancies and resolve them through the agreed process. Do not make unreviewed field modifications to accommodate a fit problem.
Verify the appliance and instrument interfaces after placement. Check the approved ventilation and service spaces, door operation and access to connections. Have the responsible parties complete their connection and operational checks. Furniture acceptance and instrument acceptance are related but distinct activities.
Provide users with care instructions and the process for requesting changes. Explain which shelves or accessories may be adjusted and what requires further review. Keep load information available so future equipment additions are evaluated against the actual assembly.
Retain a simple bench record: position identifier, component schedule, worktop material, equipment model, approved drawing and maintenance information. This is especially valuable for custom openings, where the design reason may otherwise be lost when staff change.
Material Handling USA can help organize the requirements for a bench that fits the task. Send the room dimensions, equipment documents and photographs of the current problem. The goal is a bench whose dimensions, services and operating arrangement are understood before fabrication and verified after installation.
Frequently asked questions
How much clearance does an undercounter freezer need?
Use the exact freezer manufacturer's installation requirements. Ventilation, door swing, connections and service access vary by model and must be included in the bench design.
Is the worktop height the clear opening height?
No. Aprons, braces, drawers and other components may reduce the space below the worktop. Show the lowest obstruction on the drawing.
Can a custom bench use standard components?
Often the requirement can be addressed with a documented combination of standard parts. Review the complete configuration and identify which dimensions or details truly require customization.
Should the bench be adjustable?
Base that decision on users, tasks and equipment. Review loads, service connections and operating limits for the proposed adjustable assembly.
What should a fit trial include?
Include the equipment envelope, door and cover movement, representative supplies, operator position and service access. Confirm structural and material requirements separately.
What information starts a custom bench discussion?
Provide equipment models and installation documents, loaded weights, room measurements, photographs, service needs and a description of the task or fit problem.
Define the fit before fabricating the bench
Share your application details, photographs and requirements with Material Handling USA to start a focused project discussion.