
Laboratory Casework and Custom Tables: Plan the Right Combination
Laboratory casework and tables perform different jobs. Cabinets organize supplies and support planned work areas, while a separate table can accommodate an instrument, a changing process or a task that needs a different working position. A useful layout combines them around the work.
Material Handling USA can help organize the furniture specification, dimensions and coordination questions. Start with the instruments, procedures and storage requirements, then compare complete furniture assemblies suited to those needs.

Decide which tasks belong on casework or tables

Map the work performed at each position. Include preparation, instrument operation, recording results, cleaning and temporary storage. A surface described simply as “general laboratory use” leaves too many decisions unresolved. The design should explain what will sit on it, how people will approach it and what services the task requires.
Fixed casework can provide a continuous work run with organized storage below. A freestanding table may offer different access around an instrument or allow a separate task area. Neither arrangement is universally better. The decision depends on storage demand, servicing, supported loads and the frequency of future changes.
Identify tasks that should not share the same position. For example, a balance location, a wet preparation area and a computer station may have different environmental and access needs. Record those needs rather than relying on a furniture photograph to establish compatibility with every procedure.
Ask users to describe the sequence of a typical task. The location of supplies before and after use can be as important as the instrument footprint. Include waste, sample containers and documentation in that sequence so they do not become unplanned occupants of the main work surface.
For broader furniture selection, see premium laboratory furniture planning. For an equipment opening that needs special dimensions, the custom lab bench guide develops the fit and service-access questions in more detail.
Create an instrument and load schedule
Weight
Include equipment and accessories.
Support
Identify load contact points.
Access
Show operating and service envelopes.
List each instrument with its current model, external dimensions, operating weight and manufacturer's installation requirements. Include accessories, attached computers, water systems and any equipment that will sit on an upper shelf. A catalog footprint may omit parts that project during use or servicing.
Show where the load reaches the furniture. Equipment supported on small feet creates a different condition from a broadly distributed load. Provide the support-point locations and expected operating behavior to the furniture supplier. Ask for written confirmation of suitability for the proposed configuration rather than extrapolating from a general table capacity.
Separate static weight from other performance requirements. Movement, vibration sensitivity, leveling and the need to relocate equipment can affect the selection. An adjustable table is not automatically an isolation table, and a heavy work surface does not by itself establish the performance needed by a sensitive instrument.
Record the largest service envelope as well as the operating envelope. A hinged cover, removable panel or drawer may need space that is unused during normal work. Include access to the sides and rear where the instrument manufacturer requires it. Otherwise, a furniture arrangement can fit on installation day while making routine maintenance difficult.
| Schedule item | Information to include |
|---|---|
| Instrument identity | Manufacturer, model and installation document |
| Loads | Equipment, accessories and support points |
| Operating envelope | Doors, covers, sample loading and user position |
| Service envelope | Panel removal and maintenance access |
| Utilities | Electrical, data, water, gases and other connections |
| Future change | Known replacement or expansion requirements |
Keep unresolved entries visible. A provisional instrument selection should not silently become a final furniture dimension. Assign a date and owner for confirming each item that can affect fabrication.
Compare fixed, adjustable and movable arrangements
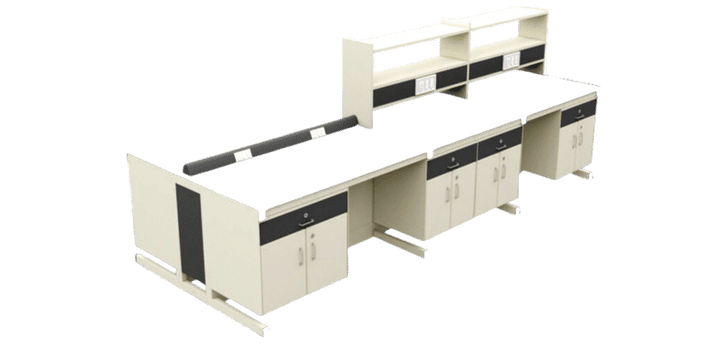
A fixed table can be a straightforward solution when the task and working position are stable. Adjustable-height furniture may serve varied users or procedures, but the adjustment method, permitted load and service connections need review. Confirm whether the proposed assembly is designed to move while loaded and under what conditions.
For a movable arrangement, include the complete travel route. Door openings, thresholds, floor condition and nearby equipment can limit practical movement. Define whether the furniture is repositioned occasionally during a room change or routinely as part of the process. Those are different operating requirements.
Manufacturer systems offer specific combinations of frames, storage and accessories. For example, Explore Labs USA laboratory furniture solutions includes casework and laboratory table and bench families. Use the selected family's current drawings and submittals to establish available configurations; the range description is not a specification for a custom assembly.
Consider storage independently from mobility. A drawer pedestal placed beneath a table can reduce leg space or block equipment ventilation. A mobile cabinet may need a parking position that does not interfere with the user. Include the furniture in its actual operating arrangement when checking clearances.
Evaluate future changes honestly. A table that can move physically may still depend on fixed utilities or a particular room environment. Describe the intended change scenario, including who would disconnect services and relocate the instrument. Flexibility has practical value when those interfaces are planned.
Compare alternatives against a common task description. This makes it easier to see whether an apparent feature addresses a real need or simply adds cost and complexity. Retain the accepted arrangement as a drawing with identified components.
Specify the work surface and cabinet interior

Choose materials from documented exposures and cleaning requirements. List the substances, concentrations, contact conditions and procedures that matter to the work area. Avoid selecting a countertop solely because it is described as laboratory grade or chemical resistant. Those terms do not define performance for every application.
Review the complete surface assembly. Edges, seams, cutouts, sinks and attachment points can influence cleaning and serviceability. A suitable sheet material may still be part of an unsuitable detail if joints or openings are not coordinated. Ask for the proposed construction details where they affect the process.
Cabinet interiors should follow the stored items. Record container sizes, quantities and handling needs before choosing the balance of drawers and shelves. Consider whether staff need to see contents immediately, separate small supplies or store larger equipment. Avoid filling the plan with identical cabinets simply because they fit the wall length.
Special storage requires its own specification. Ordinary casework should not be described as a substitute for a product designed and documented for a specific hazard or controlled storage condition. Have the laboratory's responsible team review those requirements and identify the appropriate equipment separately.
Compare hardware and access. Drawers need room to open, doors need a usable swing, and frequently selected supplies should be reachable through the intended workflow. Include neighboring furniture and the occupied user position when checking these conditions.
The lab countertop materials guide can help structure the material discussion. Keep the final decision tied to product-specific evidence and the laboratory's requirements rather than a broad ranking of materials.
Coordinate utilities before approving furniture
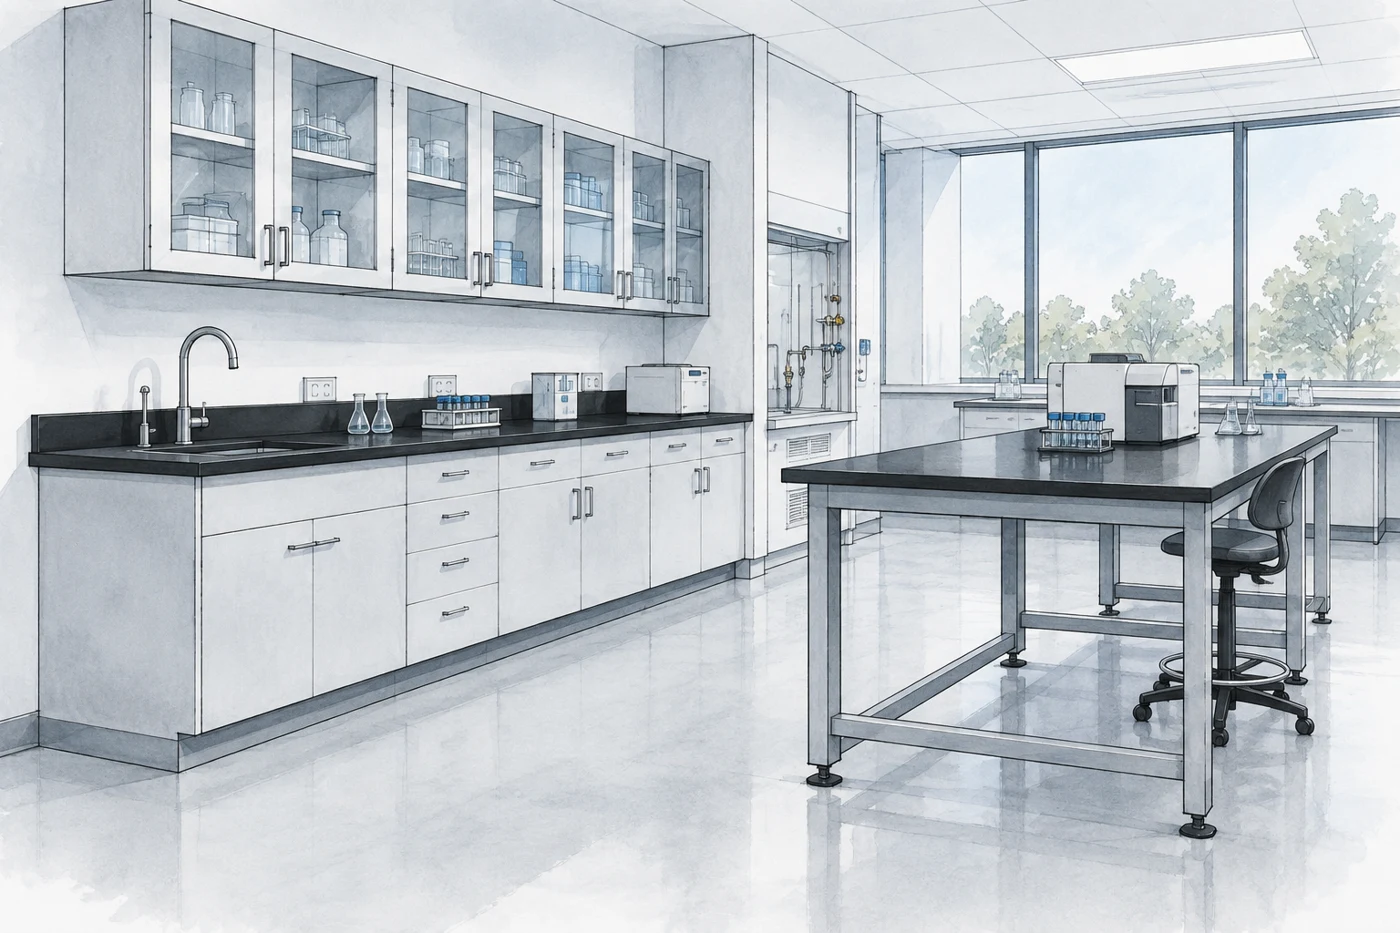
Show the intended location of every service connection on the furniture plan. Include electrical outlets, data, water, drainage and any process services. Identify which connections belong to the building and which are supplied as part of the furniture or instrument. A clear boundary avoids gaps between vendor scopes.
Check access to connections after furniture and equipment are installed. A plug, valve or service panel should not become inaccessible behind a cabinet merely because it was visible in an empty room. Coordinate service access with the responsible trades and the instrument manufacturer.
For adjustable or movable furniture, review the connection arrangement through the full approved range of movement. Cables and hoses need an appropriate design for that use; spare length alone is not a complete solution. Have qualified parties define the installation and operating requirements.
Include sinks and fixtures early. Their placement can affect cabinet construction, worktop cutouts and service routing. Confirm the selected fixtures before fabrication so dimensions are based on actual products. Late substitutions may require a revised drawing and approval.
Review the room interfaces together. A furniture change can affect access to existing equipment, wall-mounted items or environmental controls. The project team should identify those relationships before a purchase order fixes the furniture dimensions.
Document the coordination decisions on one controlled set of drawings. Separate sketches held by different suppliers make discrepancies harder to detect. Mark the revision and approval status so the installation team can distinguish current information from a preliminary concept.
Compare proposals and prepare the installation
Requirements
Record the actual equipment and work.
Interfaces
Coordinate furniture, surfaces and services.
Evidence
Retain approved product documents.
Ask each proposal to identify the furniture family, component schedule, work surface, accessories and performance documentation. Include finish references and the dimensions that require field verification. A description such as “custom lab table” is insufficient when suppliers may interpret the construction differently.
Compare complete scopes. Delivery, unloading, assembly, placement, attachment, service connections and instrument moves may belong to different parties. List those responsibilities explicitly, along with any exclusions. This makes the commercial comparison meaningful and helps the site team prepare.
Confirm delivery access before release. Consider doorways, elevators, corridor turns and the space needed to receive and protect furniture. Some assemblies may need a particular delivery sequence. Coordinate that sequence with the supplier rather than assuming every item can be carried into the finished room intact.
Plan the transition from existing furniture. Identify temporary work positions, inventory moves and the people authorized to disconnect and reconnect equipment. The furniture schedule should reflect the laboratory's operational constraints and required approvals. Do not treat an estimated manufacturing duration as the entire project schedule.
At installation, compare the delivered products with the approved documents before the room is fully loaded. Record damage, missing components or dimensional discrepancies through the agreed process. Resolving an issue while access remains open is generally simpler than working around active instruments and stored supplies.
For a wider renovation involving cabinet replacement and trade coordination, use the laboratory casework renovation guide alongside the furniture schedule.
Accept and maintain the finished work area
Accept
Check the approved furniture requirements.
Maintain
Keep care and adjustment instructions.
Change
Review replacement instrument requirements.
Define acceptance around the approved requirements. Check the furniture identity, dimensions, work surface details, drawers, doors and supplied accessories. Confirm that the instrument and service envelopes remain available after installation. Record any remaining action with an owner and a completion condition.
Retain the manufacturer's instructions, load documentation and care information. Users should know which adjustments are permitted and how to request a change. An undocumented shelf or accessory addition can affect clearances and loading even when it appears minor.
Create a room reference that links each furniture position to its component schedule. Include the worktop material, finish and replacement information where available. This helps maintenance teams obtain suitable parts and makes future expansion more consistent.
Review the arrangement after staff have used it for normal work. Look for supplies left on the floor, equipment moved beyond its planned position or drawers that cannot open comfortably during a task. These observations may reveal a workflow issue that was not apparent in the drawing.
For future instrument replacements, return to the load and service schedule before reusing the same position. Similar footprints do not establish equivalent weight, ventilation or connection needs. Check the new requirements before assuming the existing furniture remains appropriate.
Material Handling USA can help bring these decisions into one furniture brief. Share the instrument list, room dimensions, work processes and known constraints. A coordinated combination of casework and tables starts with those requirements and ends with a documented arrangement the laboratory can operate and maintain.
Frequently asked questions
When should I choose a separate table instead of casework?
Consider a table when the task needs different access, working height or instrument placement. Compare the complete load, storage and utility requirements before choosing.
Can one capacity number specify an instrument table?
No. Provide the load distribution, support points and other performance needs. Obtain confirmation for the proposed complete assembly.
Does movable furniture make a laboratory fully flexible?
Only when utilities, instruments, access routes and operating procedures support the intended movement. Physical mobility is one part of the plan.
How do I select a laboratory work surface?
Document exposures, cleaning, joints, sinks and cutouts, then compare product-specific performance information against those requirements.
What belongs in a furniture quotation?
Identify the system, components, dimensions, surfaces, accessories and documentation. Clarify delivery, installation, service connections and exclusions.
What should be retained after installation?
Keep approved drawings, component schedules, load information, care instructions and a record of accepted changes for maintenance and future projects.
Coordinate the furniture around your laboratory work
Share your application details, photographs and requirements with Material Handling USA to start a focused project discussion.