
ADA-Compliant Queue Planning: Routes, Barriers and Service Access
An accessible queue connects the building entrance, waiting area and service point in a way people can understand and use. Barrier selection is one part of that plan. Clear routes, turning space, detectable boundaries and day-to-day operating practices also need attention.
Material Handling USA can help you compare queue equipment and organize a layout brief. Have the complete proposed installation reviewed against the requirements that apply to your facility; a product description alone does not establish compliance.
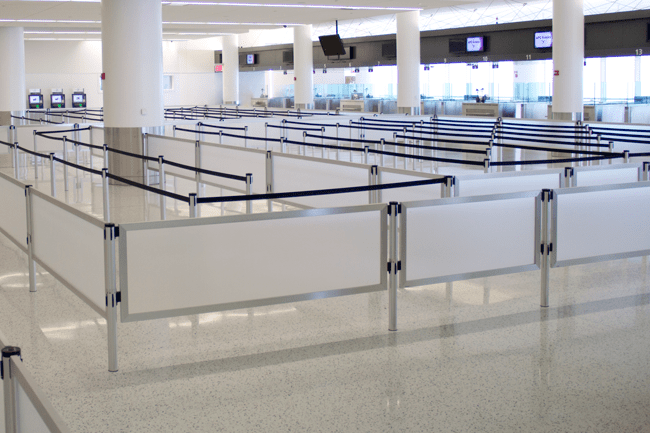
Start with the complete customer journey

Draw the route a visitor follows from the entrance to the beginning of the line, through every turn, to the service counter and back into the public circulation area. Include doors, kiosks, payment equipment and any place where a person must stop or change direction. A generous straight section does not compensate for a difficult approach or a blocked exit from the service point.
Observe both quiet and busy conditions. During a peak period, people may stand outside the planned queue, place bags beside posts or move a sign to make room. Those changes can affect the usable route. Ask staff where congestion actually occurs and identify whether the cause is arrival volume, unclear instructions or a slow transaction step.
Use the U.S. Access Board's accessible-route guidance as an authoritative starting point for the design review. The applicable requirements involve the route and connected elements, not just the equipment separating one line from another. Existing conditions and project scope should be evaluated by the responsible design professionals.
Define the service sequence before deciding how many posts to buy. A single line feeding several counters has different release and communication needs from separate lines for appointments and walk-ins. Where visitors must choose a service type, put that decision at a location with enough space and understandable information.
The objective is a complete, usable journey. Record the boundaries of the equipment supplier's scope and the items that require coordination with facilities, the architect or the service team. That prevents an unresolved counter or doorway issue from being mistaken for a stanchion-selection problem.
Review clear space at approaches and turns
Approach
Review the route to the line.
Turns
Check each change of direction.
Service
Coordinate the release point and counter.
Measure clear usable space between the parts of the installation that actually constrain travel. Post centers are not the same as clear width: bases, sign brackets, merchandise and nearby furniture can occupy some of the space shown on a sketch. Include those components in the dimensioned layout.
Straight runs, changes of direction and turning spaces need separate consideration. Do not use one aisle dimension as a blanket design rule for every part of a serpentine queue. The Access Board's accessible-route guide explains walking-surface clearances and turn conditions. Use the full applicable provisions when reviewing the arrangement.
Check the entrance and release points especially carefully. A visitor should be able to identify where to join, move toward the next service position and leave without negotiating an unintended narrow gap. Include the operating position of doors and gates, plus the space occupied by staff assisting visitors.
Review the room as furnished. A planter, waste receptacle or brochure stand that is absent from the queue drawing can become the controlling obstruction on site. Maintain a coordinated furniture plan so an approved barrier layout is not undermined by a later decorative or merchandising change.
Where possible, test the proposed arrangement before committing to a permanent installation. Use representative equipment and involve the people responsible for accessibility and operations. A trial can reveal confusing decisions and awkward release points; it supplements the dimensional review rather than replacing it.
Compare dual belts, beams and panels
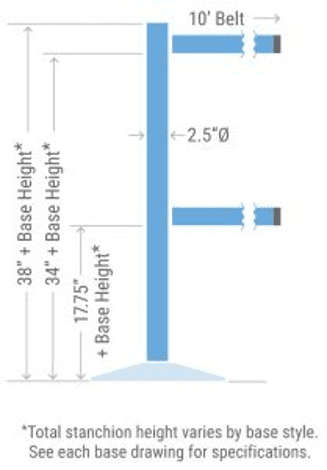
Visiontron describes dual-line belts, dual beams and panels as equipment options that can contribute to queue accessibility for people who use canes. A lower boundary can provide information that a single high belt does not. Its Explore MH-USA crowd-control solutions illustrates these approaches.
Select a barrier system as a complete assembly. Confirm the post, base, connecting components and intended arrangement. Substituting parts based only on appearance can change stability, connection behavior and boundary geometry. Obtain the current documentation for the specific product being considered.
Flexible belts support frequent layout changes, while rigid beams and panels create a more defined arrangement. That distinction affects storage, cleaning and the effort needed to reconfigure the space. A location that changes every morning may need a different operating plan from a permanent service lobby.
| Equipment approach | Planning question | Operating consideration |
|---|---|---|
| Dual-line belt system | Does the full arrangement provide the intended boundary? | Keep both connections in their approved positions |
| Beam system | How will the fixed spans fit the layout? | Define who may move or release components |
| Panel system | How do panels affect sightlines and access? | Include cleaning, handling and storage needs |
| Signs and accessories | Do attachments intrude into the route? | Keep messages current and mounting consistent |
No row in this comparison is a declaration that a complete queue complies with the ADA. Review the installed route, turns, protrusions and service access together. Equipment should support the approved design rather than act as a substitute for that design.
Make the queue understandable
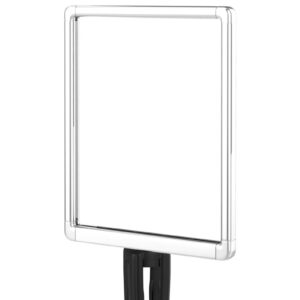
Visitors need to know where the line begins, which service it leads to, when to move and where to go next. Review those decisions from the entrance, at a seated viewing position and within the waiting area. A message that is obvious behind the counter may be difficult to find from the visitor's approach.
Use concise, consistent wording for service choices. Avoid changing terminology between the entrance sign, ticketing screen and staff instructions. If a visitor is directed to “pickup” at one point and “collections” at another, the equipment may be well arranged while the process remains confusing.
Contrast, lighting and sign placement deserve attention. Do not rely solely on color to distinguish service categories. Consider the communication needs of the people using the facility, including visitors who cannot easily hear an announcement or read a distant screen. The appropriate communication arrangements belong in the overall service plan.
Tactile signs, Braille and other features have specific applications and requirements. They should not be presented as a universal checklist attached to every queue purchase. Coordinate the relevant signage requirements with the facility's design team and accessibility review.
For the broader customer experience, see Visiontron's six-step queue planning guide. For storage and replenishment behind a retail service point, the stockroom planning guide can help keep staff movement from spilling into the public waiting route.
Plan busy periods and temporary changes
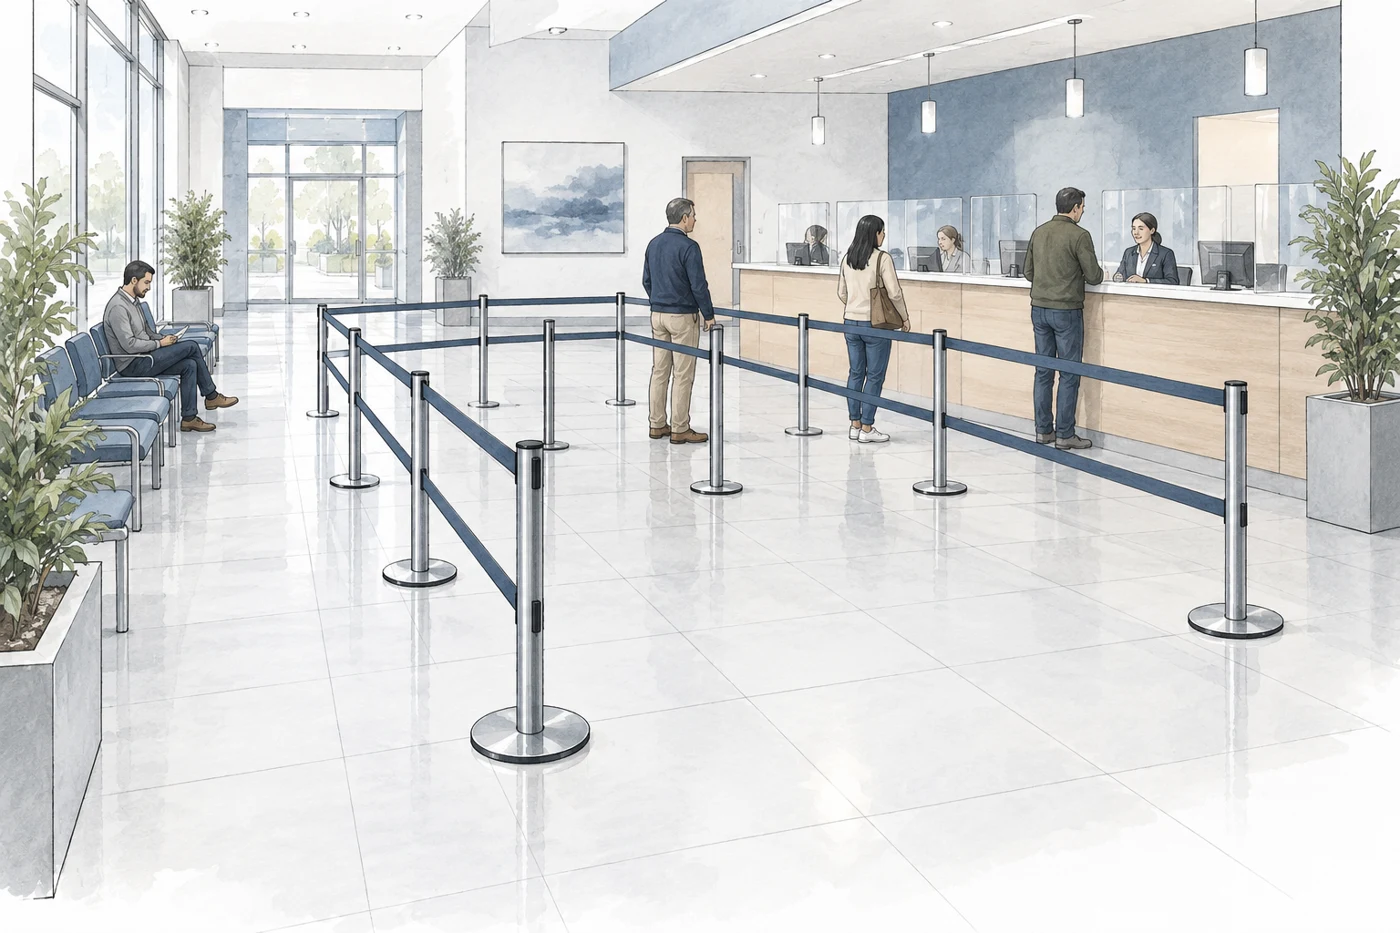
Document the normal layout and any approved peak-period arrangement. Show where extra posts may be placed, how the entrance changes and which circulation areas must remain clear. A diagram is more dependable than asking each shift to recreate the line from memory.
Assign someone to monitor the entrance during busy periods. Overflow can quickly obscure a sign or block a neighboring route even when the original queue is well designed. The operating plan should identify how staff direct arrivals before an informal second line develops.
Temporary closures also need a defined procedure. If one counter is unavailable, visitors should still understand which line to join and how they will receive service. Moving a belt across an opening without updating signs or staff instructions can leave people waiting in the wrong place.
Keep delivery carts, cleaning equipment and promotional displays out of the approved route. Schedule tasks that require temporary occupation of the space through the facility's normal operations process. Staff should know who to contact when a layout cannot be maintained as intended.
An assistance procedure should preserve a respectful, usable service experience. Train staff on the facility's approved approach and provide a clear point of contact for questions. Do not assume that having someone available to move barriers resolves a design problem that should have been addressed before opening.
Record recurring exceptions. If staff repeatedly relocate the same post, the operational need may have changed. Review the layout rather than allowing an undocumented arrangement to become the new standard.
Inspect and maintain the installed arrangement
Inspect
Check equipment, connections and clear routes.
Restore
Return moved barriers to the reviewed layout.
Update
Review operational changes before altering the line.
At handover, compare the actual installation with the approved drawing. Confirm the equipment identity, connection locations, signs and clear routes. Check the space with doors, counters and other nearby elements in their normal operating positions. Resolve discrepancies before treating the arrangement as the finished layout.
Keep the manufacturer's operating and maintenance instructions accessible. Staff who move portable barriers should understand the approved handling method and where unused components belong. Stored posts and panels should not create another obstruction beside the queue.
Include the line in routine opening checks. Look for loose connections, damaged belts, shifted bases and objects placed in the travel path. Use the facility's reporting process for damaged equipment. Do not conceal a damaged component with a temporary arrangement that creates an unreviewed protrusion or gap.
After cleaning or an event, return equipment to its documented position. Floor plans or clearly identified reference points can help staff restore the layout consistently. Any floor markings should themselves be appropriate for the surface and the facility's cleaning and maintenance procedures.
Review changes in service demand. A new kiosk, a larger delivery program or a different appointment process may alter where people wait and how they reach a counter. Include accessibility and circulation in that operational review before simply extending the line.
Keep a change record with the layout documents. Identify the reason for a revision, the person responsible for review and the date it became effective. This helps facilities and front-line staff work from the same arrangement.
Build a useful queue equipment brief
Layout
Provide dimensions and photographs.
Activity
Describe normal and peak service.
Review
Coordinate complete accessibility requirements.
Provide a dimensioned plan, photographs of the approach and service area, and a description of normal and peak activity. Identify whether the installation is permanent, frequently reconfigured or used only for events. Include existing equipment if some components will remain.
Describe the service model: one line or several, ticketed or unticketed, staffed entry or self-directed arrival. State where visitors make choices and how they are called forward. These details determine more than the total belt length; they affect signs, release points and the amount of staff involvement.
Ask the proposal to identify the complete barrier assembly and accessories. Include quantities, finishes, sign holders and any storage or transport equipment. Clarify installation responsibilities and the documents needed for the design review. Distinguish supplier product information from the facility's responsibility for the complete accessible route.
Use a coordinated acceptance checklist. The equipment should match the approved specification, the layout should match the reviewed plan, and the operating team should have instructions for normal and peak arrangements. An attractive product photograph is not evidence that those steps have been completed.
Material Handling USA can help compare the equipment options and prepare the information needed for a focused review. Send your layout and photographs, explain the visitor journey, and identify the operational issue you want to solve. The result should be a queue plan that facilities staff can maintain and visitors can navigate with confidence.
Frequently asked questions
Do dual belts automatically make a queue ADA compliant?
No. Dual belts can contribute to the boundary design, but the complete route, clearances, turns, protrusions and service access must be reviewed together.
Should I measure between post centers?
Record the clear usable space as well as equipment positions. Bases, attachments and nearby objects can reduce the space available for travel.
Can we use one layout for quiet and busy periods?
Sometimes. If overflow changes the arrangement, document and review the peak-period layout as well as the normal one, then train staff to maintain both.
Are panels always better than belts?
No. Compare the need for reconfiguration, sightlines, cleaning, handling and the intended boundary. Select the complete system for the application.
What should staff check each morning?
Check equipment condition, connections, signs and the approved clear route. Report damage and restore moved components through the facility's documented procedure.
What should I send for a layout discussion?
Send dimensions, photographs, the service sequence, normal and peak activity, existing equipment details and the contact responsible for the facility's accessibility review.
Plan the complete visitor journey
Share your application details, photographs and requirements with Material Handling USA to start a focused project discussion.