The lockers are worn, a gym renovation is approaching, and coaches still need somewhere for teams to change. Replacing the existing banks looks straightforward until someone asks about benches, accessible lockers, damaged walls, or summer practices. For managers researching school gym locker replacement Utah districts can build and maintain, the right starting point is the room's daily use, not a catalog page.
Start With the Room Not the Catalog
Consider a district facilities manager planning a partial replacement while adjacent gym work continues. Keeping the existing arrangement might reduce disruption. But if that arrangement crowds the entrance or puts personal storage where shared equipment belongs, copying it preserves the problem.
Start by defining what stays, what changes, and who uses the space. Ask whether physical education classes and athletic teams share lockers, whether coaches need separate storage, and whether visiting teams use the room. Confirm which finishes, partitions, and benches will remain.
A successful locker room is a working system, not simply a row of boxes.

Decide Where the Project Starts and Stops
A standalone replacement needs a different scope from an athletics redevelopment. At Park City's Dozier Field, reconstructed home-side seating was designed to integrate locker rooms with restrooms, concessions, a press box, and storage, according to the district's athletics project announcement. That's a facility project, not an isolated locker order.
Your district might have a smaller scope, but the boundary still matters. Identify whether plumbing, ventilation, shower access, and spectator circulation are outside the contract or coordinated with it.
For rooms connected to showers, include custodial staff in the discussion. BacteriaFAQ.com's resource on how clean are communal showers really can serve as a discussion starter, rather than a substitute for district cleaning procedures.
Once the application is clear, explore the Utah locker planning hub with a defined room use and project boundary.
Match Storage to Daily Gym Use
Inventory what users bring into the room. A student changing for physical education may need space for clothing, shoes, and a backpack. An athlete may also bring protective equipment, a uniform, towels, and a larger gear bag.
Coaches, staff, visitors, and event workers can have different needs. Don't assume that every user needs an assigned full-height locker, or that every item should fit inside a student locker.
Separate Personal Storage From Shared Equipment
Treat storage areas like rooms assigned to different jobs. Personal lockers protect individual belongings. Equipment rooms and shelving handle shared supplies. Benches support changing, not overflow storage.
- Clothing and uniforms: Check whether users need hanging space or can use folded storage.
- Shoes and towels: Decide how wet or dirty items will be separated from clean belongings.
- Personal items: Identify the expected lock type and how staff will handle access problems.
- Shared equipment: Put balls, cones, pads, and team supplies in a dedicated storage plan.
- Staff belongings: Confirm whether staff need storage outside student changing areas.
For an inventory discussion with coaches, the guide to organize sports gear with InchBug offers a related organizational resource. Use your own equipment list to determine the actual cabinet, rack, or locker dimensions.
Large shared inventories may belong in a separate room. The athletic facility mobile shelving application in Ogden is relevant when equipment storage, rather than changing space, is the main challenge.
Measure representative loaded bags and bulky gear before selecting compartments. Empty locker dimensions alone won't tell you whether a helmet, shoulder pads, or a packed team bag fits comfortably.
Compare the Main Locker Configurations
Choose a configuration around the storage task and the user. A full-height compartment may suit hanging clothing and bulky gear. Smaller compartments may suit short visits or physical education classes where users bring fewer items.
The terminology also needs care. Ask suppliers to show the actual compartment arrangement on drawings. Terms such as half-height and double-tier can describe different overall assemblies.
| Configuration | Application fit | Planning advantage | Main trade-off | Quote question |
|---|---|---|---|---|
| Full-height lockers | Hanging clothing and larger personal gear | More vertical storage per user | Fewer compartments along a given wall than stacked arrangements | Will loaded athletic bags fit? |
| Half-height lockers | Smaller loads and selected younger-user areas | May support lower overall banks | Less hanging and gear space | What are the overall and usable heights? |
| Double-tier lockers | Personal storage where hanging needs are limited | Stacks compartments within the bank | Upper and lower access need review | How will accessible units be incorporated? |
| Open or ventilated compartments | Supervised team areas and gear storage | Offers visibility or ventilation openings | Open units don’t provide enclosed personal security | What remains exposed? |
| Mobile or shared storage | Team equipment and flexible support spaces | Separates shared inventory from personal belongings | Needs parking space and movement routes | Where will units sit during room use? |
Balance Capacity With Usability
A taller locker isn't automatically a better athletic locker. Interior shelves, hooks, and door openings can matter as much as exterior height. Likewise, a lower bank may improve sightlines, but it doesn't automatically make each compartment accessible.
Ventilated doors aren't a room ventilation system. Discuss moisture conditions and cleaning methods with the project team before choosing materials and finishes. Ask how the proposed finish, hinges, and hardware suit the actual environment.
Use the publisher's locker specifications resource to prepare product questions, then move from comparison to a site-specific layout. The useful output is a proposed bank arrangement with clear assumptions, not merely a list of product models.
Measure Layout, Clearances, and Daily Access
Verify the room in the field, even when district drawings are available. Existing documents may not show later partitions, added outlets, repaired walls, or changes to floor finishes.
Record the usable wall lengths rather than just the room's overall dimensions. Note corners, columns, door frames, exposed pipes, and anything that limits installation or door movement.
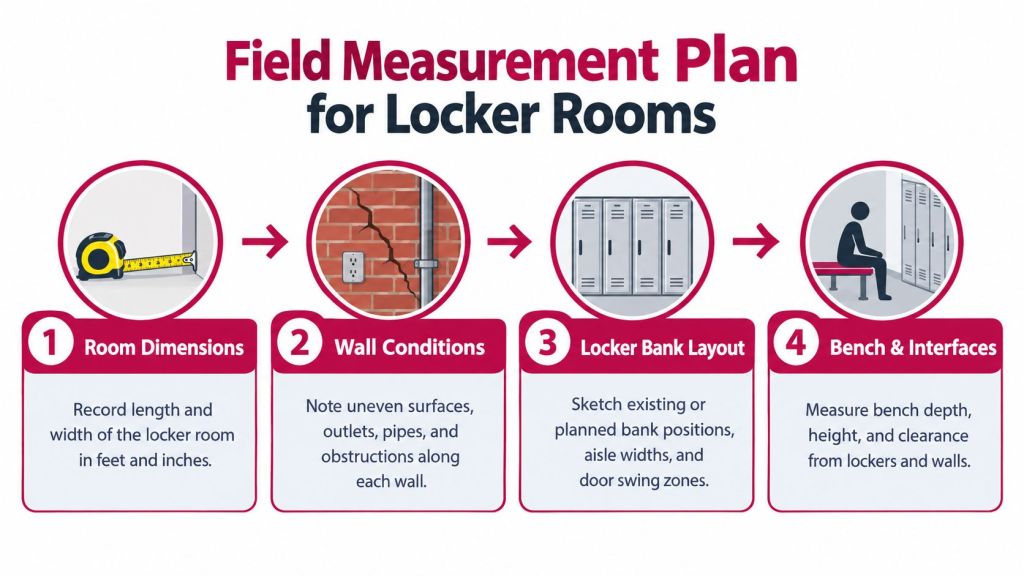
Take a Working Site Checklist
- Room geometry: Measure wall runs, recesses, ceiling restrictions, and out-of-square corners.
- Existing banks: Sketch locations, end panels, bases, fillers, and attachment points.
- Benches: Record depth, supports, condition, and the relationship to locker doors.
- Movement: Show entrance doors, partition openings, approach routes, and likely gathering points.
- Services: Locate outlets, switches, sprinklers, plumbing, and ventilation openings.
- Surfaces: Photograph floor slopes, wall damage, moisture marks, and uneven finishes.
- Delivery access: Measure the route from unloading to the installation area.
A bank can fit against a wall yet function poorly when students open doors and sit on benches. Review the room during changing activity, not just as an empty floor plan.
Field rule: Measure the space people need to use the lockers, not only the space the lockers occupy.
Distinguish product dimensions from project clearances. The supplier can provide locker dimensions and door details. The design team must confirm the applicable approach, maneuvering, egress, and other project requirements.
Don't prescribe a universal aisle width from a product page. Have the proposed configuration checked against the room's use and governing criteria. Mark uncertain conditions on the survey so bidders don't mistake assumptions for verified facts.
Plan for Accessibility, Privacy, and Utah Requirements
Accessibility belongs in the replacement scope from the start. Utah's legislative audit states that at least 5% of lockers, including locker-room lockers, must be identified as accessible and provide accessible features, and documents schools with fewer accessible units or none, according to the Utah school facilities audit.
A count alone isn't an accessibility plan. Ask the design team to identify the units, explain their placement, and document how users will reach and operate them.
Require a Reviewable Accessibility Plan
The Utah School Construction and Facilities Resource Manual requires accessible educational facilities for new construction, remodels, and renovations using applicable accessibility criteria. Final requirements need project-specific review.
Request documentation covering:
- Unit identification: Which compartments are designated accessible.
- Placement: How those compartments serve the room's actual users.
- Operation: Hardware, mounting, and reach details.
- Approach: Clear space around lockers, benches, and doors.
- Acceptance: Field verification against approved drawings.
Replacing the same number of lockers in the same footprint doesn't establish compliance. A modern finish can conceal an unresolved access problem.
Review Privacy Before Freezing the Layout
Walk through changing patterns with district administrators. Review views from entrances, partition placement, staff supervision, and access to private changing options. Don't let a new locker bank block a privacy arrangement the district depends on.
Where a student-specific privacy plan is involved, have district administrators confirm current legal and policy requirements. Product selection can't resolve those obligations on its own.
The Taylorsville High School locker replacement opportunity provides a concrete Utah example of locker removal and replacement framed as construction. Treat that example as procurement context, not as a universal specification for other districts.
Set Procurement and Installation Scope
Comparable bids start with comparable responsibilities. A low product price doesn't tell you who removes the old lockers, repairs the wall, supplies anchorage, or returns to adjust doors.
Separate known work from uncertain conditions. Specify the visible installation scope and use clearly defined allowances where demolition may reveal concealed damage or obsolete supports.

Make the Quote Buildable
Include locker material and gauge, finish, usable dimensions, hardware, number plates, benches, fillers, bases, and anchorage. Then describe demolition, disposal, wall patching, floor repairs, protection, delivery, installation, and closeout separately.
Ask bidders to state exclusions plainly. “Installation included” leaves too much open if no one has defined unloading, assembly, drilling, leveling, or disposal.
Utah law requires school boards to advertise qualifying building projects with estimated cumulative costs above $80,000 at least 10 days before bids are due, according to the school building project procurement statute. Have district procurement staff confirm the current statute, project classification, cumulative scope, and local requirements before issuing a solicitation.
Buying advice: Compare the installed scope before comparing the bottom-line price.
Ask About Availability Without Assuming It
Some common sizes are stocked at select manufacturers, subject to confirmation. Custom colors, hardware, compartment arrangements, and project quantities need separate availability checks.
Ask when lead time begins and whether freight, assembly, or installation scheduling adds another dependency. Fast shipping and delivery only help when the receiving area and installation space are ready.
For a free quote, provide a marked-up plan, photographs, a proposed locker count, and the district's scope documents. Use Contact Us through the publisher's website for a layout consultation rather than treating a catalog selection as a complete construction price.
Coordinate Delivery Installation and Team Operations
A school calendar doesn't stop while facilities work proceeds. Plan who can enter the work zone, where teams will change, and how equipment will move during demolition and installation.
Salt Lake City School District's Glendale Track and Field updates describe locker-room, storage, and restroom construction alongside plans for temporary shelter and restroom facilities while sports continued. The practical lesson is to include interim operations in the project plan.
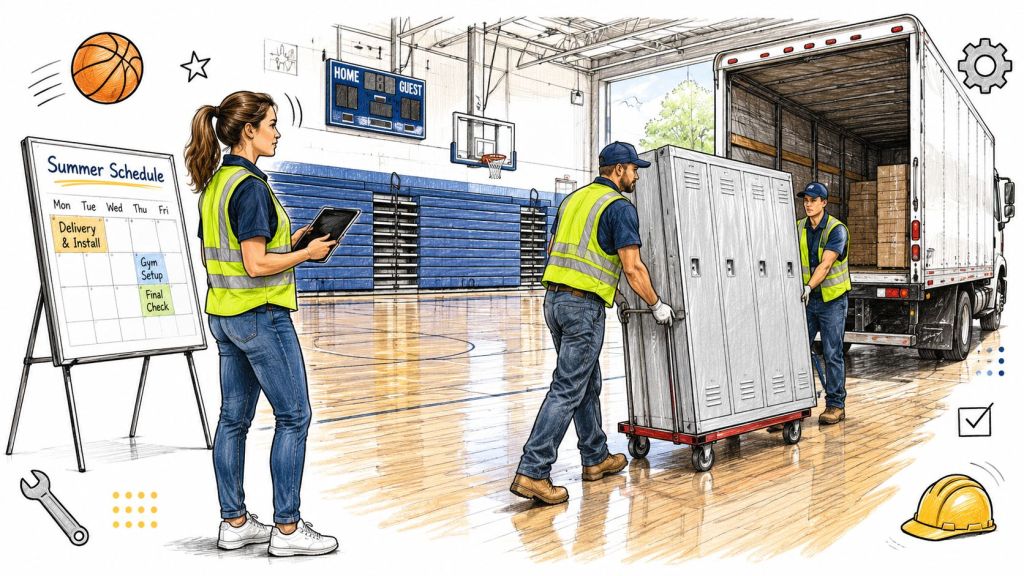
Match Execution to Project Complexity
For a standalone replacement, focus on room readiness, removal, and a clear delivery route. For a phased remodel, release each work area only when the district and contractor agree it's ready.
For a larger modernization, coordinate locker installation with completed walls, flooring, utilities, and inspections. A time-sensitive request needs a firm decision process, not an assumed delivery date.
- Removal: Who disconnects, removes, and disposes of existing units?
- Protection: Who protects gym floors, door frames, and occupied areas?
- Receiving: Who unloads, checks damage, and stores materials securely?
- Closeout: Who records incomplete work and confirms final adjustments?
Keep cleaning and turnover responsibilities explicit. If nearby drinking stations are included in the reopening plan, WipesBlog.com sanitation insights can support a separate custodial discussion.
Evaluate competitive pricing and quality materials alongside service scope. Ask about free layouts and designs with no obligation, free quotes, and delivery coordination before committing to a configuration. Earlier decisions give the project team more room to resolve conflicts, without guaranteeing a particular installation window.
Choose the Right Replacement Path for Your District
The right next step depends on what the district is buying. Classify the project before selecting a final locker model.
Use the Project Type to Set the Next Action
Standalone refresh: Retain useful layout features, but verify existing conditions and attachment methods. Confirm whether the purchase includes removal and installation or products only.
Phased remodel: Tie each locker bank to the contractor's work plan. Identify which rooms remain operational and which delivery areas are unavailable during other work.
Athletics modernization: Resolve interfaces with plumbing, ventilation, changing spaces, storage, and spectator support before final selection. Don't let the locker order get ahead of the room design.
Time-sensitive replacement: Send complete site information early and ask suppliers to test feasible configurations. Avoid treating an unconfirmed product listing as a schedule commitment.
For another campus application, the Utah State University testing-center locker resource can help buyers distinguish short-term personal storage from athletic changing-room needs.
Frequently Asked Questions
Can we reuse the existing locker layout?
Possibly. Keep it only after checking access, room use, door movement, and the conditions behind the existing banks.
Which locker configuration suits athletes?
Start with representative gear. Hanging needs, bag size, personal security, and shared equipment storage determine the useful compartment arrangement.
Should every student receive a full-height locker?
Not necessarily. Class turnover and storage loads may support a mixed arrangement, provided access and district operations work.
Can ventilated lockers fix a damp room?
Don't rely on locker openings to solve room moisture problems. Ask the project team to assess ventilation and maintenance conditions separately.
What should we send for a quote?
Provide field measurements, photographs, user needs, finishes, hardware preferences, installation responsibilities, and the project schedule.
When should accessible lockers be selected?
Identify them during layout development. Waiting until ordering can leave placement and approach issues unresolved.
What matters at final acceptance?
Check the approved layout, attachment, operation, finish condition, identification, and required documentation. Record unresolved items before turnover.
Finish With a Decision Checklist
- Purchase type: Product-only, installed replacement, phased construction, or bundled modernization?
- Design readiness: Are site conditions and user needs documented?
- Responsibility: Does each contractor know what they must deliver?
- Acceptance: Has the district defined how completed work will be checked?
For school gym locker replacement Utah districts can carry forward confidently, connect storage choices to verified room conditions, design review, and a complete installed scope. Starting that work sooner gives buyers more opportunity to resolve trade-offs before orders and construction dates are fixed.
For school gym locker replacement, Material Handling USA offers product selection support, free layouts and designs with no obligation, and free quotes based on your room and installation needs. Contact Us to request a layout review and quote, or Call (800) 326-4403 with your measurements, photographs, and project schedule.