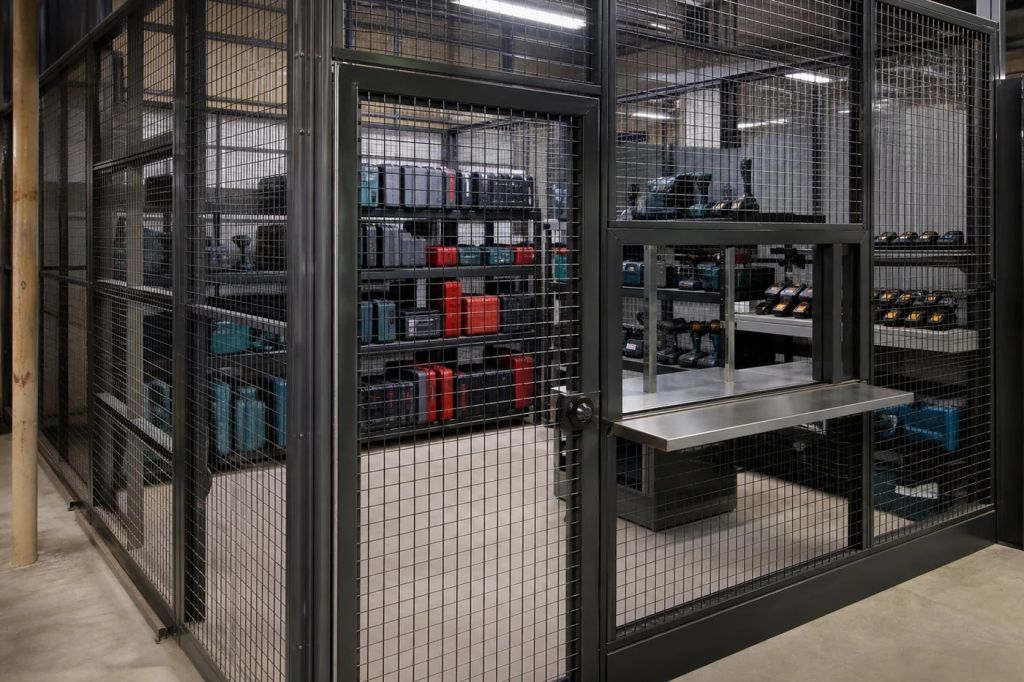
A warehouse tool cage is a welded or bolted wire mesh enclosure sized to secure tools, MRO parts, or high-value inventory while keeping them visible and accessible to authorized staff. Most US buyers start with 10 to 6 gauge wire and 1.5 to 2 inch openings, then adjust the design for traffic, inventory, and access control.
The need usually shows up in a familiar way. Tools disappear from a maintenance crib, serialized parts sit unattended near staging, or technicians spend too much time looking for equipment that should be checked out and returned. A planned cage creates a clear boundary without hiding the contents from supervisors.
The right purchase is not just a lock and four walls. Mesh, gauge, height, doors, ceiling panels, anchorage, and workflow all change the result. This guide lays out the decisions to settle before you request a quote, and you can test any of them in our free security cage configurator.
What a Warehouse Tool Cage Is and Why Operations Need One

A warehouse tool cage is a controlled access enclosure made from wire mesh panels, steel frames, posts, and one or more lockable doors. It can protect shared maintenance tools, MRO parts, customer owned equipment, evidence, or shrink prone inventory while preserving visibility and airflow.
The value goes past theft prevention. A tool crib works best when you can name the person responsible for each issue and return. A cage supports that by putting inventory in one visible place with a single entry point. Sign out sheets, badge access, or a simple key control process can then handle accountability. The same logic drives heavy-industry storerooms — see our maintenance storeroom security cage case study.
Cargo theft reporting has pointed to warehouses and distribution centers as one of the leading locations for stolen freight and stored goods. That is one reason secure storage is often placed near receiving, returns, maintenance, and other areas where inventory changes hands. See this warehouse security guide from Wisenet Security Ltd for broader context on layered facility protection.
What a tool cage does for the operation
- Centralized security. High value tools, MRO parts, and test equipment sit behind one locked door instead of in five unlocked places.
- Visibility. Open mesh lets a supervisor or a camera see stock levels without opening a cabinet.
- Controlled access. Padlocks, keyed hardware, or badge access limit entry to trained and authorized staff.
- Better workflow. One checkout point with labeled locations shortens the hunt for a tool and makes returns easy to enforce.
How cages compare with other storage
A locker protects one person’s tools but does not create a shared crib. Pallet rack stores larger loads well but does not control access. A drywall room gives you separation but makes visual checks harder.
Wire mesh cages sit between those options. They create a physical barrier, support lockable access, and let supervisors see stock without opening every cabinet. For a smaller footprint, a lockable storage cage may fit better than a full room size enclosure. For the wider product family and finish options, start at our wire mesh security cages hub.
Practical rule: Design the cage around the check in and check out process, not only around the items you want to protect.
Engineering Specs That Drive a Tool Cage Build
A quote should show more than overall width and height. Wire gauge, mesh opening, frame, anchorage, and the top condition decide how well the enclosure resists reach through, cutting, impact, and climbing.
Lower gauge numbers mean thicker wire. Published partition specifications commonly describe 10 gauge wire with 1.5 inch woven mesh as normal duty construction, and 6 gauge wire with 2 inch mesh as a heavy duty option. Woven and welded mesh are built differently, so the quote should say which one is included. Review the Explore MH-USA security cage solutions language alongside any quote you receive, then ask us to confirm the exact panel, frame, and hardware in your build.
Panel specifications often list details such as the wire gauge, the mesh pattern, the steel angle used for the frame, and the mounting hardware size. Those are the items to compare line by line. A generic “heavy duty cage” description on a quote tells you nothing you can check at delivery.
Tool cage engineering specs at a glance
| Spec | Standard duty | Heavy duty | High security |
|---|---|---|---|
| Wire | 10 gauge | 6 gauge | 10 gauge or heavier woven wire |
| Mesh opening | 1.5 to 2 inches | 2 inches, where appropriate | Tight woven mesh with no reach through gaps |
| Height | 8 feet is common | 8 to 10 feet | Height selected with top access controlled |
| Door hardware | Padlock compatible | Reinforced lockable door | Commercial grade locking hardware |
| Top condition | Open or tied to structure | Top tie or ceiling panels as required | Ceiling panels when the cage does not reach the structural ceiling |
| Anchorage | Floor mounted posts | Reinforced floor anchoring | Anchoring reviewed for site and hazard conditions |
Safety guidance for industrial guarding commonly places guard heights between 7 and 10 feet, with 8 feet the most common. The gap at the floor should generally stay under 6 inches, or 150 mm, so no one can reach or crawl under the barrier. These dimensions come from industrial safety cage guidance, and the final design still needs a review against the site hazards, fire protection, egress, and local code.
Mesh opening has to match the item and the risk. Smaller openings make it harder to pass tools through the panel. Larger openings keep visibility and airflow. For machine guarding, opening size also depends on how far the mesh sits from the hazard. Wire mesh guarding guidance lists different opening limits at different reach distances, so do not copy a machine guard detail into a storage cage without checking the application. If you want a sizing reference before you spec panels, see our guide to storage cage sizes and specifications.
Choosing the Right Configuration for Your Space

Configuration choices affect security and daily labor at the same time. A cage that looks strong on a drawing can slow the operation if the door blocks an aisle, the opening will not take a pallet jack, or staff must walk around the enclosure for every transaction.
| Configuration choice | Best fit scenario | Tradeoff to consider |
|---|---|---|
| Open top | Low risk indoor tool storage with no top access concern | Does not stop climbing or passing items over the wall |
| Ceiling panels | High value stock, restricted items, or a cage below the building structure | Adds material, installation, and sprinkler coordination |
| Single hinged door | Foot traffic and compact tool checkout | Swing arc uses floor space |
| Double hinged door | Pallets, carts, or wide equipment | Needs more wall clearance and hardware |
| Sliding door | Tight aisles or frequent pallet movement | Costs more than a basic swing door and needs a clear track |
| Dutch door or service window | Small item handoff with limited entry | Can create a bottleneck if the opening is undersized |
| Modular panels | Layouts likely to change | Bolted connections need inspection and upkeep |
An open top enclosure only works when the top is not a practical bypass route. If the cage stops below the structural ceiling, ceiling panels may be needed to block access from above. They also need coordination with sprinklers, lighting, ducts, and fire protection rules. Do not assume a ceiling grid can be added without checking those clearances.
Match the door to the traffic
For a technician carrying a handheld tool, a single hinged door is often the simplest choice. For palletized MRO stock, a double door or sliding gate is more practical. A door has to open fully without hitting a rack, guardrail, column, eyewash station, or walkway.
A service window or Dutch door can keep the main enclosure closed while staff pass small parts to authorized users. That improves control, but it does not replace a wider equipment opening if carts or pallets have to enter. Look at wire mesh modular cage options when the enclosure may need to move or grow later.
Consider the interior
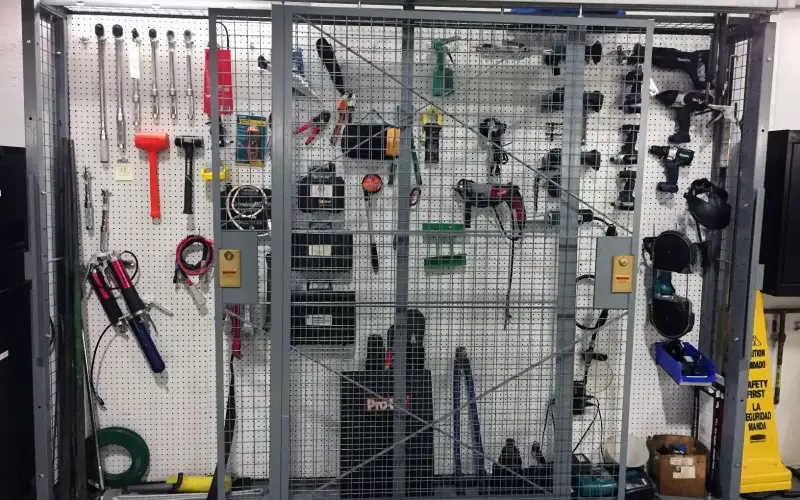
The cage shell is only part of the system. Shelving, bins, tool boards, barcode locations, lighting, and a checkout counter decide whether staff can find and return items. Solid panels add privacy, but they remove useful sightlines. In most tool cribs, open mesh with an organized interior is the better balance.
Ready to see your layout? Configure panels, doors, height, and ceiling options in the free security cage configurator, then send the design to our team for pricing. Prefer to talk it through? Call (800) 326-4403.
How to Size and Specify Your Tool Cage
A good quote starts with accurate inputs. This sequence matches the information a configurator needs before drawing a layout.
-
Audit the inventory. List the tool and MRO categories, count the active SKUs, find the tallest item, record the heaviest single unit, and note any pallet or forklift handled inventory. Include batteries, aerosols, chemicals, and other items that may trigger separate storage rules.
-
Measure the footprint. Record wall lengths, column spacing, ceiling height, dock door widths, nearby rack dimensions, and the position of fixed equipment. Sketch the footprint to scale. A cage that fits an empty rectangle can still fail once door swing, staging, and walkway clearance are added.
-
Map access. Mark the normal operator path, forklift approach, badge controlled areas, emergency routes, and supervisor sightlines. Decide whether the door should swing, slide, or act as a controlled handoff window. Keep the entrance from becoming a pinch point.
-
Select mesh and gauge. Use the inventory to pick the opening. A 2 inch opening suits larger hand tools and visible stock, while 1.5 inch mesh limits access to smaller MRO items. Choose 10 gauge for normal duty and consider 6 gauge where impact or tampering is the bigger concern.
-
Resolve the top and anchorage. Decide whether the cage will reach the structural ceiling. If not, flag ceiling panels or another approved top treatment. Confirm slab conditions and floor anchoring requirements, especially in seismic regions.
-
Prepare the quote package. Send one PDF with plan dimensions, elevations, mesh and gauge requirements, a door schedule, finish preference, photos, and notes about sprinklers and nearby traffic. Add a simple inventory list so the design can be tested against actual use.
Incomplete measurements are the most common reason a quote stalls or comes back with revisions. A few clear photos and a scaled sketch prevent an expensive field change.
Costs, Lead Times, and What Really Drives Them
There is no honest universal price for a warehouse tool cage. Cost follows the enclosure surface area, hardware, engineering, finish, and installation conditions.
The main drivers are:
- Panel count: More wall area means more panels, posts, connections, and anchors.
- Wire gauge: Moving from 10 gauge toward 6 gauge increases material and handling requirements.
- Door type: Sliding, double, Dutch, and access controlled doors cost more than a basic hinged opening.
- Ceiling treatment: Top panels add material and require coordination with overhead systems.
- Finish: Galvanized steel and powder coated steel suit different environments and durability needs.
- Engineering and installation: Seismic review, unusual slabs, field obstacles, and custom fabrication add labor.
A compact cage with standard panels and one hinged door sits at the simple end of the range. A multi wall enclosure with ceiling panels, sliding doors, special mesh, access control, and installation takes more design coordination. Our security cage cost guide helps you organize those variables before you ask for a formal quote.
Lead time follows the same logic. Stock panel sizes with a standard finish move fastest. A cage that needs shop drawings, custom doors, ceiling systems, a non standard powder color, or engineering review takes longer, and every one of those items adds a step. Ask us for a current lead time on the exact configuration you want rather than working from a general estimate, because stock and production schedules change.
The quickest projects use complete dimensions and standard mesh, door, and finish choices.
Common Mistakes Buyers Make When Ordering Tool Cages
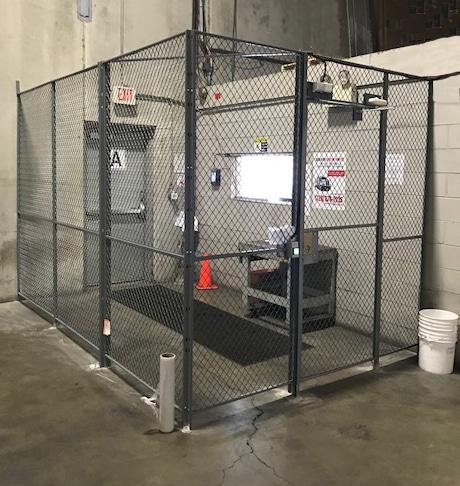
Most rework starts before fabrication. The drawing reflects an incomplete site survey, and the installer finds the problem after the material arrives.
Door and access errors
Undersized doors are the most frequent failure. A person can walk in, but a pallet jack, cart, or forklift cannot. Measure the largest load and the equipment that must pass through, then specify the clear opening, not just the nominal door size.
Swinging into an active aisle creates a daily obstruction. Mark the full swing arc on the floor plan and test it against foot and lift truck routes. Use a sliding door or reverse the hinge when floor space is tight.
Forgetting the service window forces every user through the main door for a small part. Add a Dutch door or service opening when the workflow has frequent handoffs, and keep a larger opening for equipment.
Panel and security errors
Choosing 2 inch mesh for tiny parts can let small tools, bearings, batteries, or gauges pass through the grid. Compare the opening to the smallest item and use tighter mesh where reach through is the concern.
Using light wire near forklift traffic leaves the cage open to impact damage. Select heavier wire, reinforced posts, and guarding where the wall sits beside a dock or a lift truck lane.
Skipping floor anchoring can leave a tall enclosure unstable and may conflict with site engineering requirements. Confirm the slab, anchor type, and seismic design before fabrication.
Leaving out ceiling panels creates a top access route. Review the inventory, cage height, sprinkler layout, and local fire requirements before you accept an open top design.
Blocking sightlines weakens the workflow. Solid walls hide inventory from supervisors and cameras. Use open mesh unless privacy, contamination control, or another documented need calls for something else.
For a deeper walkthrough of layout, fire coordination, and access planning, read our guide to warehouse security cage design and our article on wire partitions for tool cribs.
Frequently Asked Questions About Warehouse Tool Cages
What gauge wire is right for a warehouse tool cage?
Ten gauge wire is a common normal duty choice for indoor tool storage. Six gauge is the heavier option for areas exposed to impact or higher tampering risk. The right pick depends on the inventory, the location, and the access process.
Do bolted wire mesh partitions meet OSHA expectations for a tool crib?
A bolted partition can support an organized, controlled storage area, but OSHA compliance is not decided by the bolts alone. The finished installation has to address the specific hazard, opening size, access, anchorage, egress, and the workplace rules that apply.
How long does a custom warehouse tool cage take to ship?
It depends on the configuration. Stock panels with a standard finish ship soonest. Shop drawings, custom doors, ceiling panels, special powder colors, and engineering review each add time, so ask for a current lead time on your exact design.
Are ceiling panels required on a security cage?
Not in every application. They matter when the cage does not reach the structural ceiling and the stored items need protection from top access. Sprinkler coverage, fire code, insurance requirements, and the contents should be reviewed together.
Are sliding doors better than hinged doors for tool checkout?
Sliding doors work well where aisles are tight or carts and pallets move through often. Hinged doors are simpler for pedestrian only access, but the swing arc has to stay out of active traffic.
Can a warehouse tool cage be moved later?
Many modular cages can be taken apart and reconfigured when the floor plan changes. Relocation still needs a review of the new slab, anchors, clearances, door position, and any ceiling or fire protection conflicts.
Should tools and MRO parts share the same cage?
They can share an enclosure when the access rules and storage conditions match. Separate zones, cabinets, or smaller cages work better when one group needs tighter access, different environmental controls, or its own accountability.
What should I send with a request for quote?
Send a scaled footprint, ceiling height, door and aisle measurements, inventory dimensions, mesh and gauge preference, photos, and notes about forklifts, sprinklers, anchors, and access control. That package lets the designer price the real installation instead of a generic box.
Design it yourself, then get a quote
Material Handling USA can configure a tool crib or security enclosure around your inventory, traffic, anchorage, and access requirements, with layout support and installation options. Build the design first, then send it to our team for pricing:
- Security cage configurator for panels, doors, height, and ceiling options
- Wire mesh security cages for the full product family
- Shelving configurator for the interior storage inside the cage
- Pallet rack configurator when palletized stock sits next to the crib
To request a quote, contact the team at Sales@MH-USA.com or call (800) 326-4403.