
Home › Laboratory Furniture › Lab Countertops & Work Surfaces
Lab Countertops & Work Surfaces
Epoxy resin, phenolic resin, stainless steel, solid surface and laminate lab work surfaces — specified, templated and installed by MH-USA. Call (800) 326-4403.

5
Core work-surface materials
144″
Max stainless deck without a seam
1947
Eagle Group founded
1997
MH-USA serving the West
The Work Surface Is the Part of the Lab That Fails First
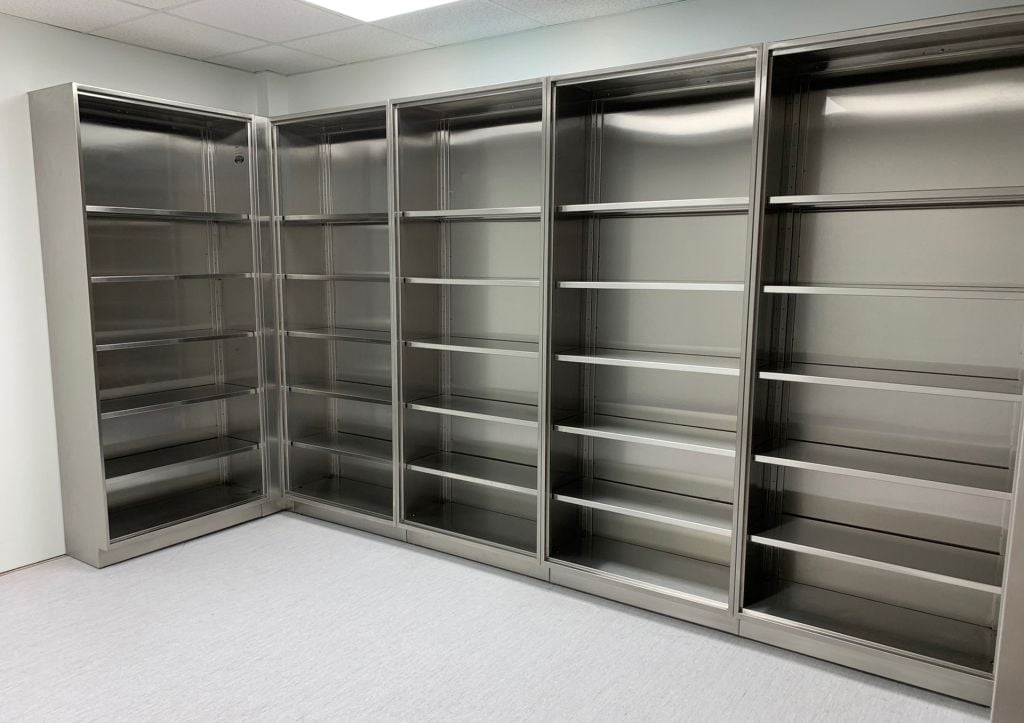
Cabinets outlive countertops. In almost every lab we walk through the casework is still square while the tops are stained, blistered, delaminated at a seam or eaten out around a sink. That is what a surface looks like after fifteen years of reagents, heat, water and abrasion. The mistake is treating a countertop as a finish item instead of the piece of equipment it is.
Choosing a work surface is a short list of real questions. What chemistry hits it? Does anything hot land on it? Wet zone or dry instrument bench? Alcohol wipe, flooded disinfectant, or hose-down? How much weight? New build or retrofit? Answer those and the material narrows to one or two candidates before anyone talks about color.
MH-USA has specified lab work surfaces from Salt Lake City since 1997 and ships nationwide. We represent Eagle Group, whose Eagle MHC division builds stainless casework, countertops, sinks and bench frames for pharmaceutical, vivarium, pathology, cannabis and cleanroom labs. The full range of laboratory furniture sits one level up.
The Five Lab Work-Surface Materials That Matter
Almost every laboratory work surface sold is one of a handful of materials. Each exists because it solves a problem the others do not.
“Masonite workbench top” and other shop-grade surfaces
Buyers from an industrial background often ask for a masonite workbench top. Tempered hardboard is a sacrificial cover sheet — fine over a shop bench, but not a lab work surface: it absorbs liquid, swells and cannot be disinfected. In a lab, use a chemical-resistant top with a removable work mat.
Lab Countertop Material Comparison
Cost is shown as a relative tier, never a number — the real figure depends on thickness, edge profile, cutouts, splash configuration, seam count and freight.
| Material | Chemical resistance | Heat & impact | Relative cost tier | Typical use |
|---|---|---|---|---|
| Epoxy resin | Excellent; non-absorbent full-depth | Best heat of the resins; chips at a sharp edge strike | Higher | Wet chemistry, teaching labs, fume hoods |
| Phenolic resin | Very good; resistant surface over a dense core | Moderate heat; light, stiff, good impact for its weight | Mid | Dry labs, instrument and retrofit benching |
| Stainless steel (304) | Very good; sensitive to chlorides | Excellent heat; dents rather than cracks | Higher | Compounding, pathology, wash-down rooms |
| Stainless steel (316) | Best where chlorides or salts are present | Excellent heat; dents rather than cracks | Highest | Chloride-heavy processes, cleanrooms |
| Solid surface | Moderate; not for concentrated acids or solvents | Will scorch; repairable and sandable | Mid to higher | Clean, patient-facing counters |
| Chemical-resistant laminate | Fair; surface-only, edges are the weak point | Low heat; edges chip and delaminate | Lowest | Write-up and dry storage counters |
| Maple / butcher block | Poor; absorbs liquid, cannot be disinfected | Good impact absorption; not for hot work | Lower to mid | Dry shop and kitting benches only |
Stainless Steel Lab Countertops: Gauge, Grade and Fabrication
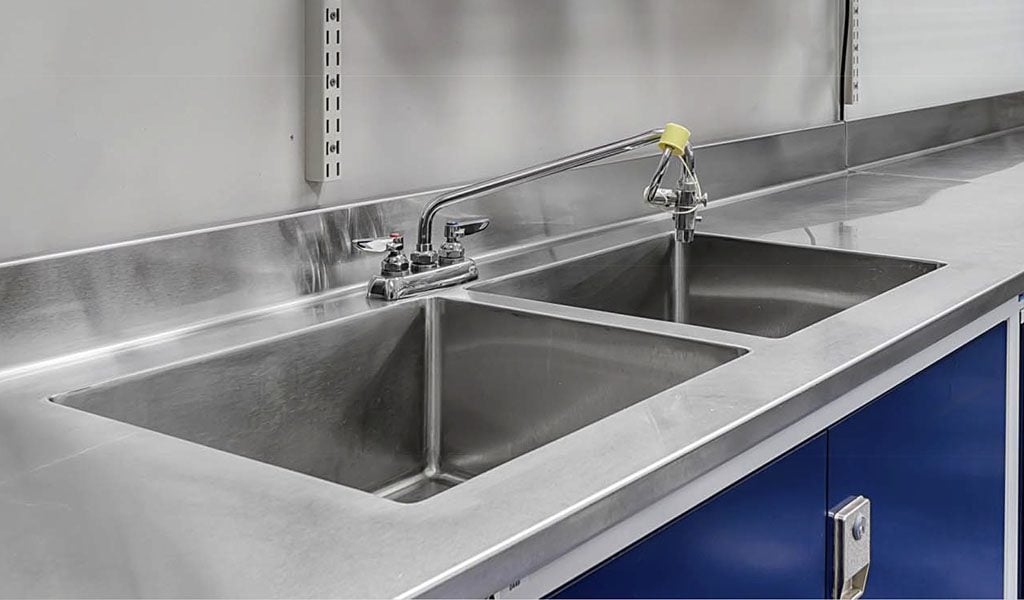
A stainless work surface is fabricated, not cut from a slab. The two numbers that matter are gauge and type: standard construction is 16 or 14 gauge in type 304 or 316, with other gauges available for specialized chemical demands. Specify 14 gauge where equipment sits on the top or carts hit the edges.
Type 304 is the workhorse. Type 316 adds materially better resistance to chlorides and halide salts — the failure mode that pits 304 in salt-heavy process work and high-chloride water. If chlorides are in play, spend the money on 316 for the deck even if the bases stay 304. Fabrication details do the rest: coved sanitary corners on all working surfaces and bowls, a sound-deadened substrate so the deck does not drum under equipment, and bowls fabricated in nearly any size and depth, welded and polished in as one piece.
- Gauge: 16 gauge standard, 14 gauge under heavy equipment or cart traffic
- Type: 304 for general service, 316 where chlorides are present
- Seams: mechanical hairline seam or field-welded joint, per your specification
- Max length: up to 144″ without a seam, reduced about 5-1/2″ for each end splash
Edges, Drip Grooves, Backsplashes and End Splashes
Edge and splash decisions determine where a spill ends up, and they are the details most often left blank on a purchase order. Standard stainless front edges are square or box marine. A marine edge raises the deck perimeter so liquid stays on the surface instead of running down the drawer fronts — the right default in any wet zone, pharmacy or animal facility. A square edge is fine at a dry instrument bench.
On resin tops the equivalent details are the edge profile — square, eased, bullnose or drip-groove — and the drip groove itself, a channel routed into the underside near the front edge. Without it, liquid wicks around the edge into the cabinet, which is how sink bases rot from the inside. Backsplashes and end splashes are manufactured per specification and are part of the top, not trim: a coved welded backsplash removes the silicone joint at the wall, and every end splash reduces the maximum seamless stainless deck length.
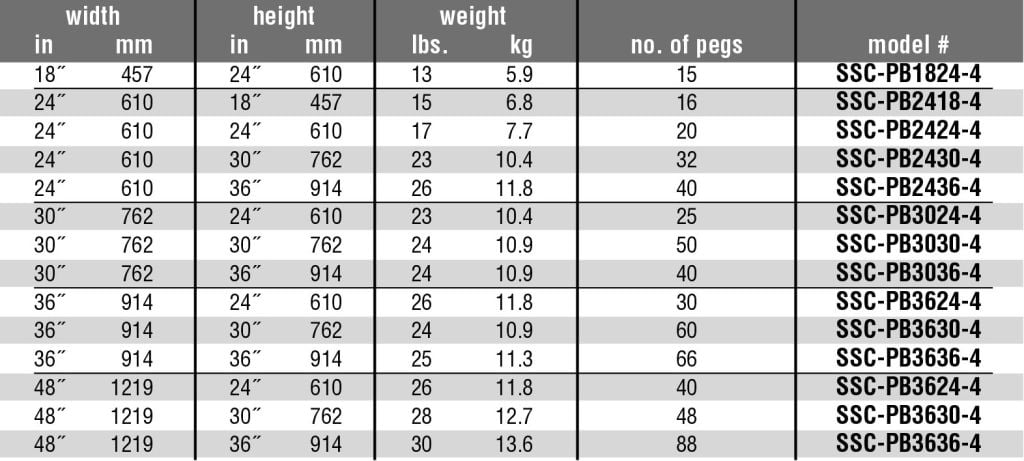 Pegboards with Drip TroughsHeavy gauge 304 stainless pegboards with 6″ polymer pegs and a 4″ integral drip trough keep drying glassware off the deck.
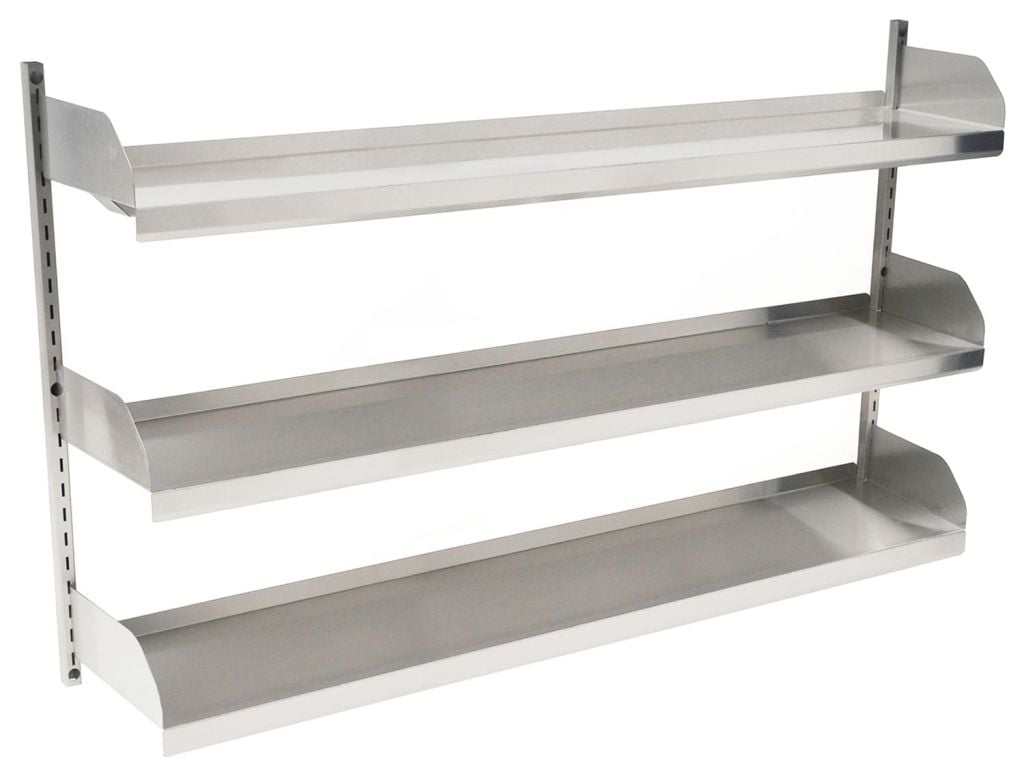 Wall Shelves Above the Bench16 gauge stainless shelves with a reinforced hat channel and 1.25″ rear upturn, adjustable in 1.5″ increments.
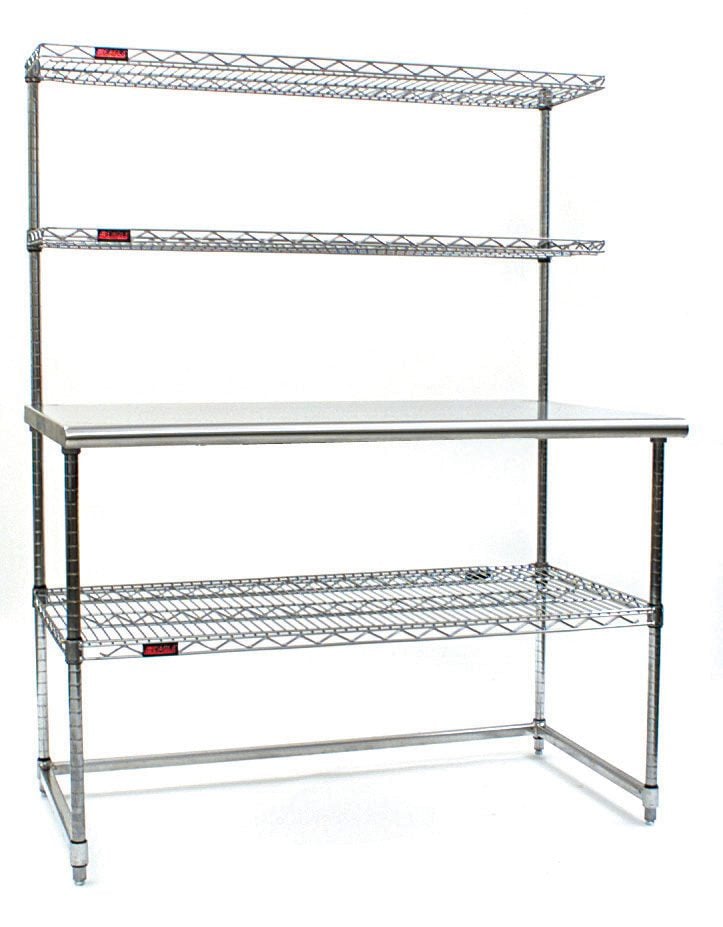 Adjustable Work Surface SystemsSolid or perforated tops with numbered posts and cantilevered overshelves at a 34-1/2″ working height.
Sinks, Cutouts, Seams and Field Joints
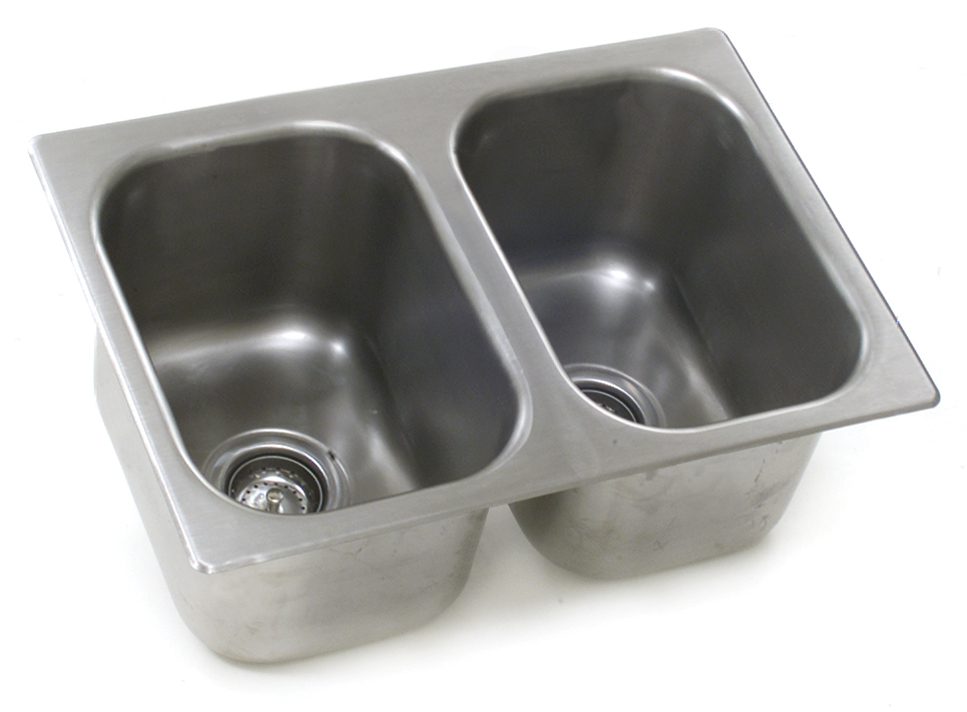
Every hole in a countertop is a place it can fail, so cutouts get planned, not improvised. An integral bowl is welded into a stainless deck as one piece — no joint, nothing to seal, the one to specify in compounding, necropsy and wash-down rooms. A drop-in bowl sits in a cutout with a rim on the deck: serviceable, but the joint needs maintenance. An undermount bowl sits below a resin or solid surface top and keeps the deck clear for wiping.
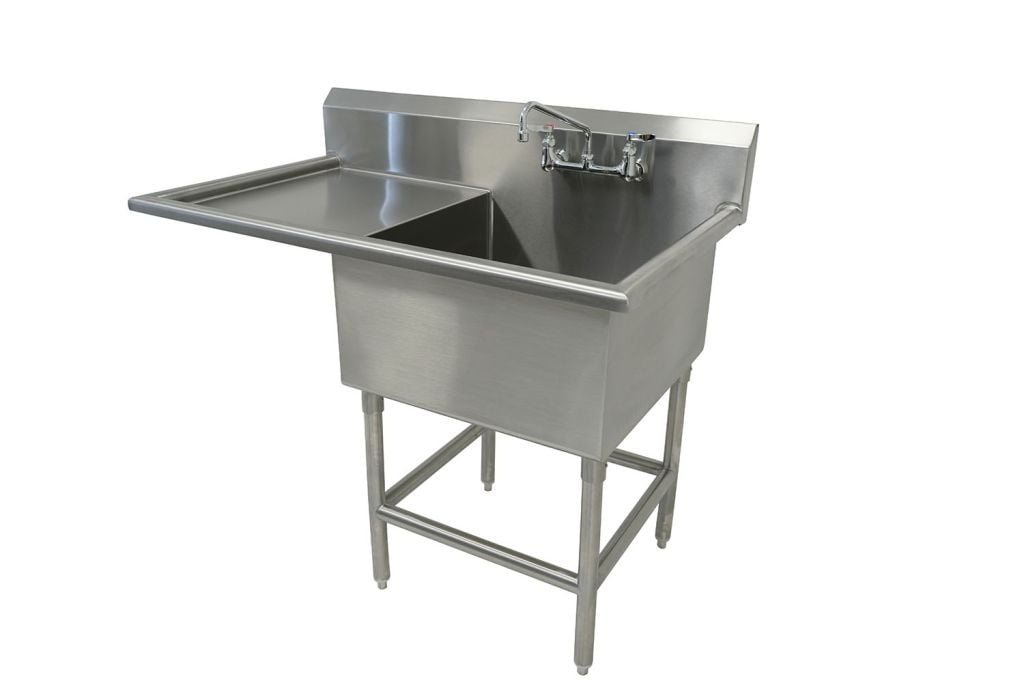
Fabricated stainless service sinks use 14 gauge type 304 with welded and polished bowls, radius corners, rolled edges and an 8″ backsplash, in one, two or three compartments with optional integral sloped drainboards.
Seams follow one rule: put them where the top is supported and where nothing sits in a puddle. Land a seam over a cabinet end or bench leg, keep it out of the 18″ zone around a sink, and never let it intersect a cutout. On stainless, choose a mechanical hairline seam or a field-welded joint ground and polished into a continuous surface — in high-sanitation rooms, pay for the weld.
Support, Spans and What Sits Underneath

A countertop is only as good as what carries it. Cracked resin tops almost always trace back to an unsupported span, a missing support under a seam, or a field-added overhang. The rules: support under every joint and cutout, intermediate support so no span exceeds the material rating, and a bracket or leg under any overhang.
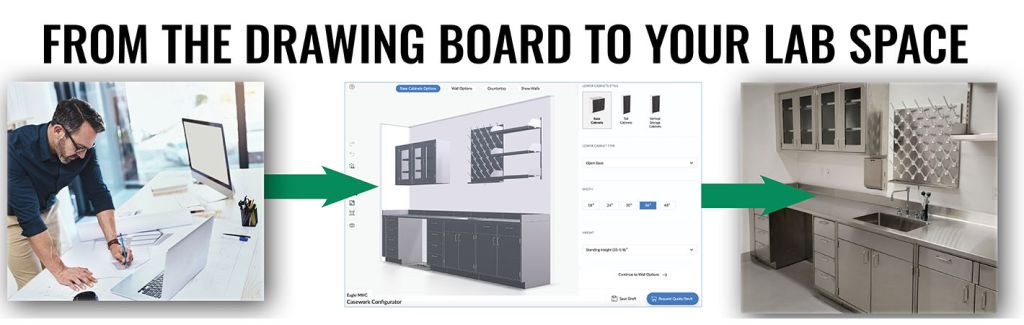
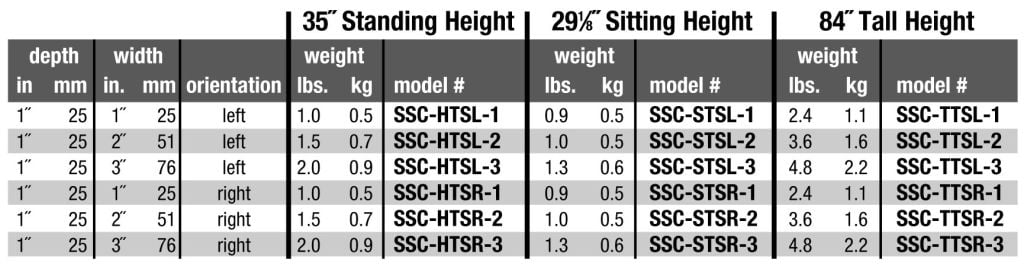
Underneath, you have three structural options. Stainless inset casework gives enclosed storage and a continuous bearing surface, in standing (35″) and sitting (29-1/2″) heights. Bench frames give an open, cleanable understructure: type 304, 22″ or 28″ deep, 35″ or 29-1/8″ high, 2″ square legs with leveling bolts and leg shoes. Wall-mounted tables clear the floor for wash-down with 14 gauge brackets and a 200 lb capacity. Seated stations need a knee space apron kit — 24″ to 48″ wide with or without a 3″ drawer — detailed early, because adding knee space later means cutting the top.
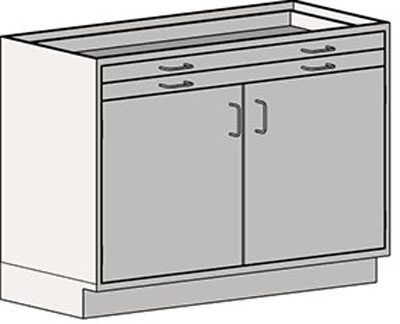
 Stainless Inset Casework BaseEnclosed base cabinets in standing and sitting heights, in door, drawer and sink-base configurations.
 Knee Space & Seated StationsApron kits 24″–48″ wide with or without a 3″ drawer.
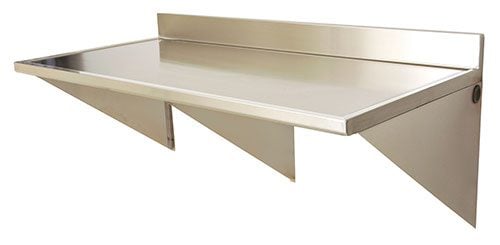 Wall-Mounted Work Surfaces14 gauge brackets, 200 lb capacity, flat top or 5″ backsplash, for rooms that get hosed down.
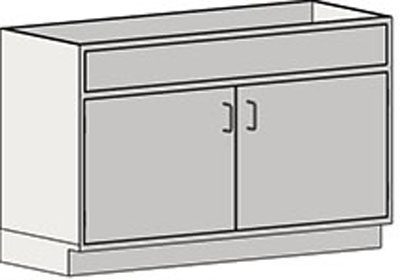 Sink Base SupportStanding height bases with a partial-height back panel for plumbing under an integral or drop-in bowl.
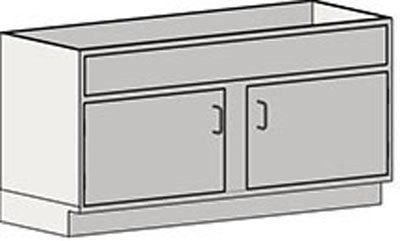 Sitting Height Sink Base29-1/2″ sink bases for seated wash and prep stations.
 Non-Critical Lab WorkstationsSpec-Master style workstations, 14 or 16 gauge tops, adjustable undershelf or tubular base.
Cleanability, Wash-Down and Chemical Exposure by Lab Type
The cleaning protocol is a material specification in disguise: a surface wiped with alcohol twice a shift has different needs from one flooded with disinfectant and squeegeed into a floor drain.
| Lab type | Dominant exposure | Work surface that fits | Detail to insist on |
|---|---|---|---|
| Wet chemistry / teaching | Acids, bases, solvents, hot glassware | Epoxy resin | Drip groove, coved backsplash, tall splash |
| Analytical / instrument | Light solvents, static loads | Phenolic or epoxy | Flat, level, supported spans under instrument feet |
| Pharmacy compounding | Alcohols and disinfectants | Stainless 304 or 316 | Integral welded bowl, coved corners |
| Vivarium | Water, cage wash chemistry, humidity | Stainless 316 | Marine edge, wall-mounted or sealed base |
| Pathology / necropsy | Fixatives, formalin, biological soil | Stainless 304/316 | Field-welded seams, integral bowl, sloped drainage |
| Cannabis / extraction | Solvents, oils, wash-down | Stainless 304 or epoxy | Continuous seams, coved splash |
| Cleanroom | Particulate control, alcohol wipe-down | Electropolished stainless | Perforated tops for laminar flow; no traps |
| Write-up / administrative | Paper, laptops, coffee | Laminate or solid surface | Durable edge banding; do not over-specify |
A note on listings and claims
Third-party listings and standards conformance are model- and configuration-specific, not line-wide. We confirm in writing what applies to the exact models on your submittal before you order.
When to Replace a Lab Countertop — and How Retrofits Work
Most labs replace tops too late, after the surface has started shedding into the work. The honest triggers: staining or etching that no longer cleans off, blistering around a reagent zone, an open seam, water damage inside the sink base, cracks at a cutout, a top that will not level for balances, or a change of use.
A retrofit over existing casework is the best value in lab renovation when the base survives inspection. We check four things: cabinets sound and free of rust or racking, run square and level, service locations still workable, and enough capacity for the new material — laminate to epoxy roughly doubles the load. Toe scribes and rear filler scribes, cut in the field to follow irregular walls, are what make a retrofit look intentional instead of patched.
- Deep stains, etching or blistering that no longer clean off
- Delaminated seams, open joints or a rolled edge lifting from the substrate
- Swelling or rot in the sink base from a missing drip groove or failed rim seal
- Cracks radiating from a cutout, or a top that flexes under hand pressure
- A surface that can no longer be leveled for balances, microscopes or analyzers
- A change of use: a dry bench becoming wet chemistry or wash-down service
- Further reading: materials to consider for your lab countertops and when to replace your lab countertops
Measuring, Templating, Lead Time and Installation
Scope the room
Chemistry, heat, moisture, cleaning protocol, loads, seated positions and fixed service locations.
Field survey
We measure real conditions, not the drawing: wall bow, floor slope, base height and square.
Template
A template of the actual run: cutouts, seams, splash returns and knee spaces.
Shop drawing
You approve dimensions, material, edge profile, splash, bowls and seam plan before fabrication.
Fabricate
Standard resin tops move fastest; stainless with integral bowls and welded joints takes longest.
Install
Demolition, support correction, setting, seaming, splashes, plumbing reconnect and a punch list.
Send us your bench dimensions or a photo of the existing run
Email a plan, a sketch or a phone photo with rough dimensions and tell us what happens on the surface. We will come back with a material recommendation, a support and seam plan, lead time and freight. Call (800) 326-4403.
Brands We Represent
We are brand-agnostic on material and specific once the material is set. Our work-surface and casework fabrication runs primarily through Eagle Group’s Eagle MHC division, founded in 1947 in Clayton, Delaware, with CAD and Revit files for the standard catalog and SpecFAB custom fabrication for everything else.
- Eagle lab products — stainless casework, countertops, sinks, bench frames and lab shelving
- Eagle cleanroom products — electropolished and perforated work surfaces and cleanroom tables
- Laboratory material handling solutions — the lab industry hub: storage, transport and workflow
- Stainless steel shelving — corrosion-resistant shelving to pair with a stainless work surface
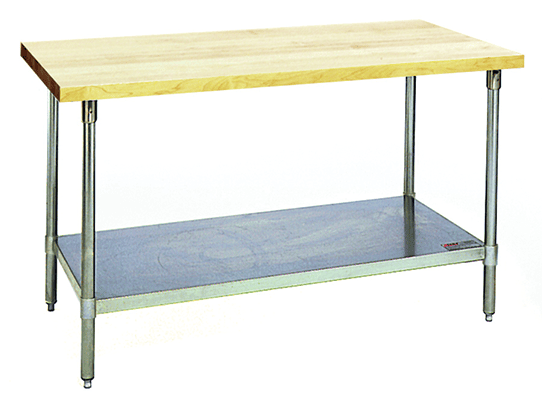
Shop Stainless Steel Work Surfaces Online
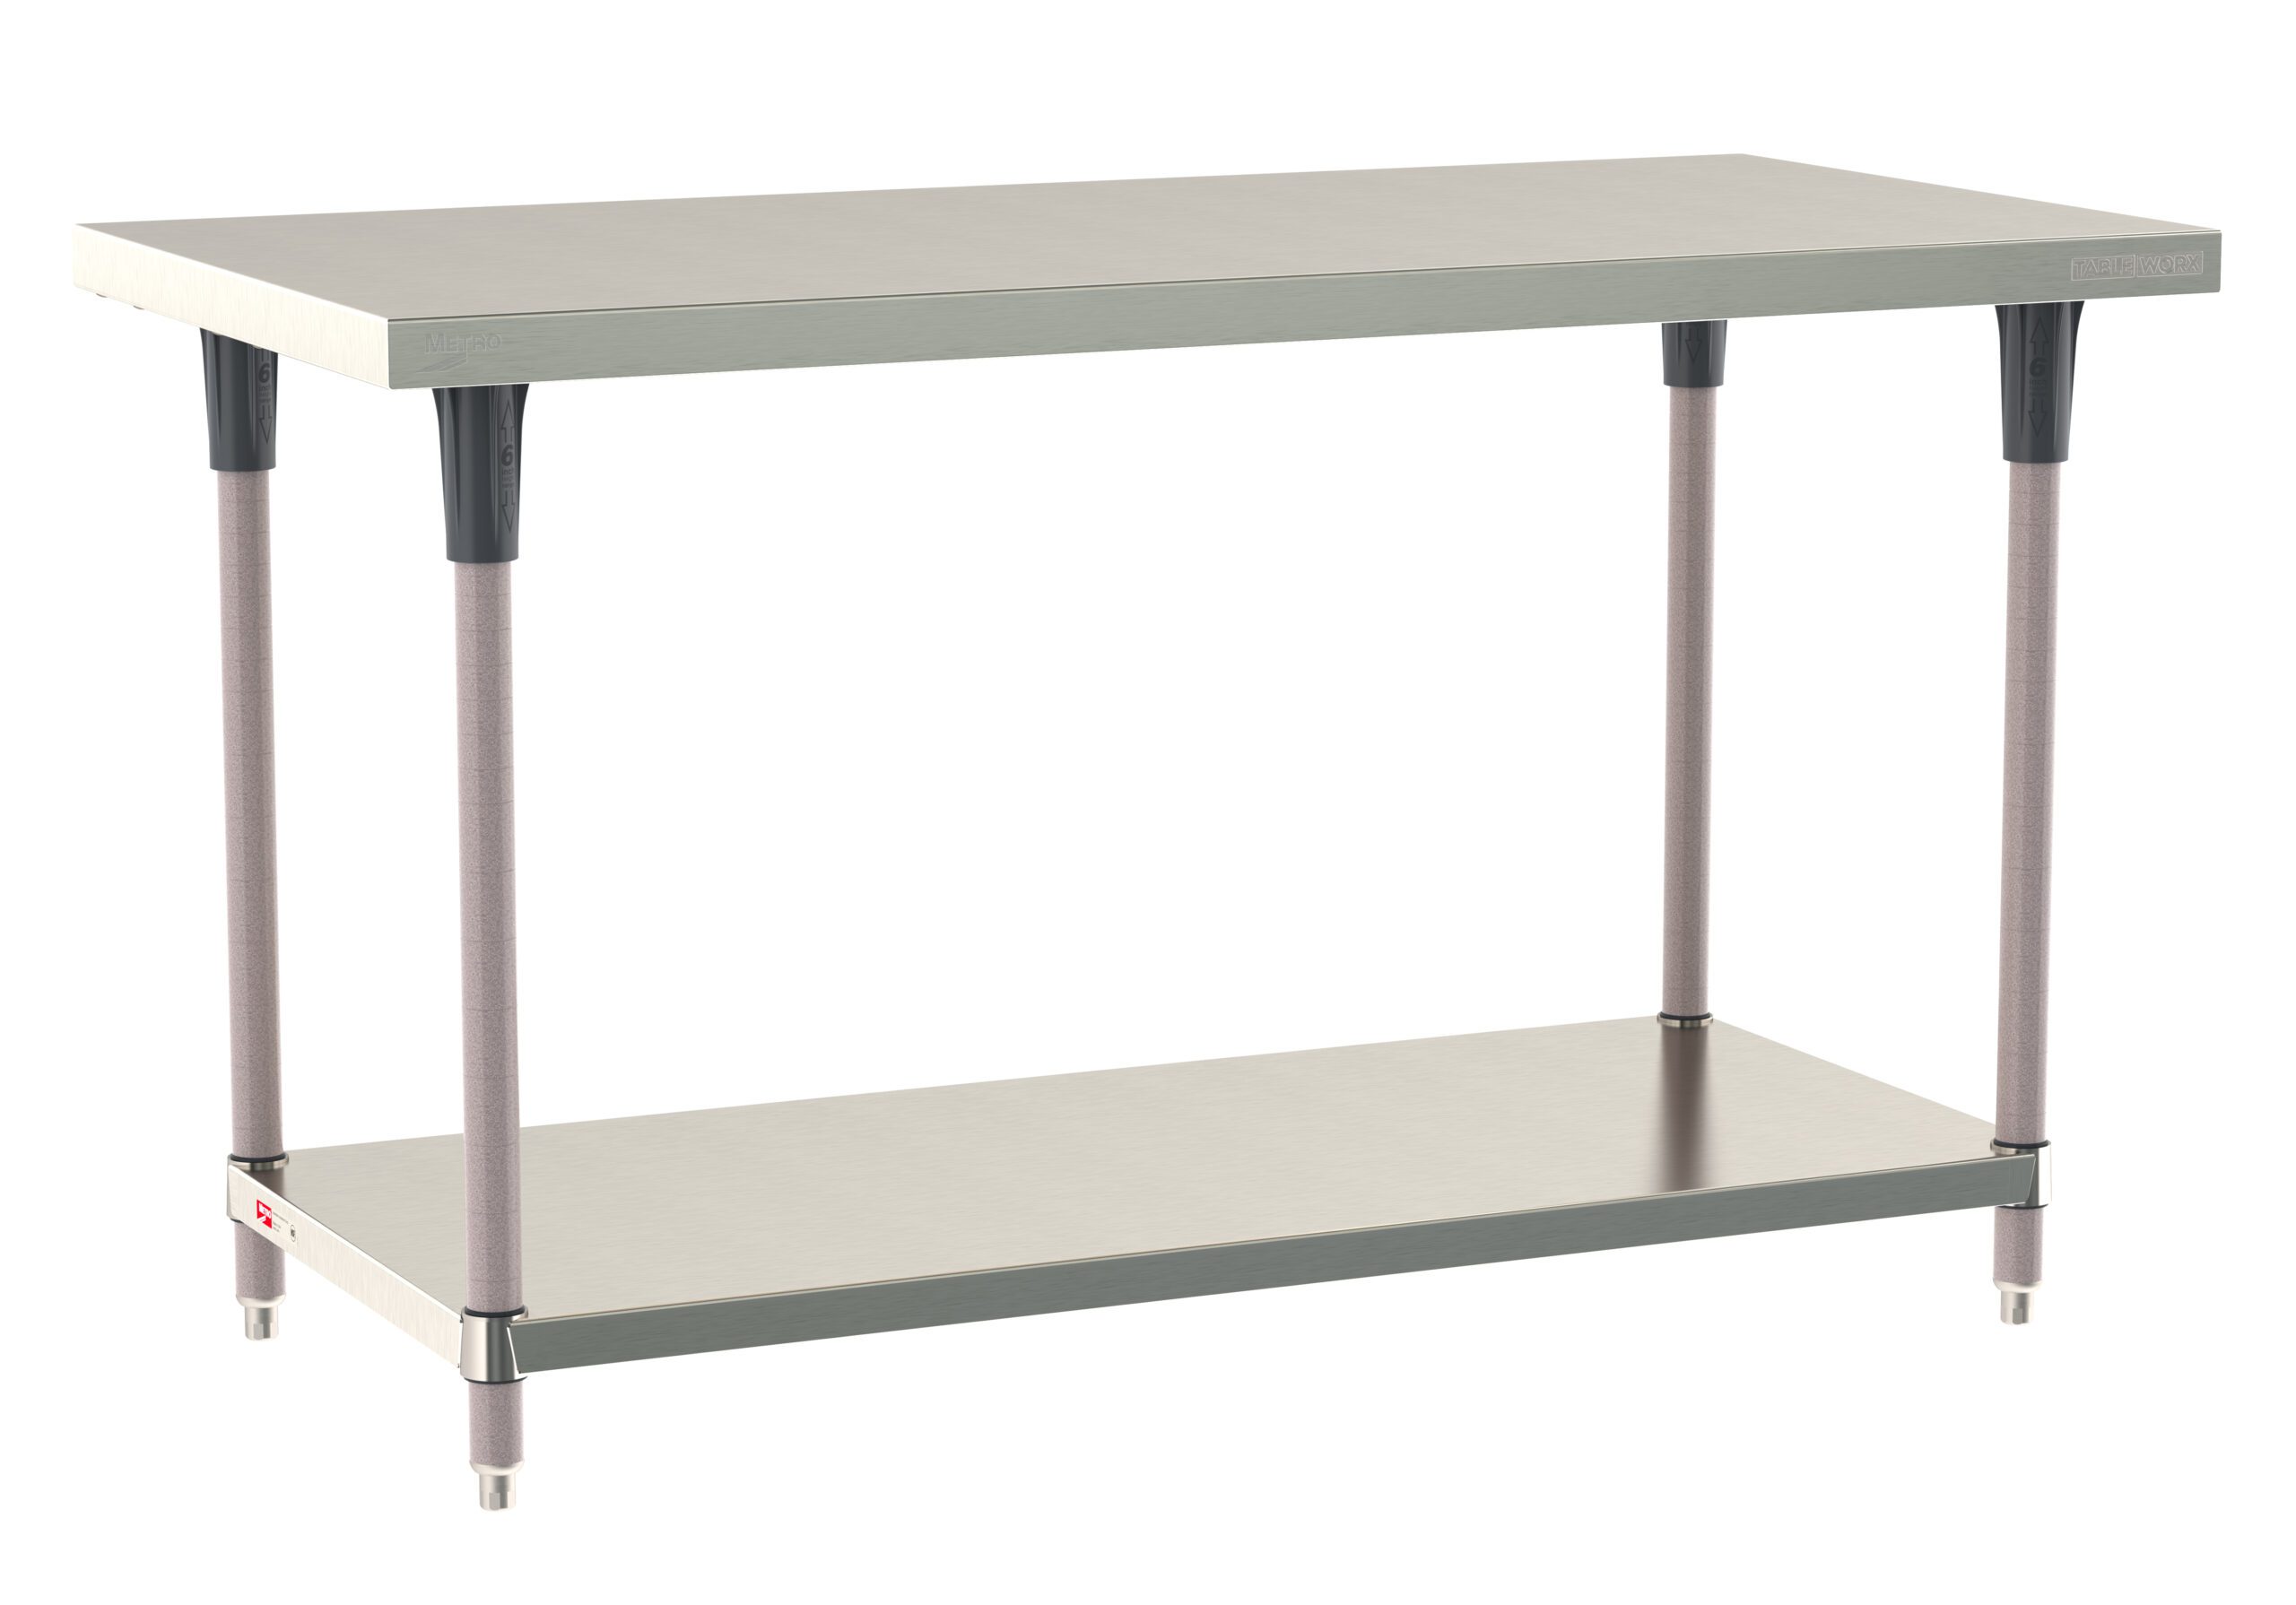
Stationary work tables with type 304 and 316 stainless work surfaces ship from our store. For fabricated countertops and welded seams, request a quote.



Get a free quote
Tell us what you are storing, the room size and your timeline. A project specialist will follow up with layout options and pricing. Prefer to talk? Call (800) 326-4403.
Lab Countertop & Work Surface FAQ
What is the best material for a lab countertop?
Epoxy resin vs. phenolic resin — how do I choose?
Can I replace just the countertop and keep my existing casework?
How long can a lab countertop run before it needs a seam?
What support and spans do lab countertops need?
Are marine edges, drip grooves and coved backsplashes worth specifying?
How long does a countertop replacement take, and how do you measure?
Related Pages
Work surfaces are one component of a lab build. The rest of our laboratory furniture range covers what sits under and above them.
- Laboratory casework — stainless base, wall and tall cabinets that carry the countertop
- Lab benches & workstations — bench frames, mobile benching and adjustable-height workstations
- Laboratory shelving & storage — wall shelves and lab storage systems
- Utility carts — mobile work surfaces between benches
- Eagle lab products — the full Eagle MHC lab line we represent
Get a Lab Countertop Quote
Send dimensions, a plan or a photo of the run you want replaced. We will spec the material, plan the supports and seams, and quote it with lead time and freight. Call (800) 326-4403.