
Pallet Rack Identification & Compatibility
Before you order a replacement beam, connector or accessory: send us clear photos and a few measurements of the rack you already have, and we’ll tell you honestly what we can confirm — and what still needs a closer look.

Why identification comes before a compatibility answer
“Will this fit my old rack?” is a common buyer question, and it deserves an honest answer — not
a guess based on a photo of a similar-looking beam online. Two racks can look nearly similar and still
use different connector shapes, hole spacing or a different approved parts combination. A matching paint
color or a teardrop-shaped punch in the column is not proof that a beam, connector or
accessory from a different manufacturer or era will seat correctly and belongs in that system.
Compatibility is also more than whether one part physically fits into another. Adding, replacing or
mixing components can change the load path and the system’s overall capacity, not just the connection
point — so a full compatibility answer usually means reviewing the configuration and capacity
question, not only a photo of one connector.
This page is a practical intake guide: what to photograph safely, what to measure, and what
information we need before we can tell you what we can confirm about a proposed replacement or addition
to the rack you already have. It is not a substitute for reviewing your specific components, and it does
not replace a site visit or engineering review when your project needs one.
Matching boltless, rivet or other steel shelving rather than pallet rack? See how to identify existing shelving and get matching parts.
Look for a label or capacity plaque
Look for a manufacturer name, model or part reference and any capacity plaque from a safe, accessible position. Placement varies. Photograph readable identification and keep the original layout, purchase records and installation documentation with it. A tag helps establish what you have, but a capacity plaque must also correspond to the current configuration. If markings are missing or painted over, send the available records and accessible component details; photos alone may not establish identity.
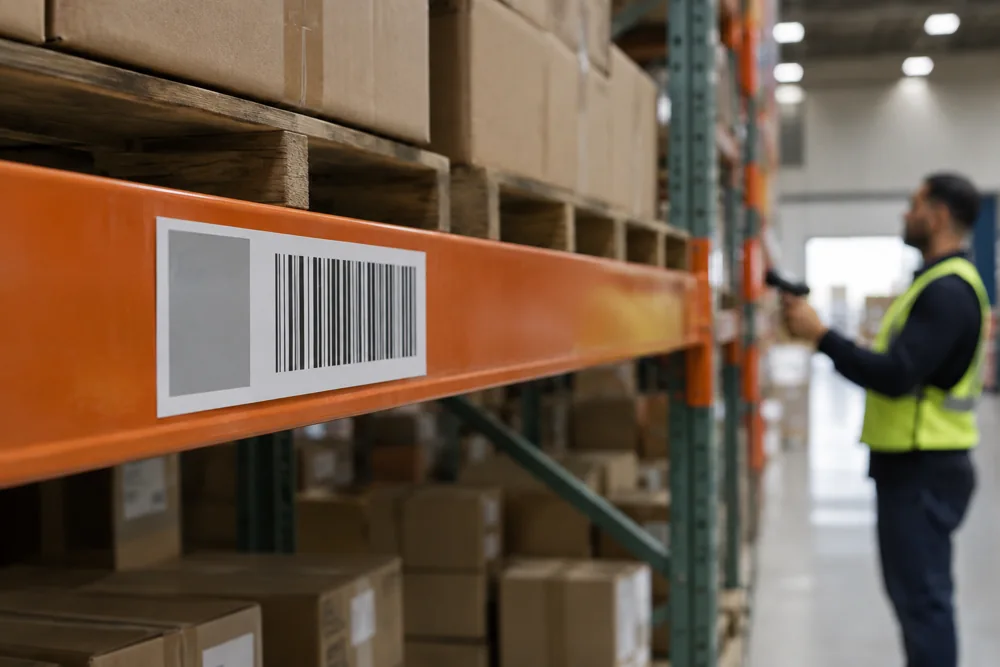
Separate warehouse location or bin labels (used for picking and inventory, not structural
identification) are a different thing entirely. A location label tells you where a SKU lives; it says
nothing about the rack’s manufacturer, capacity or connection type. Send us both if you have them, but
don’t assume a bin label answers a compatibility question.
Photograph the connector, column punch pattern and frame details — safely
The beam-end connector and column-hole pattern are useful starting points. Take photos only from a safe, normal standing position with site permission. Do not climb, disassemble anything, remove an installed connector or enter a restricted or affected area. Use accessible, unloaded components when available; do not unload or move rack just to obtain a photo. If a needed view is unsafe or inaccessible, say so. Useful details include:
- The shape of the connector tabs or hooks on the beam end
- The hole or slot pattern in the column face (teardrop, round, rectangular — shape and spacing)
- Whether the connector is welded, riveted or a separate clip
- Column face width and depth, only where safely accessible; otherwise use records or mark unknown.
- The upright’s bracing style, corner construction and base plate shape
A visually similar teardrop punch on two different racks does not guarantee the beam connectors are
interchangeable between them — hole spacing, tab thickness and locking geometry can differ between
manufacturers and even between product lines from the same manufacturer. Manufacturers publish reference
diagrams of these construction features, like the example at right (one manufacturer’s labeled upright)
— useful for understanding what to look for and photograph, not a claim that every rack shares this
exact construction.

How to Measure Your Existing Pallet Rack Before Ordering
Most “will this fit?” questions stall on the same handful of numbers. Measure only what you can reach safely from the floor, on unloaded or easily reached parts. Write down where each measurement starts and ends, and mark anything you couldn’t reach as “unknown” rather than estimating it. A rough number that’s labeled as rough is more useful to us than a precise-looking guess.
Upright frames
- Frame depth: measure from the outside of the front column to the outside of the back column, at the floor. Common depths are 36″, 42″ and 48″, but custom depths exist.
- Frame height: measure from the floor to the top of the column.
- Column face and side: measure the width of the front face (where the holes are) and the side depth. Brands can differ by only a few hundredths of an inch here, so write down exactly what the tape shows.
- Hole shape and spacing: note whether the holes are teardrop, keyhole/keystone, rectangular slots, round, or bolt holes. Measure center-to-center from one hole to the next; 2″ is common, but not universal. Take a straight-on photo with a tape measure held beside the holes.
- Foot plate (base plate): record its width × depth, the number of anchor holes, and whether it’s bolted or welded to the column.
- Bracing: note the pattern (horizontal and diagonal struts), and whether the frame is welded or bolted together.
If you’re replacing frames, our replacement upright frames page covers what to order once you have these numbers.
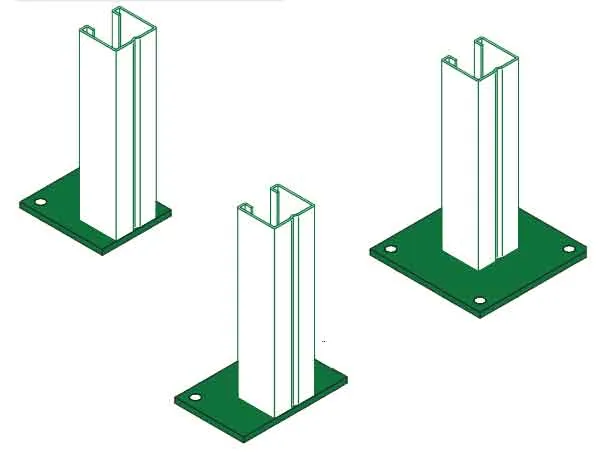
Foot plates vary in size and anchor-hole count — record both.
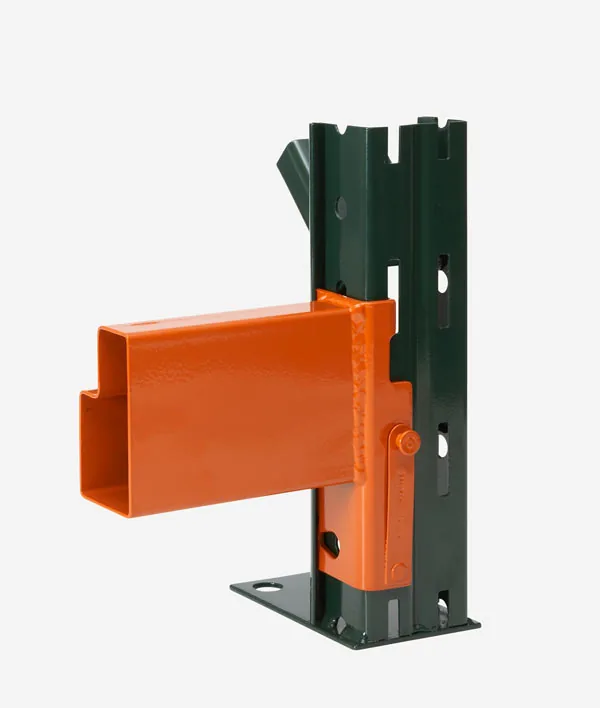
Count the connector tabs and note the lock type (Ridg-U-Rak example shown).
Beams
- Length: measure the clear opening between the two uprights, from the inside face of one column to the inside face of the other. Don’t measure tip-to-tip across the connectors. A beam listed as “96 inches” by one maker and one listed as “96 inches” by another may not use the same reference point, which is exactly how a slightly-too-long beam gets discovered mid-install.
- Face height and profile: measure the beam’s vertical face, and note whether it has a step (a ledge for decking) or is a box or channel shape.
- Connector: count the pins or tabs on the end plate, measure the plate height, and note the type of safety lock.
Beams are usually quoted and installed in pairs — see ordering beams by the pair. If you’re adding levels or height, read adding levels or height first.
Steel thickness (gauge)
If a part number or label is available, it’s more reliable than measuring. If you have calipers and can reach an exposed edge on an unloaded part, a thickness reading helps. For example, one manufacturer’s columns run from about 0.075″ (14 ga) to 0.105″ (12 ga). Paint adds a little, so mark readings as approximate.
Structural or roll-formed?
Structural rack is built from hot-rolled C-channel, and its beams are usually bolted to the columns. Roll-formed rack is made from formed sheet steel, and its beams hook into punched holes with a clip or spring lock, with no bolts. Hybrid systems also exist, so photograph the connection either way. More on structural pallet rack.
What color can (and can’t) tell you
Color helps us find the right part in your photos. It doesn’t identify the manufacturer, the gauge, or whether a part will fit. Orange beams are used by many brands, and the same maker may ship its uprights in blue, green, gray or a custom color. Go by the label, the dimensions and the connector instead.
Working from an RFQ or bid drawings?
If the bid documents list one beam length or frame size and the drawings show another, flag it before anything is ordered. Send us the RFQ and the drawings together and note which items conflict. We’ll list the discrepancies we find and ask which document governs, so the questions can be answered by whoever issued the bid. For full layouts or bid drawings, see Pallet Rack Design Services.
Quick send-us checklist
- Photo of any manufacturer label or load plaque
- Straight-on photo of one beam-to-column connection, with a tape measure in frame
- Frame depth (outside-to-outside) and height
- Beam clear length, face height and profile
- Column face/side size, hole shape and spacing
- Foot plate size and anchor-hole count
- Structural (bolted) or roll-formed (clip/lock)
- How many frames, beam pairs or levels you’re adding or replacing
If anything looks bent or damaged, start with rack repair & inspection instead — if a beam or frame is damaged, condition comes before compatibility.
“Beam” language: sold individually vs. counted as a pair
In a conventional two-beam selective rack bay, a level uses two parallel beams: one connects the left and right upright frames at the front, the other at the back. A quote may price one beam or a pair. Confirm the order unit, levels per bay and total individual-beam count before comparing quantities. Other configurations may differ, so use the actual drawing rather than assuming this arrangement applies to every system.
When you’re adding levels or replacing damaged beams on rack you already own, tell us the pair count
you need and send a photo of one full level so we can confirm connector type, length and profile match
before quoting.
What “compatible” actually means here
Compatibility is not a brand-wide guarantee or a single matching dimension. Review the approved component combination and the resulting rack configuration and load capacity. Manufacturer documents and a qualified review may be required. For damaged equipment, RMI’s repair-or-replace guidance describes the need for a rack design professional—not a DIY decision from a photograph.
In practice that means we ask for the manufacturer name or tag if available, clear connector and
column photos, the beam/column dimensions, and (when relevant) the original layout or purchase
documentation. If your rack shows damage, has been relocated, or its condition or capacity is in
question, that’s a job for our Repair & Inspection
review, not a same-day compatibility answer over email.
If you’re deciding whether to reuse existing rack at all versus buying new, see
Why Buy New Pallet Rack for the tradeoffs. If you’re planning a
full layout, quote or a preliminary drawing, start at
Pallet Rack Design Services, where the intake checklist
covers full project scope. This page exists for the narrower, upfront question: is the rack I already
have identified well enough to know what will and won’t attach to it.
Replacing beams in an older or mixed-brand system
Beam replacement is where compatibility problems show up in the field, not on the quote. A replacement beam that looks right on paper can still refuse to seat if the existing uprights are an older profile, a discontinued size, or a different manufacturer than the one that made the new beams. Before ordering, work through these points:
- Find the brand first. Check the beam and column stickers or capacity plaques. Systems built up over years often mix brands bay to bay, and a single warehouse can hold beams from two or three makers.
- Never mix beam brands within one bay. Each level of a bay should use beams from the same manufacturer and connector family so the load path and locking arrangement stay consistent. Mixing brands in the same bay is not an accepted configuration, even when the connectors appear to fit.
- Do not force a beam in. If a connector has to be hammered or pried to seat, stop. Forcing it can damage the column punching and the beam end plate, turning a simple swap into a repair job.
- Plan for re-baying. When new beams will not seat in the existing bays, the practical fix is to regroup components so every bay is single-brand: take down the affected bays, rebuild them with the new beams, and move the removed original beams to bays that still match them. That is extra labor beyond a one-for-one swap, so it should be scoped and priced before the crew arrives, not discovered mid-install.
- Isolated single-beam swaps can hide the problem. One replacement beam in a bay may seat with effort where a run of several will not. Treat a tight fit on the first beam as a warning, not a success.
If you send us photos of the existing connector and stickers before ordering, we can flag a likely mismatch up front and quote the re-baying labor with the beams, so the project has one price and one visit.
How to send us your rack for a compatibility check
Send the following through our quote request or email sales@mh-usa.com. Measure only safely accessible items; label estimates as unverified:
- Photo of any manufacturer tag, model sticker or capacity plate on the column
- Close, straight-on photo of one beam-to-column connection
- Column face width/depth and beam length from records or safely accessible measurements; state units.
- How many beam pairs or levels you’re trying to add, replace or match
- Whether decking, if any, needs to match the beam profile you already have
We can help organize the available information and identify the manufacturer-reference or qualified-review steps needed. Tell us about missing records or uncertain measurements. A quote, photograph or catalog listing is not engineering approval for a changed configuration.
Shop Pallet Rack Components
Catalog examples are starting points, not confirmed replacements for your rack. Verify the exact configuration, load requirements, availability and complete quote before ordering.
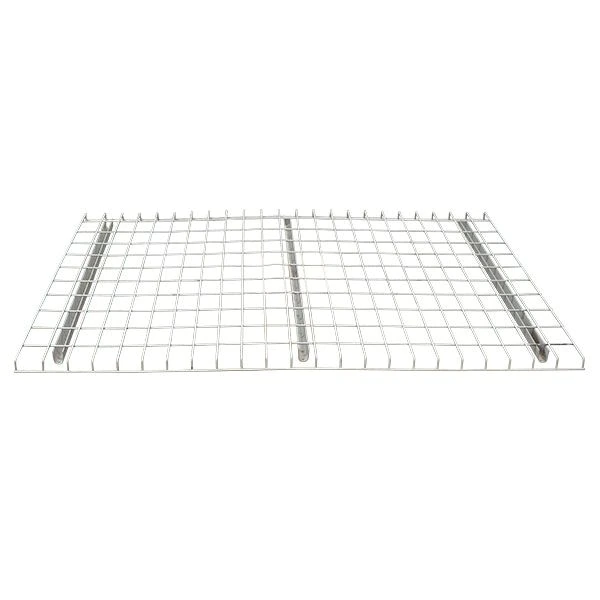 Interlake Wire Deck for Pallet RackFrom $95.38 per panel, depending on size/capacity configuration.
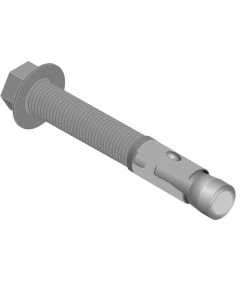 Interlake Pallet Rack Anchor Bolts$3.64 each — confirm the anchor type your engineering documentation specifies.
 Interlake Pallet Rack Column ProtectorFrom $69.68, depending on configuration.
Identification & Compatibility FAQ
Does a matching connector shape mean two beams are compatible?
What if my rack’s manufacturer tag is gone?
Can I mix beams from a different manufacturer with my existing uprights?
Is a rack location or bin label the same as an identification tag?
My rack has damage or looks bent — can you confirm compatibility from photos alone?
Do I need to know the beam pair count before I ask for a quote?
Why do 48″-deep pallets usually go on 42″-deep frames?
Is teardrop rack all interchangeable?
What’s the lightest standard beam capacity?
My rack has no label. Can you still help identify it?
Send Us Photos of Your Existing Rack
We’ll tell you honestly what we can confirm from photos and measurements, and what still needs a closer look.