
How to Size a Mobile Shelving System for Your Room
A repeatable method for turning what you store today into shelves, carriages and a floor plan — including the growth, fill rate and clearances that most estimates leave out.
1 cu ft
A standard records center carton, in federal conversion guidance
1.5 / 2
Cubic feet in a letter-size and a legal-size file drawer
70-75%
Fill rate long used in collection planning practice
Ranges
The number of ranges per aisle drives the saving
Most sizing errors happen before any arithmetic
When a room turns out too small, the cause is almost never a mistake in multiplication. It is that somebody sized the system for the volume of records visible on the day of the survey, in the equipment they happened to be stored in, with no allowance for growth, no fill-rate discipline, and no space set aside for the clearances a working room needs.
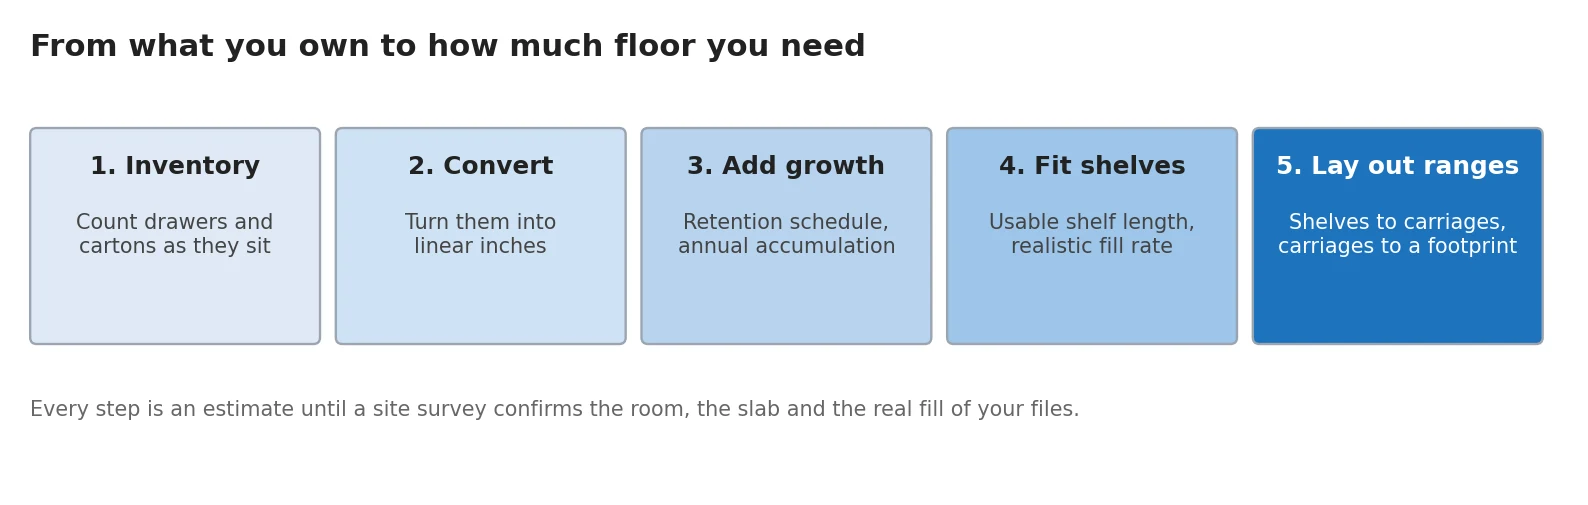
Sizing a high-density mobile shelving system properly is a five-step chain, and each step has one honest question in it. What do we have? What is that in comparable units? What will it be at the end of the planning horizon? How many shelves does that need? And what floor area do those shelves occupy once aisles, clearances and access are counted?
The method below is the one we use to produce budget layouts. It is deliberately conservative: it is far cheaper to discover a shortfall on a spreadsheet than after the rail is anchored.
Step 1: inventory what you actually have
Count storage equipment and contents as they sit today, by series or department, not as a single lump figure. The unit does not matter as long as it is consistent and countable: file drawers, shelves of files, cartons, binders, boxes, uniforms, cases.
Two habits make this step reliable. First, record the fullness of each unit rather than assuming it is full — archives guidance for records inventories asks for exactly that, estimated to the nearest quarter or so. Second, note what is stored somewhere else: material in an off-site records center, in departmental cabinets, or in boxes in a corridor is part of the requirement even though it is not in the room. If you are weighing whether that off-site material should come home at all, the off-site versus on-site comparison covers that decision separately.
Finally, flag anything that is not paper. Oversize drawings, media, specimens, equipment and evidence all have different depth and height requirements and should be sized as their own populations rather than folded into an average. Parcel volume is the clearest example: mail centres size their storage from peak receipts and dwell time rather than retention, as set out in our guide to mobile shelving for mailrooms and package rooms.
Inventory by series, not by pile
Sizing by series lets you allocate the right deck, the right shelf depth and the right level spacing to each population, and it lets you apply the correct retention rule to each. A single blended number for ‘the records’ hides both the peaks and the material that could legitimately leave.
Step 2: convert to comparable units
Equipment counts are not comparable until they are converted. Records management practice provides published conversions, and using them makes an estimate defensible to an auditor as well as to a vendor.
| What you have | Common planning equivalent | Source of the convention |
|---|---|---|
| One letter-size file drawer | 1.5 cubic feet | Federal records inventory conversion table |
| One legal-size file drawer | 2 cubic feet | Federal records inventory conversion table |
| One standard records center carton | 1 cubic foot | Federal records inventory conversion table |
| 36-inch shelf of letter-size files | about 2.25 cubic feet | State archives volume computation guidance |
| 36-inch shelf of legal-size files | about 2.75 cubic feet | State archives volume computation guidance |
| Letter-size files | about 15 linear inches per cubic foot | State archives volume computation guidance |
| Legal-size files | about 12 linear inches per cubic foot | State archives volume computation guidance |
Published conversions differ slightly between jurisdictions because they describe slightly different equipment. Pick one published set, cite it in your estimate, and apply it consistently. Mixing conversions from several sources produces a number nobody can reproduce.
For planning shelving specifically, linear measure is usually more useful than volume: shelves are sold by length, and a linear-inch figure converts directly into shelf count. Keep cubic feet as well if you also need to compare against off-site storage pricing, which is normally quoted per cubic foot.
Count what leaves, too
Every retention schedule creates an outflow as well as an inflow. If a series is destroyed on a fixed cycle, its steady-state volume is bounded and can be sized accordingly. If a series is permanent, it accumulates forever and needs either growth space or a transfer plan. Sizing both populations the same way is one of the most common causes of an oversized capital request and an undersized working area.
Step 3: add growth honestly
Growth is where estimates quietly diverge. Three inputs are enough to make it defensible. That growth number also feeds a separate decision worth making at the same time — how much rail, floor and control capacity to reserve so the system can actually be expanded later. See designing a mobile shelving system for future expansion.
- Annual accumulation. Measure it if you can — a year of transfers into the records room is the best possible input. Where no measurement exists, use two or three years of transfer logs rather than an impression.
- Planning horizon. Ten years is common for an installed system, because the equipment lasts far longer than that. Whatever you pick, state it in the estimate so the number can be re-checked later.
- Realised disposition. Apply the retention schedule, then discount it. Legal holds, open records requests and simple backlog mean that less leaves than the schedule permits.
The output of this step is the capacity the system has to reach at the end of the horizon, not today. Building to today’s volume and hoping to extend later is only viable if the room and rail were designed for extension — a decision that has to be made now, not then.
Want us to run the numbers with you?
Send your inventory counts and a room sketch. We will convert them, apply a realistic fill rate and return a capacity figure with a layout that fits the space.
Request a Quote See the design guidance for architects Call (800) 326-4403
Step 4: turn volume into shelves
Now the arithmetic becomes concrete. A shelf holds a usable length, not its nominal length, and it should not be planned full.
Usable length is the clear opening between uprights, reduced by dividers and end stops. Usable depth depends on what is stored: cartons and folders have real depths that must fit within the shelf, which is covered in detail in the guide to shelf depth and level spacing. Level count depends on the height staff can safely work and on the clearances required above the top level.
Then apply a fill rate. Collection planning practice has long used something in the region of 70 to 75 percent of theoretical capacity as a working target, because material has to be shifted to stay in order. Records rooms behave the same way: a shelf that is completely full cannot accept an interfiled document without moving everything after it.
| Input | Where the number comes from | Typical failure |
|---|---|---|
| Usable shelf length | Clear opening between uprights, less dividers and stops | Using the nominal shelf width from the catalogue |
| Levels per range | Working reach, clear height, clearance above the top level | Planning a level that cannot be reached without equipment |
| Fill rate | Operational practice, typically well below 100 percent | Sizing at theoretical capacity, so the room is full on day one |
| Deck and divider type | The contents themselves | One deck type applied to populations that behave differently |
Step 5: carriages, aisles and the real footprint
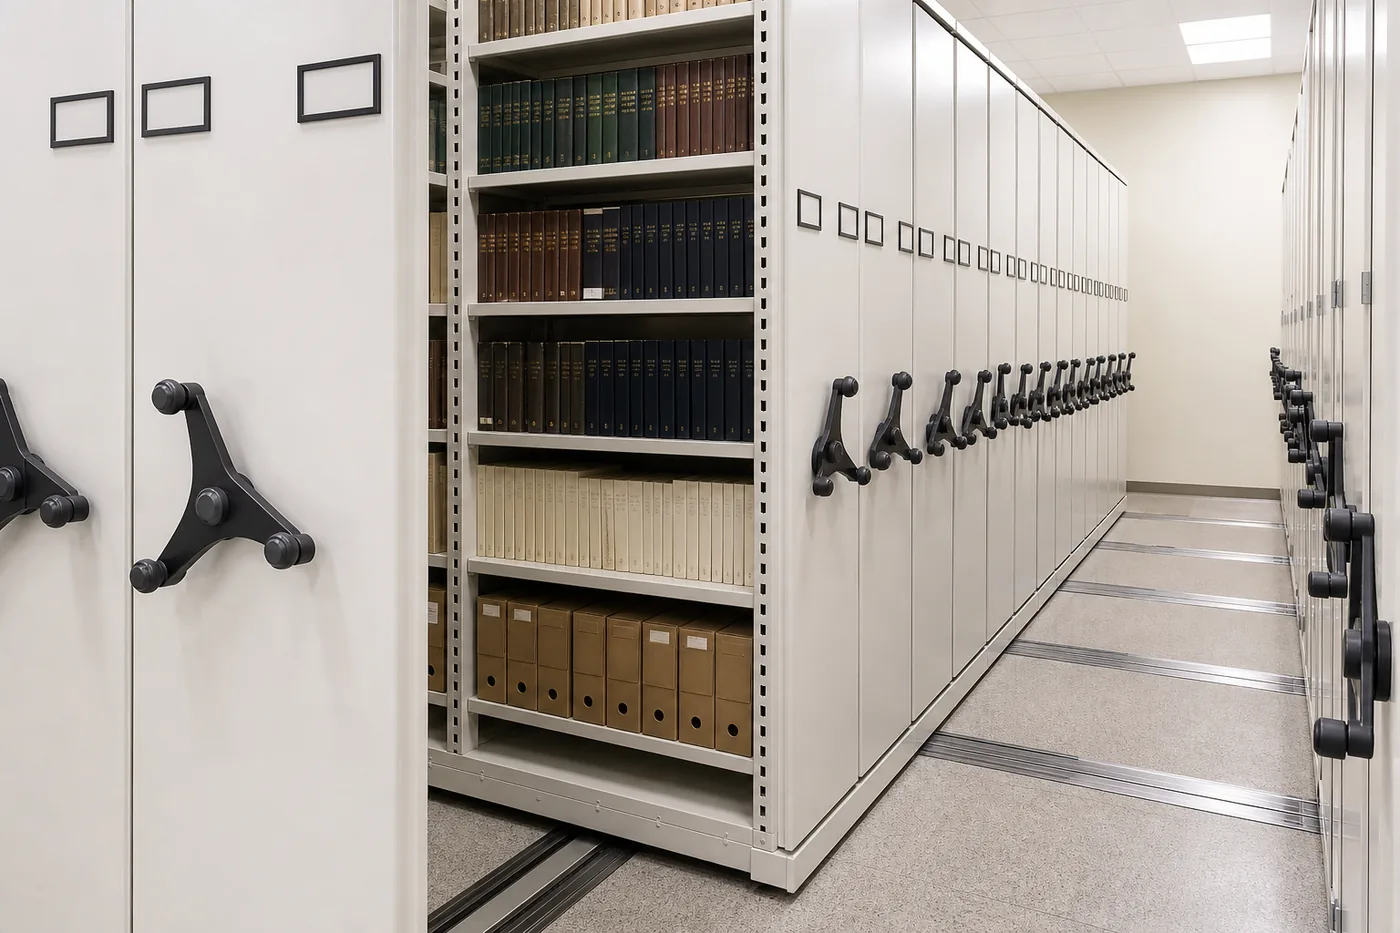
Shelves become ranges, ranges become carriages, and carriages need floor. The saving that makes high-density storage worth doing comes from one fact: static shelving pays for an aisle beside every range, while a mobile run shares one aisle across many.
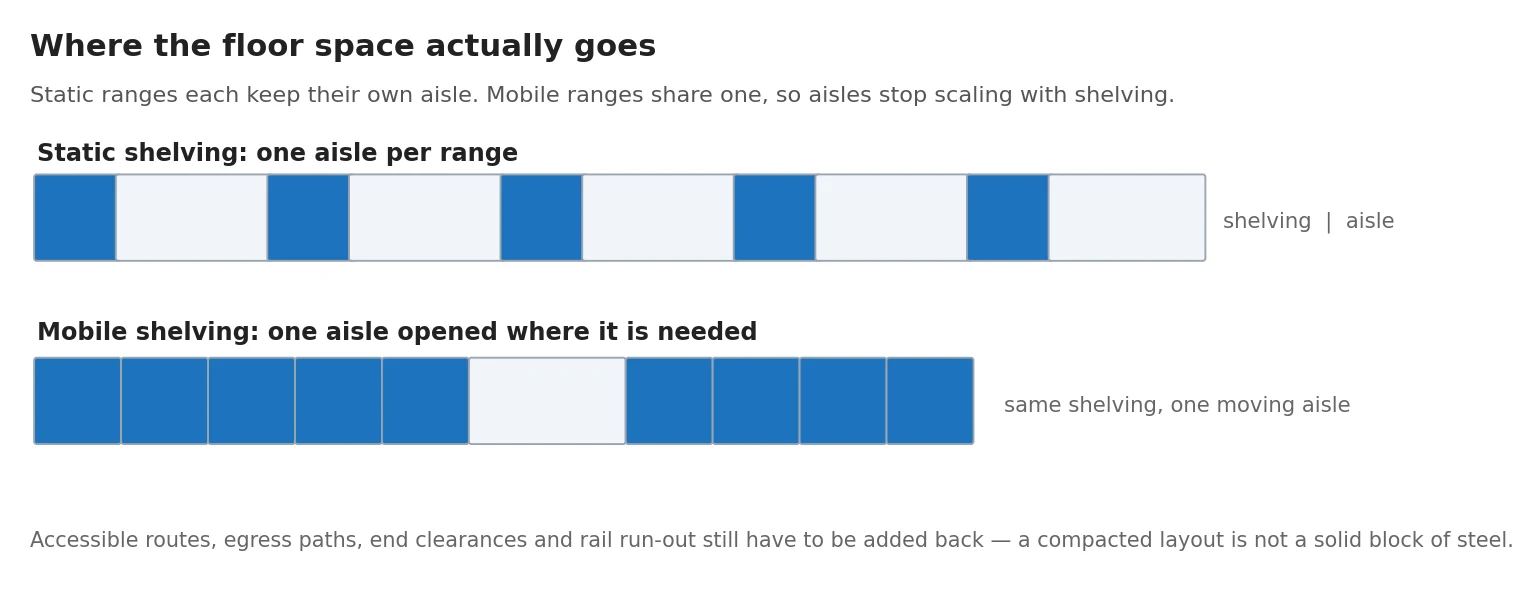
This is also why generic space-saving percentages are unreliable. In a small room that only fits two or three ranges, the saving is modest. In a deep room where a single run can carry many ranges, it is dramatic. Your room’s proportions, not a brochure, determine the number.
What the compacted layout does not do is turn the room into a solid block of steel. Several allowances have to be added back:
- The working aisle — at least one, sized for how the room is worked, plus any additional aisles kept open for simultaneous users.
- Accessible routes — accessible aisle provision changes both aisle width and how aisles are operated; see accessible aisle planning.
- End clearances and rail run-out — the rail extends beyond the last carriage position, and the ends of ranges need space to work.
- Egress and doors — exit access routes and door swings are not negotiable and are frequently forgotten in early sketches.
- Service clearances above — sprinkler, lighting and HVAC requirements above the ranges limit usable height before the shelving does.
Finally, the loaded system has to be checked against the building. Compaction concentrates weight, and the governing question is whether the slab can carry the loaded system — covered in the guide to floor load requirements. In an existing building, the retrofit guide covers the other constraints that shape a layout.
A worked example, and how to read it
Suppose a department holds 120 letter-size file drawers and 400 records center cartons, and transfers about 60 cartons a year into the room. Using the published conversions above, the drawers represent roughly 180 cubic feet and the cartons 400 cubic feet, so about 580 cubic feet today. Over a ten-year horizon at 60 cartons a year, with a realistic assumption that only part of the eligible material actually leaves, the planning figure is materially larger than today’s volume — and that larger figure, not the 580, is what the shelving has to accommodate at a working fill rate.
Read that example for its structure, not its numbers. Every input in it is specific to a real organisation: the conversions you adopt, the accumulation you measure, the disposition you actually realise, the shelf sizes you specify and the fill rate you are prepared to work at. What the method guarantees is that each of those assumptions is visible and can be challenged, which is exactly what an estimate needs to survive review.
Capacity also has a budget dimension. More capacity means more carriages, more shelving and sometimes a different drive selection — see the drive type comparison and the cost and budget drivers guide before fixing a number in a capital request.
What a sizing estimate cannot tell you
A spreadsheet can tell you how many shelf feet you need. It cannot approve a layout. Three things always require a site survey and, where structure is involved, a licensed engineer.

Use the estimate to ask better questions
A good sizing exercise is not a purchase decision — it is the document that makes the site survey productive. It tells the surveyor what has to fit, which populations are growing, and which constraints are already known. Bring it to the survey and expect some of its assumptions to be corrected. That is the estimate doing its job.
Library and academic collections have their own conventions on top of this method; those are covered in the guide to library book stacks on mobile shelving.
Related Boxes & Packaging Supplies
These are boxes and packaging supplies, not shelving, mobile carriages, or storage-system equipment. See each product page for current price and ordering details.




Once you know how much you need to store, confirm the shelf and carriage ratings actually cover it — see mobile shelving weight capacity and load ratings.
Frequently asked questions
How much space does mobile shelving actually save?
How do I convert filing cabinets into shelf space?
What fill rate should I plan for?
Do I size for today or for the retention period?
Can I add ranges to a mobile system later?
Does a taller system always store more?
Find out what will actually fit in your room
Send us your inventory counts and room dimensions. We will size the system, lay it out and tell you plainly if high-density storage is the wrong answer for the space.