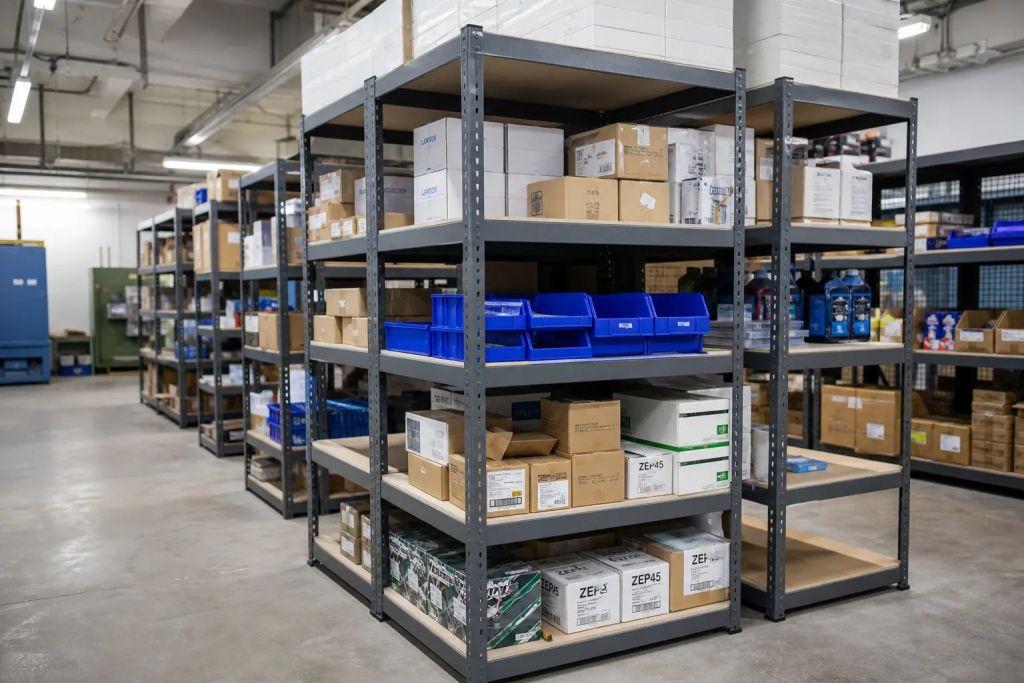
Quick answer: A standard four-shelf boltless shelving unit takes about 15 to 30 minutes to assemble with a rubber mallet. One manufacturer’s heavy-duty boltless instructions list 20 to 30 minutes per section with two people. Once a two-person team finds its rhythm on a job of ten or more units, the pace often drops to about 10 minutes per unit. A professional crew can install roughly 50 to 75 bays per day. The steel goes together fast. Prep, access, leveling and cleanup are what stretch the schedule.
Maybe you are planning a stockroom upgrade while receiving, picking or production keeps running. You need a labor number you can trust, not a best case from a product listing. This boltless shelving assembly time and labor guide shows how to estimate crew hours, what to prepare, the assembly steps, and when paying for installation saves money. If you already know your sizes, you can lay out the bays in our free boltless shelving designer and see the parts list before you plan labor.
How Long Does Boltless Shelving Take to Assemble?
Boltless shelving (also called rivet shelving) has no nuts or bolts. Steel posts have keyhole slots. Beams have rivets on each end that drop into those slots and lock down when you tap them with a rubber mallet. That is why it goes together much faster than clip or bolted steel shelving.
Here are the published time figures we trust, and where each one comes from:
- Single standard unit, one person: about 15 minutes for a four-shelf unit, per our boltless shelving buyer’s hub. Most units fall in the 15 to 30 minute range.
- Heavy-duty or long-span section, two people: about 20 to 30 minutes per section. That figure comes straight from a major manufacturer’s printed assembly instructions, which also recommend two people.
- Repeat units on a larger job: about 10 minutes per unit for a two-person team once they have a rhythm on 10 or more units.
- Professional crew: roughly 50 to 75 bays per day. A 100-bay warehouse job is often done in 1 to 2 days, per our boltless shelving installation services page.
Consumer review sites land in the same range. Independent boltless shelving assembly reviews report about 10 to 20 minutes per unit, with taller units closer to 25 minutes. Treat all of these as ranges, not promises. They measure the time to build a unit once the parts are in front of you.
How to Estimate Labor Hours for Your Project
A shelving project rarely runs late because someone cannot seat a beam. It runs late because the team plans for the assembly and forgets everything around it. Split the job into four parts and estimate each one:
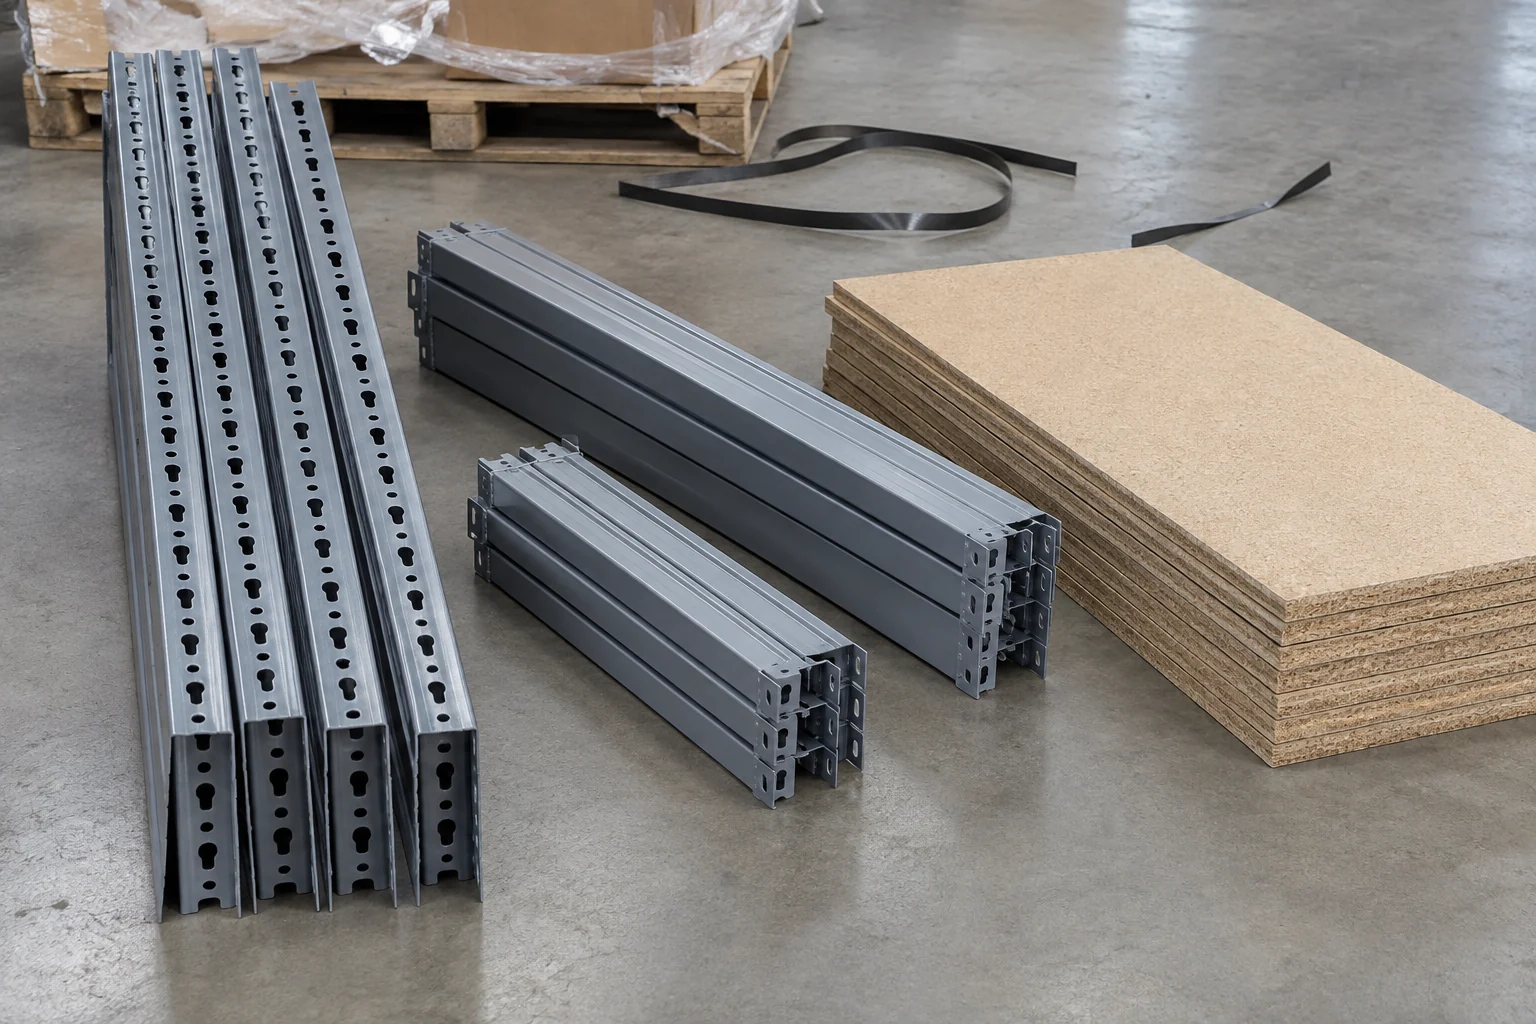
- Prep: Clear the area, receive the freight, open cartons, count parts and sort them by type.
- Assembly: Build the frames, seat the beams, set shelf levels and drop in the decks.
- Adjust and secure: Square and level each run, join add-on units, and anchor where required.
- Turnover: Inspect, clean up cartons and banding, then load stock in a planned order.
Only step 2 is covered by the per-unit times above. For steps 1, 3 and 4, walk the site and write down what is in the way: stairs, a long carry from the dock, a floor that slopes, or an aisle that must stay open during the shift.
Assembly time by project size
The table below does the math for assembly only, using the published ranges above. Labor hours are crew hours times two people.
| Project size | Two people at a steady pace (about 10 min per unit) | Two people, first-time pace (20 to 30 min per section) | Professional crew (50 to 75 bays per day) |
|---|---|---|---|
| 5 bays | About 1 hour (2 labor hours) | About 1.7 to 2.5 hours (3.5 to 5 labor hours) | Part of a day, usually set by travel and setup |
| 20 bays | About 3.3 hours (7 labor hours) | About 6.7 to 10 hours (13 to 20 labor hours) | Under one day |
| 50 bays | About 8.3 hours (17 labor hours) | About 17 to 25 hours (33 to 50 labor hours) | About one day |
| 100 bays | About 17 hours (33 labor hours) | About 33 to 50 hours (67 to 100 labor hours) | About 1 to 2 days |
Remember that these hours leave out prep, carry-in, anchoring and cleanup. On a tight site, those tasks can take as long as the assembly. The broader lesson in why work takes longer than estimated fits here too. The visible task is assembly, but the real schedule includes setup, interruptions, fixes and handoffs.
Planning rule: Estimate the assembly first. Then add time for receiving, sorting, carry-in, leveling, anchoring, inspection and putting stock back.
For a dollar view of the same job, including when a crew costs less than your own staff, read our shelving installation cost guide.
What to Prepare Before Installation Day
A delivery can show up on time and still leave a crew waiting. The usual causes are unsorted parts, a blocked dock, an uneven floor, or a layout that ignores a column or an electrical panel. Good prep is the biggest single thing you control.
Pre-install checklist
- Measure the room. Record wall lengths, ceiling height, door openings and fixed objects like columns, drains, panels and sprinkler heads. Leave room for people and carts. Our hub suggests at least 36 inches for hand-loaded aisles and 60 inches or more where carts or lift trucks pass.
- Confirm the load. Write down the heaviest load per shelf and how it sits on the deck. Light-duty boltless shelving is often rated around 300 to 500 lb per shelf. Heavy-duty double rivet models often hold 1,000 to 1,500 lb, and some wide-span units go higher. Published boltless shelving specifications show why you must check the rating for the exact model, size and deck you order.
- Pick the crew size. Two people work best, and many manufacturers recommend it. One person can build a short unit against a wall, but tall or wide frames need a second set of hands.
- Check every carton. Look for shipping damage and compare parts to the packing list. Finding a missing beam on day one is better than finding it at bay 40.
- Read the instructions. Each line has its own rules. Keep the sheet on site. Our shelving installation instructions library is a good place to start.
- Gather tools. Rubber mallet, 4-foot level, tape measure, gloves, safety glasses, a step ladder for tall units, and a utility knife for banding. Add a hammer drill and anchors only if your plan calls for anchoring.
Plan delivery and access
Ask who will sign for the freight, where it will be dropped and how it gets to the room. A pallet of posts and a stack of decks need a dock or a liftgate truck, a pallet jack, and a clear path. Stairs, small elevators and long carries add real time.
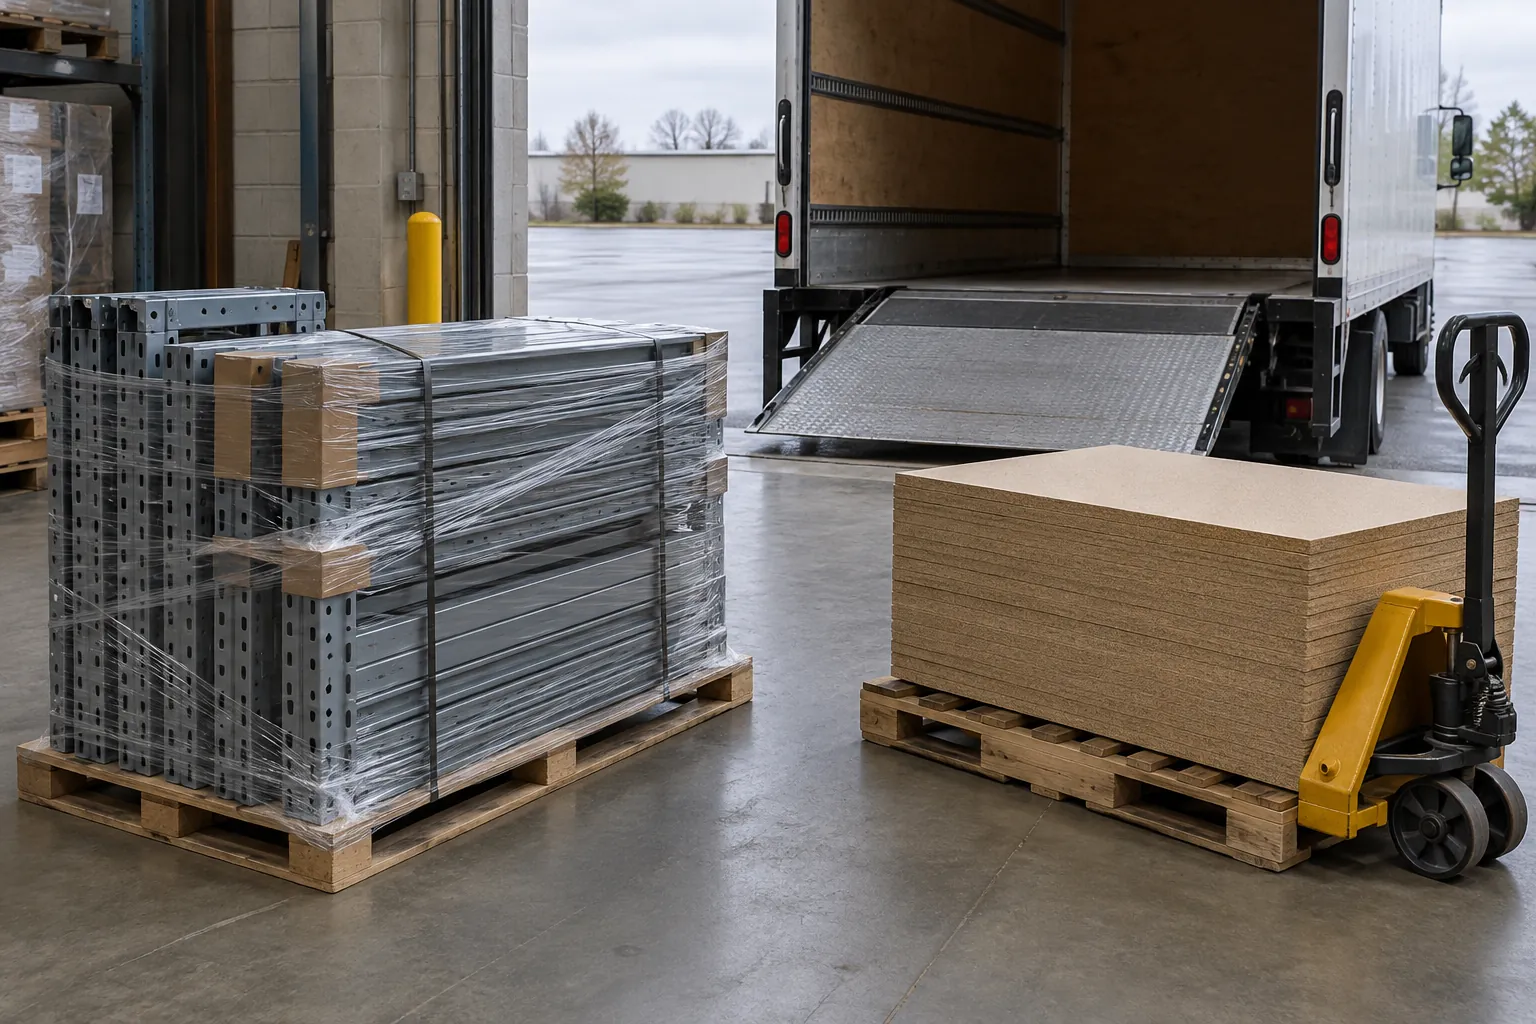
This is common in offices, schools and apartment buildings. When Ogden Housing Authority shelved storage rooms on several floors of a building with no way to take a freight delivery, we received the shelving, delivered it and installed it as one job. That kind of scope is easier to plan before the order than after the truck arrives.
Plan for growth, not just today
Filling every inch with shelving often leaves no room to restock, inspect or add a bay later. Mark access zones on the drawing first, even if it costs a few shelves. If you expect to grow, order add-on units and accessories on the same system so new bays share posts with the old ones.
Step-by-Step Boltless Shelving Assembly
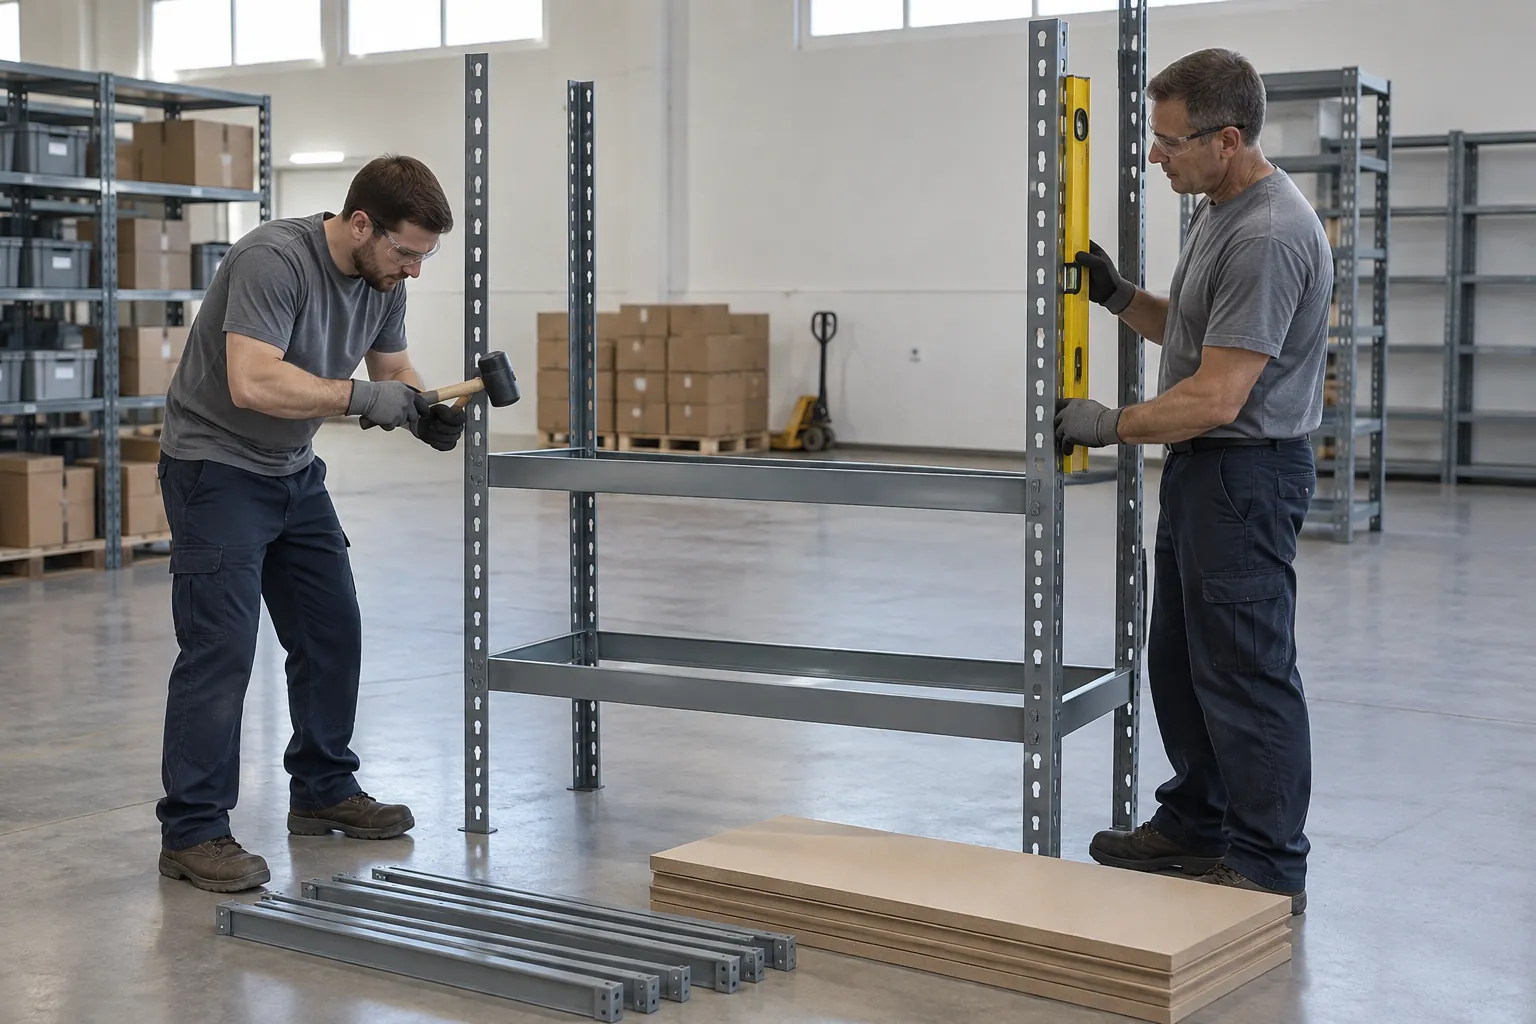
Every brand has its own sheet, so always follow the instructions that ship with your shelving. The steps below match how most rivet shelving goes together. Many units need no tools at all, though a rubber mallet seats tight rivets and a level catches problems early. Manufacturer information on tool-free boltless shelving describes the same idea: fewer parts to fasten means less time per unit.
- Stage the parts. Separate posts, long beams, short beams, decks and any center supports. Check that posts are right side up. On many lines the narrow part of each keyhole points toward the floor.
- Build the first end frame. Lean two posts against a wall or have a helper hold them. Insert a short beam at the bottom and one near the top. Some lines leave the bottom slot empty. Others leave the top slot open so the top deck sits flush. Your instructions will say which.
- Seat the rivets. Tap each beam down with the rubber mallet until the rivets sit at the very bottom of the keyhole. Strike close to the post, not the middle of the beam, and keep fingers clear.
- Build the second end frame and join them. Repeat for the other end, then connect the two frames with the long beams at the top and bottom. The unit will now stand on its own.
- Add the middle shelf levels. Set each beam pair at the height on your drawing. Many units adjust in 1.5-inch or 2-inch steps, so set heights to fit your cartons and bins.
- Check square and plumb. Put the level on the posts and on a beam. Measure the diagonals if a unit looks off. Fix it now, before the next bay locks the mistake into the whole run.
- Drop in the decks. Lay particle board, wire or steel decks into the beam ledges. Add center supports where your line calls for them on wide or deep units.
- Add the next bay. Add-on units share posts with the unit before them, often using a T-shaped post. Repeat steps 3 to 7.
- Anchor if required, then inspect. Anchor through the foot plates where your plan, the manufacturer or your building official requires it. Then check that every rivet is seated and every deck sits flat before loading.
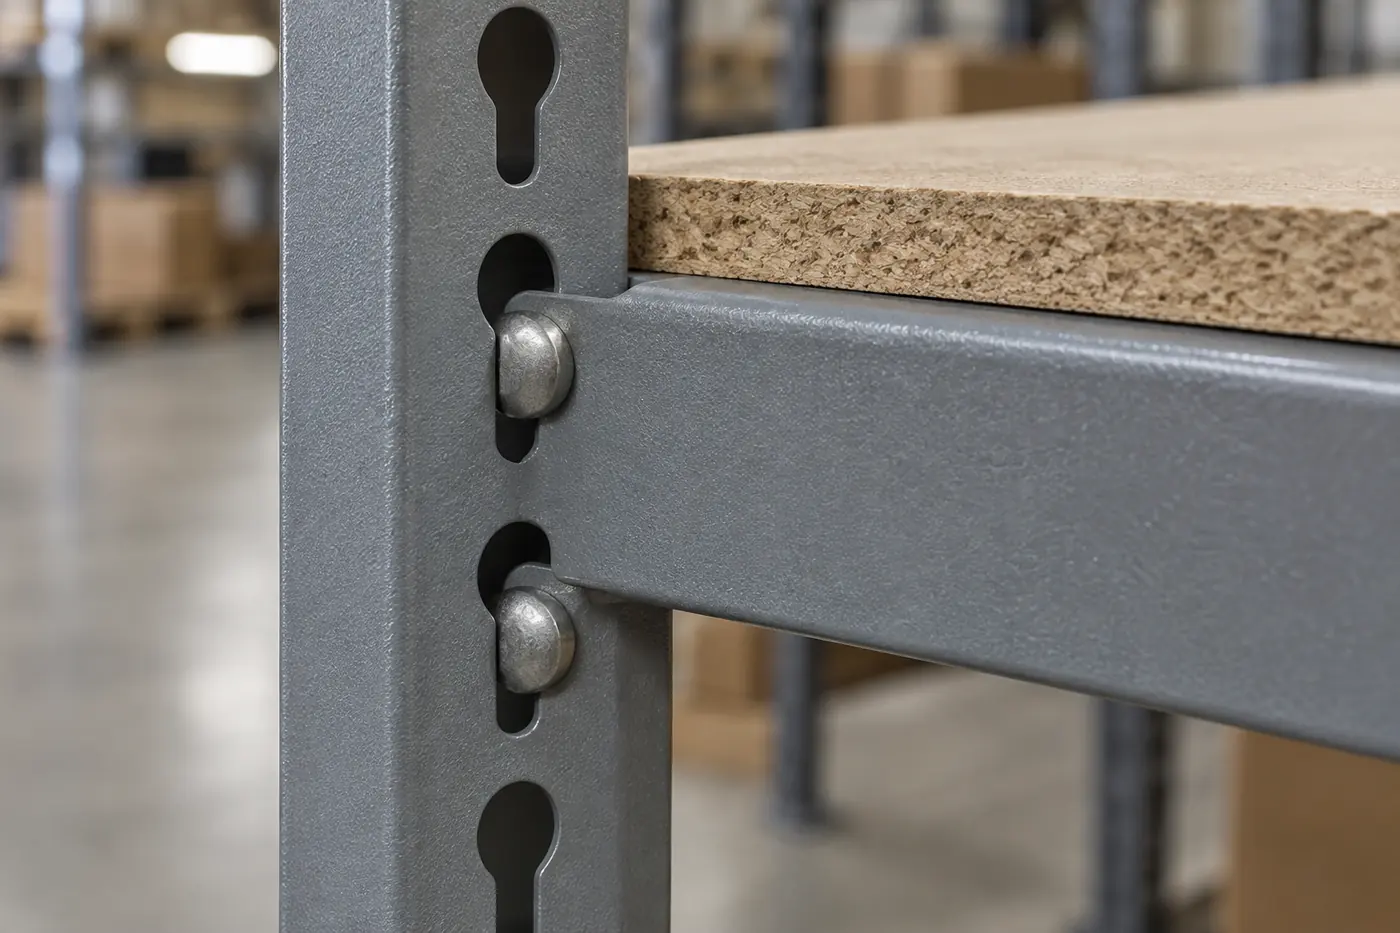
Some lines add their own rules. Penco’s RivetRite instructions, for example, require double rivet beams at the top and bottom of every unit, even on single rivet units. Read the sheet for your line before you sort parts, so the right beams end up at the right levels. Our guide to single vs double rivet boltless shelving beams explains how beam type changes shelf capacity.
For more detail on a specific product, see the boltless shelving installation guidance and confirm site rules before work starts.
Want an exact parts list before you plan labor?
Lay out your bays in the free boltless shelving designer, or price standard units in Build and Price Your Shelving. Prefer to talk it through? Call (800) 326-4403 and we will review your layout and quote installation as its own line.
What Changes Installation Time
The connection method is only one part of the schedule. Use this table to spot the factors that will move your estimate up or down.
| Factor | Why it adds time | How to plan for it |
|---|---|---|
| Unit height | Units over about 8 feet need a ladder and a second person to hold posts | Plan two-person teams and a stable ladder for tall runs |
| Width and depth | Wide or deep units use more beams, center supports and heavier decks | Check whether your line needs center supports before install day |
| Starter vs add-on units | Long runs of add-ons go faster because they share posts | Group bays into runs instead of many single units |
| Deck type | Particle board drops in fast. Wire or steel decks can take extra fitting | Confirm deck type on the order. See our boltless shelving decking options |
| Floor condition | Slopes, cracks, drains and joints cause rocking and out-of-plumb frames | Walk the floor and follow the maker’s method for shims or leveling |
| Anchoring | Drilling and setting anchors adds time per post | Ask early whether your plan, height or local code requires anchors |
| Site access | No dock, stairs, small elevators and long carries slow everything | Arrange receiving and carry-in as part of the scope |
| Active facility | Open aisles and safety zones break up the work | Schedule around receiving, or work after hours in phases |
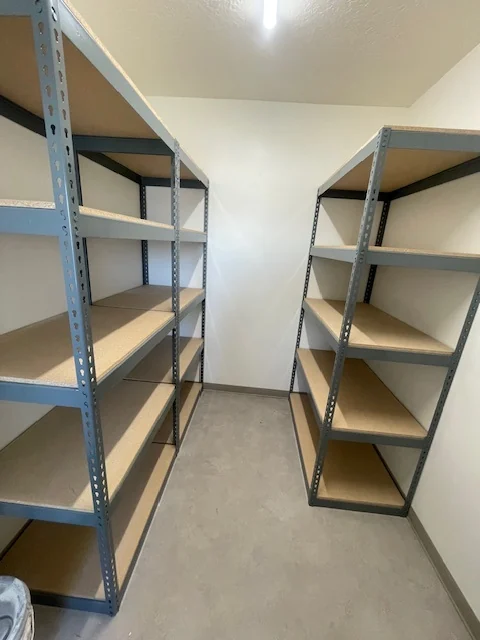
Tight rooms take longer per bay
A long row of matching bays on an open floor moves fast. A small storage room with a door in one wall and shelving on both sides does not. The crew has less room to stage parts, build frames and turn long beams.
Crew experience matters, but so do checks
An experienced crew is faster because it knows the part pattern. Speed should never replace the level and the rivet check, though. Fixing a leaning run after it is loaded takes far longer than catching it at the first bay.
Safety is part of the schedule too. OSHA’s general rule for handling and storing materials (29 CFR 1910.176) says stored material must not create a hazard and must be stable and secure against sliding or collapse. Industrial boltless shelving is covered by the ANSI MH28.2 design and testing standard from the Storage Manufacturers Association, an MHI industry group. Buy shelving that is rated for your loads and install it the way the maker intends.
Boltless Shelving vs Other Storage Systems
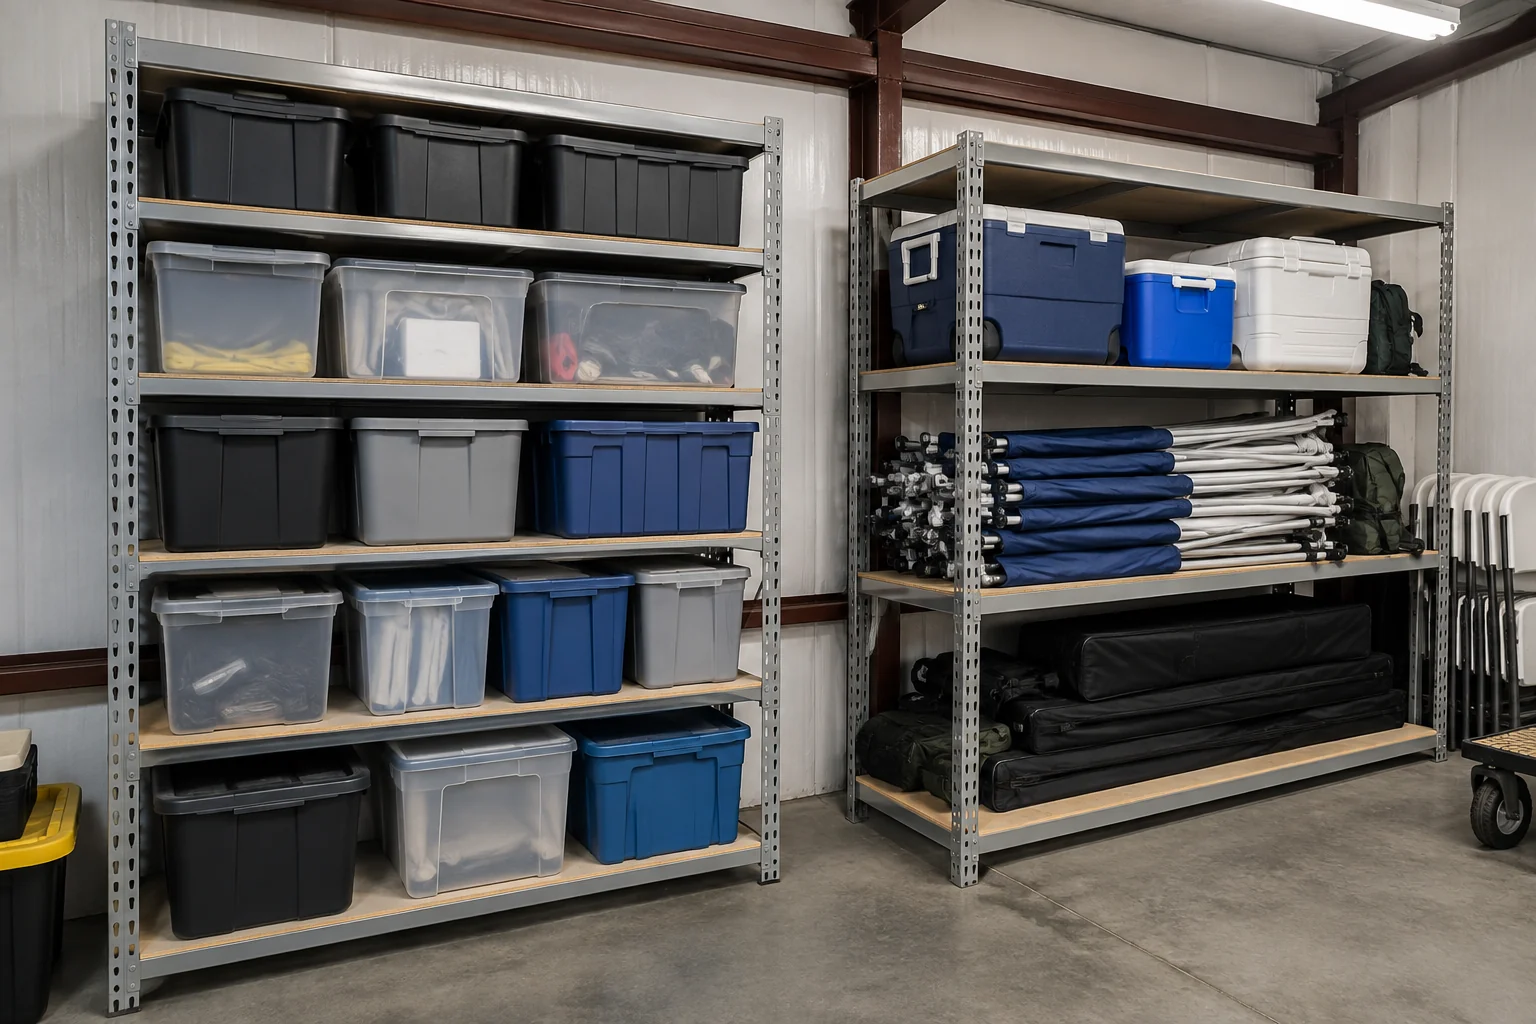
Boltless shelving is not right for every job. It fits stockrooms, parts rooms, retail backrooms, archives and light industrial space where people load by hand and shelf heights may change. If you store full pallets moved by forklift, you need pallet rack instead.
| System | Assembly effort | Tools | Best fit | Changing it later |
|---|---|---|---|---|
| Boltless (rivet) shelving | Fast. Minutes per unit once parts are sorted | Rubber mallet, level | Hand-loaded cartons, bins, parts and records | Easy. Beams lift out and move |
| Clip or bolted steel shelving | Slower per unit. Each shelf clips or bolts on, plus sway braces or panels | Wrenches, nut drivers | Small parts, closed or bin storage | More work. Shelves and braces must come off |
| Wire shelving | Fast, but a different connection style | Often none | Food service and areas that need airflow | Easy, but lower capacity per shelf |
| Pallet rack | A planned install with anchoring and load signs | Hammer drill, anchors, mallet | Palletized loads handled by lift truck | Possible, but needs a capacity review |
| Mobile shelving | A project install with rails, carriages and leveling | System-specific tools and trained installers | High-density records and supplies | Involved. Usually a planned move |
Still deciding? Compare boltless shelving vs pallet racking or boltless vs welded shelving. If your loads are on pallets, start with our pallet rack designer instead.
The same layout ideas apply in small spaces outside the warehouse. A guide on how to maximize basement space with shelving covers wall clearance, access paths and vertical storage in tight areas. The setting changes, but the mistake is the same: filling the floor without protecting access.
DIY or Professional Installation?
Your own team can handle a few units with no trouble. The math changes as the job grows. Use these signs to decide:
- DIY usually works for under about 10 units, standard heights, an open floor, easy freight access and staff who can spare the hours.
- A crew usually pays off for 20 or more bays, tall units, anchoring, several rooms or floors, no loading dock, or a site that must keep running.
- Get it on the quote either way. Ask what is included: receiving, carry-in, assembly, leveling, anchoring, cleanup and a final walk-through with a punch list.
Our commercial shelving installation in Utah page lays out that scope line by line. Outside Utah, start with our national boltless shelving installation service page.
Want to see how real projects were scoped? Read how a youth cycling league added to the same boltless system over three orders, or how Granite School District shelved its carpenter shop with heavy-duty rivet shelving.
Frequently Asked Questions
How long does one boltless shelving unit take to assemble?
A standard four-shelf unit takes about 15 to 30 minutes. One person can often build a basic unit in about 15 minutes. Heavy-duty or long-span sections take about 20 to 30 minutes with two people, based on manufacturer instructions.
How many bays can a crew install in a day?
A professional crew can install roughly 50 to 75 boltless bays per day on a clear site. A 100-bay warehouse job often takes 1 to 2 days. Tight rooms, stairs and anchoring lower that number.
Can one person assemble boltless shelving?
Yes, for smaller units. Lean the posts against a wall to hold them while you seat the first beams. For tall or wide units, use two people so the frame cannot tip.
What tools do I need?
Most boltless shelving needs only a rubber mallet. Add a level, tape measure, gloves and safety glasses. Bring a step ladder for tall units and a hammer drill only if you are anchoring.
What is the most common assembly mistake?
Beams that are not fully seated. The rivets must sit at the bottom of the keyhole slots. Other common mistakes are skipping the parts sort, building on a sloped floor and loading before checking level.
Does boltless shelving need to be anchored?
Freestanding boltless units usually stand on their own foot plates. Taller units, tied runs and units in seismic areas may need floor anchors. Follow the manufacturer’s instructions and any rule from your local building official.
How much weight can boltless shelving hold?
It depends on the model, beam type, size and deck. Light-duty units are often rated around 300 to 500 lb per shelf. Heavy-duty double rivet units often hold 1,000 to 1,500 lb per shelf. Always confirm the rating for the exact unit you buy.
Is it worth paying for installation?
For a few units, your own team is usually fine. For larger jobs, tall units, anchoring, no loading dock or an active site, a crew can cost less than the staff hours and downtime it saves.
Plan Your Boltless Shelving Project
A reliable plan starts with a short list: room size, product sizes, shelf loads, budget, access limits and any code items. Then answer the easy-to-skip questions. Where will restock carts travel? How will maintenance reach utilities? Will you need another row next year?
- Layout: Doors, columns, utilities, aisles and service access marked on the drawing.
- Load: Shelf rating matched to the heaviest product and how it sits.
- Labor: A crew sized for tall or wide frames, with hours estimated for all four phases.
- Site: A clear staging area, known floor conditions and a freight plan.
- Package: Drawing, parts list, decks, accessories, delivery and install scope reviewed together.
Material Handling USA can review your sizes, loads and layout, then send a free design, CAD drawing and detailed quote with installation priced as its own line. Start in the boltless shelving designer, browse the full boltless shelving line, call (800) 326-4403, or email Sales@MH-USA.com.
Design it yourself, then get a quote
Use our free online tools to configure what this article describes, then send it to our team for pricing:
- Boltless shelving designer for custom bay layouts
- Build and Price Your Shelving for standard units
- Pallet rack designer if your loads are on pallets
Related reading: how to plan with the Jaken shelving designer, our boltless shelving parts guide, and used vs new boltless shelving.