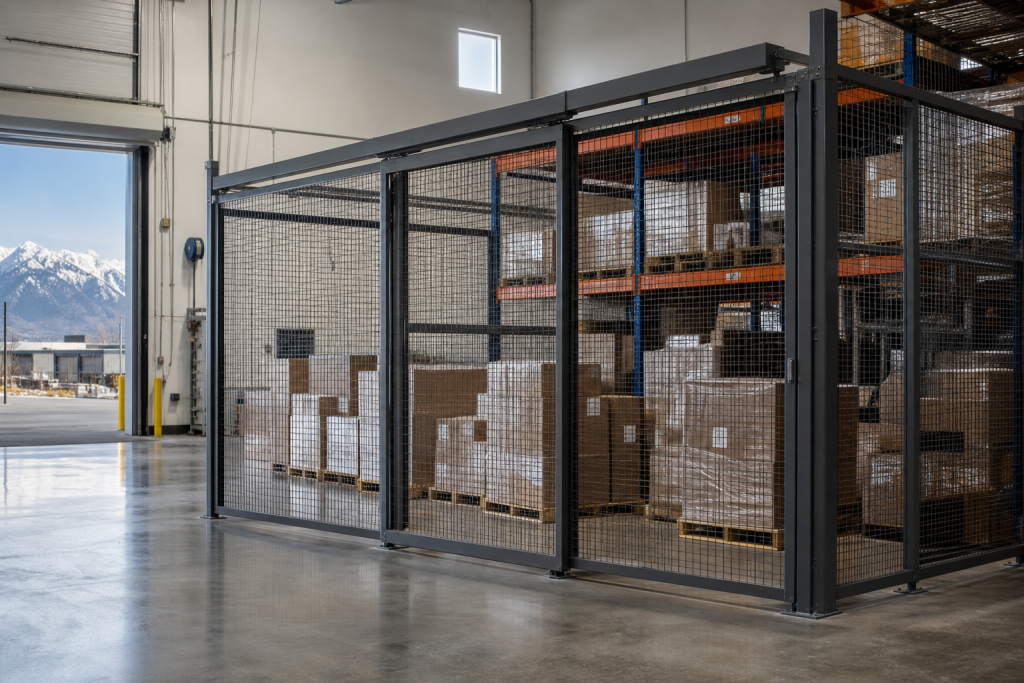
When a warehouse needs to control access to high-value inventory, tools, returns, evidence, or customer-owned goods, a wire enclosure can create a clear physical boundary. The best warehouse security cage design does more than surround the product. It fits the storage risk, the movement of people and equipment, the sprinkler layout, the access process, and the conditions of the building.
Short answer: Start with the item being protected and the way it moves. Then map the cage footprint, gate, mesh, top treatment, anchoring, access controls, and approval checks before you order panels. That sequence helps prevent blocked aisles, unusable doors, roof gaps, and late changes.
What Good Warehouse Security Cage Design Should Accomplish
A security cage is one part of a larger control process. The enclosure can limit casual access and make the boundary visible, but it cannot replace a clear key or badge policy, inventory control, camera placement, or employee training. Design the physical barrier and the daily work process together. Where the stored items sit on someone else’s property record, the design changes again: see our accountable property cage case study for custody-based zoning.

Start with the operating problem
Ask these questions before discussing a panel catalog:
- What needs protection? List the item type, size, value, ownership, and whether it is serialized, controlled, or awaiting inspection.
- Who needs access? Identify employees, supervisors, contractors, drivers, visitors, and emergency personnel. Separate routine users from occasional users.
- How does product move? Trace receiving, inspection, picking, staging, returns, replenishment, and shipping. Mark every handoff.
- What record is needed? A key log may fit a small team. Badge events, camera review, inventory transactions, or a WMS record may be needed when the process requires individual accountability.
- What must remain visible? Wire mesh often supports sight lines and airflow, but stored goods, rack uprights, doors, and columns can still create blind spots.
A practical rule is simple: make the authorized action easy and the unauthorized action visible. If workers must prop open a door to keep orders moving, the layout is working against the security plan.
Use the security cage systems hub to compare enclosure applications, then use the Security Cage Designer to organize the footprint and features.
How to Measure and Map the Cage Layout
Do not size the cage from a clear rectangle on a floor plan alone. Walk the proposed area during a busy operating period. Trace pallet jacks, forklifts, carts, employees, visitors, and emergency paths. A layout that fits on paper may still create a pinch point at the gate or a blind corner at the handoff.
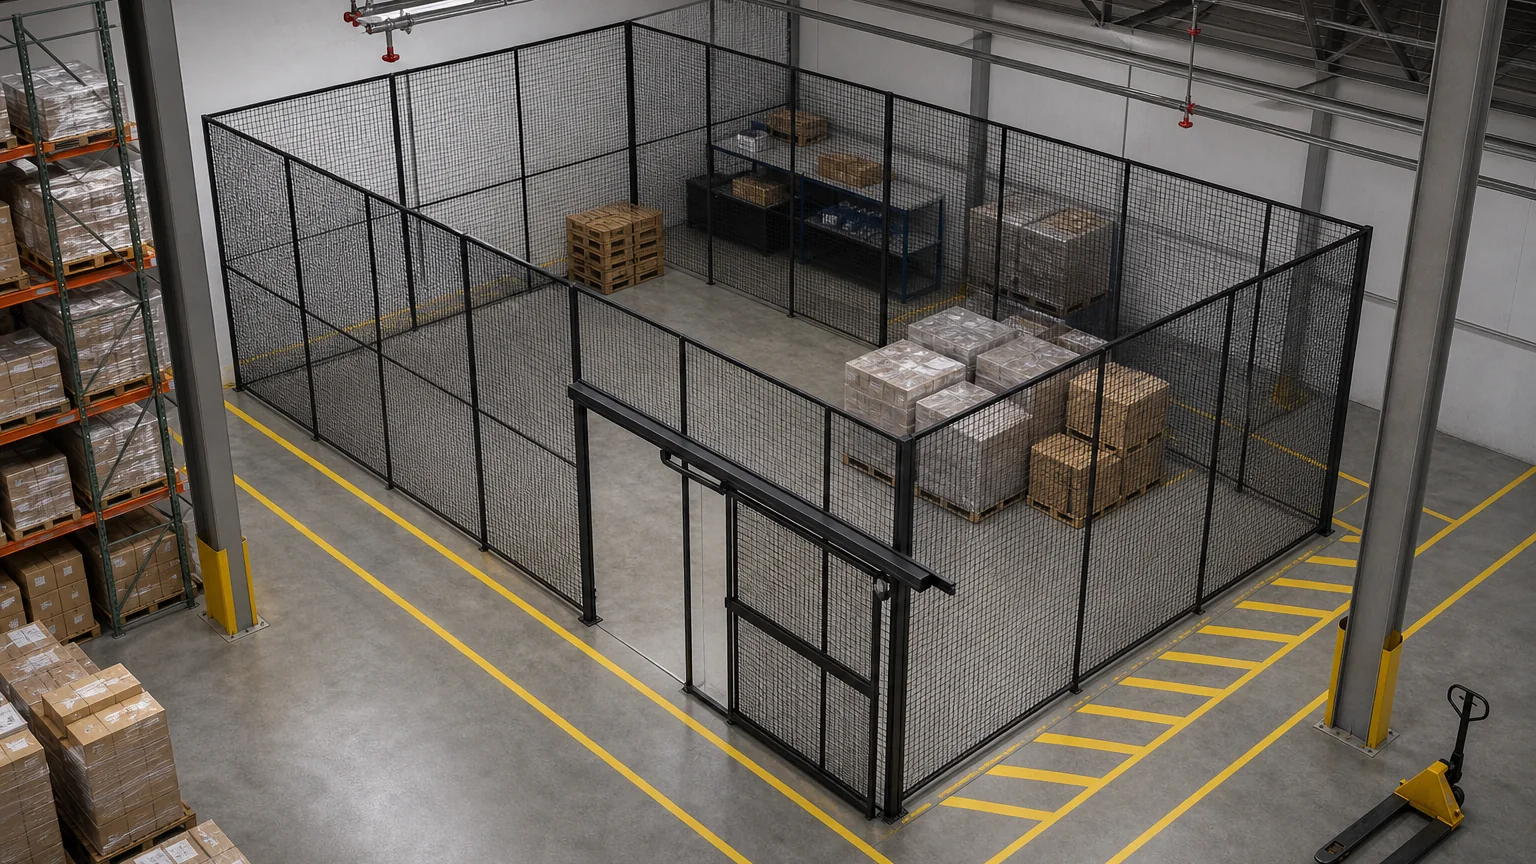
Collect these inputs before requesting a quote
- Clear footprint: Measure usable length and width. Mark racks, columns, doors, walls, drains, conveyors, floor joints, and damaged slab areas. Reserve space outside the cage for inspection, loading, and handoffs.
- Vertical conditions: Record finished floor to deck height. Locate sprinkler heads and deflectors, lights, ducts, cable trays, roof structure, and any service access that could affect a ceiling-height enclosure.
- Stored risk and volume: Describe the goods and how much space the process needs, including receiving or inspection space. For an applicable TAPA Americas high-value cage, the 2023 Facility Security Requirements state that when no buyer, logistics service provider, or applicant agreement sets the size and use, the high-value cage must be able to store at least 6 cubic meters of product. That is a requirement for the applicable TAPA use case, not a universal size for every warehouse cage. Confirm the current requirement with the buyer and security lead. The existing TAPA Americas Facility Security Requirements document remains in this article as an Outrank citation.
- Travel and handling: Show pallet, cart, forklift, and pedestrian routes. Identify the tightest turn and the point where goods cross the cage boundary. Do not treat an aisle as spare space until the required equipment clearance has been reviewed.
- Gate position: Draw a hinged door swing or the full travel path of a sliding door. Place the opening where authorized staff can see the handoff without creating cross-traffic or a blind corner.
- Connections and bypass paths: Note floor, wall, rack, column, and deck conditions. A cage boundary is only as complete as its corners, perimeter connections, floor gap, and top edge.
- Controls and services: List locks, badge readers, cameras, alarms, power, data, conduit, emergency release, and any inventory-system connection. Show where each service will be installed and maintained.
For a second measuring checklist, review the security cage sizing guide. When the basic inputs are ready, send the configuration through the designer or request a security cage quote for project review.
Choose Mesh, Frame, Top Treatment, and Doors as One System
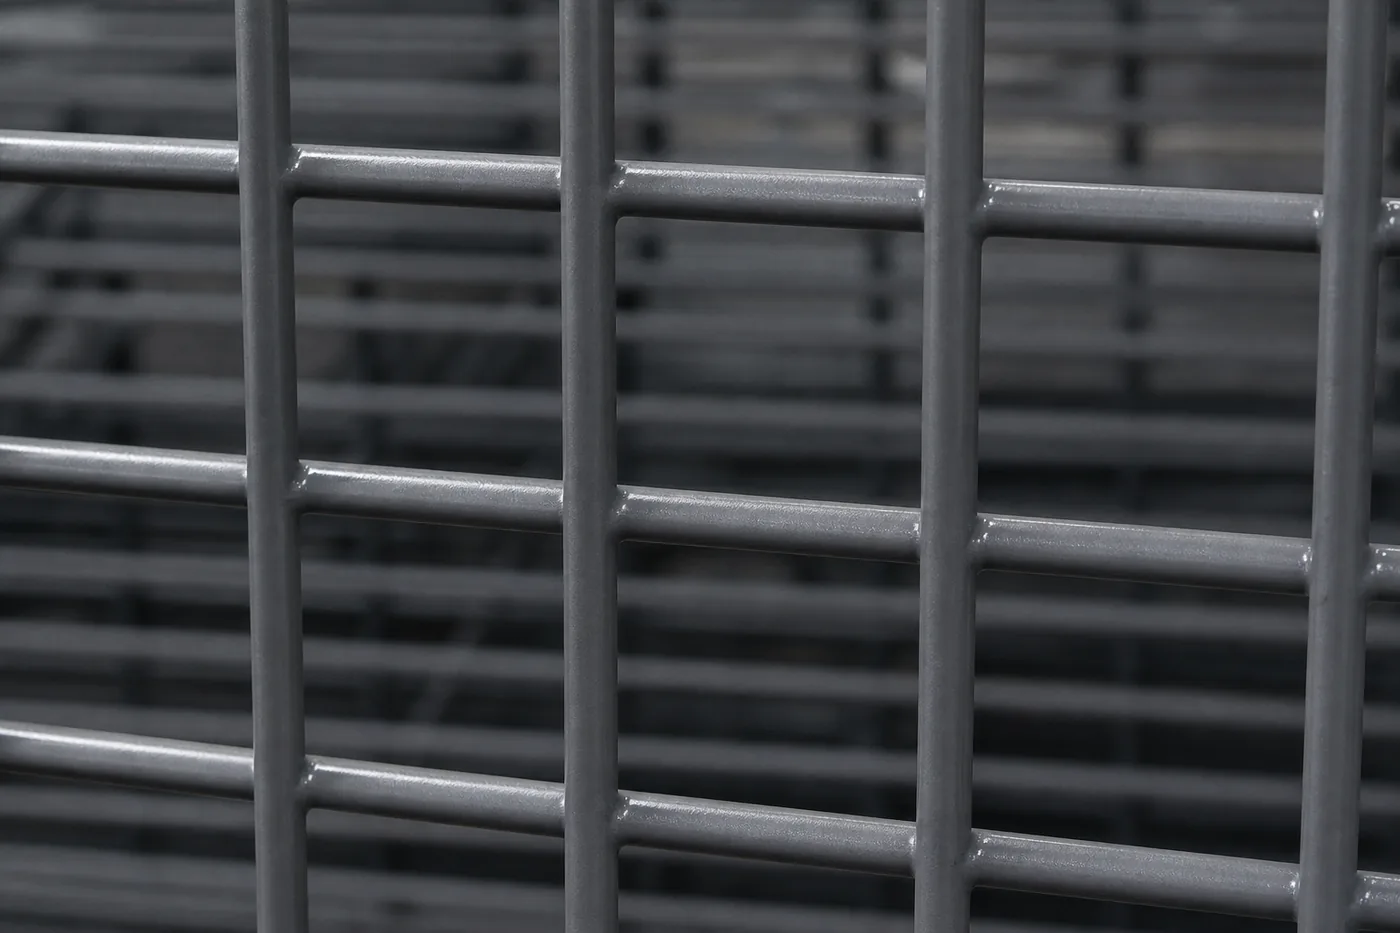
Mesh selection is not a contest to find the heaviest panel. Choose an enclosure that addresses the stored risk while supporting sight lines, airflow, handling, inspection, and future changes. The mesh opening, wire size, frame, fasteners, hinges, latch, posts, and anchors should be reviewed together.
| Design choice | Use this decision lens | Questions to resolve |
|---|---|---|
| Mesh opening | Smaller items and reach-through risk may call for a tighter opening. Larger openings may support airflow and visibility. | What is the smallest item at risk? Can a hand, package, or tool pass through? Will the opening affect inspection? |
| Wire and frame | Consider impact exposure, tamper risk, panel height, and the strength of joints and perimeter connections. | What does the supplier submittal specify for the panel, frame, fasteners, hinges, latch, posts, and anchors? |
| Open top | May fit areas where sprinkler and building-service coordination favors an open boundary. | Does the open top still meet the security objective? Has the fire protection professional reviewed the complete arrangement? |
| Ceiling to deck | May be needed when a climb-over path or a buyer security requirement makes the top part of the boundary. | Can it connect to the structural deck? What happens at sprinklers, lights, ducts, utilities, and service access? |
| Hinged door | Can suit pedestrian access or a simple opening when a full swing can be kept clear. | Does the swing reduce aisle or exit clearance? Can it close and latch after every entry? |
| Sliding door | Can help when a hinged swing conflicts with traffic or staging space. | Is the overhead track supported? Is the travel path clear? Can authorized and emergency users operate it safely? |
Use the wire mesh panel options guide, security cage door guide, and security cage ceiling guide to build a project-specific specification. Avoid treating a generic catalog row as approval for a unique site.
Coordinate Fire Protection, Egress, and Building Conditions
A cage can be physically strong and still create a life-safety problem. Fire protection and egress review should happen before fabrication, not after panels arrive.
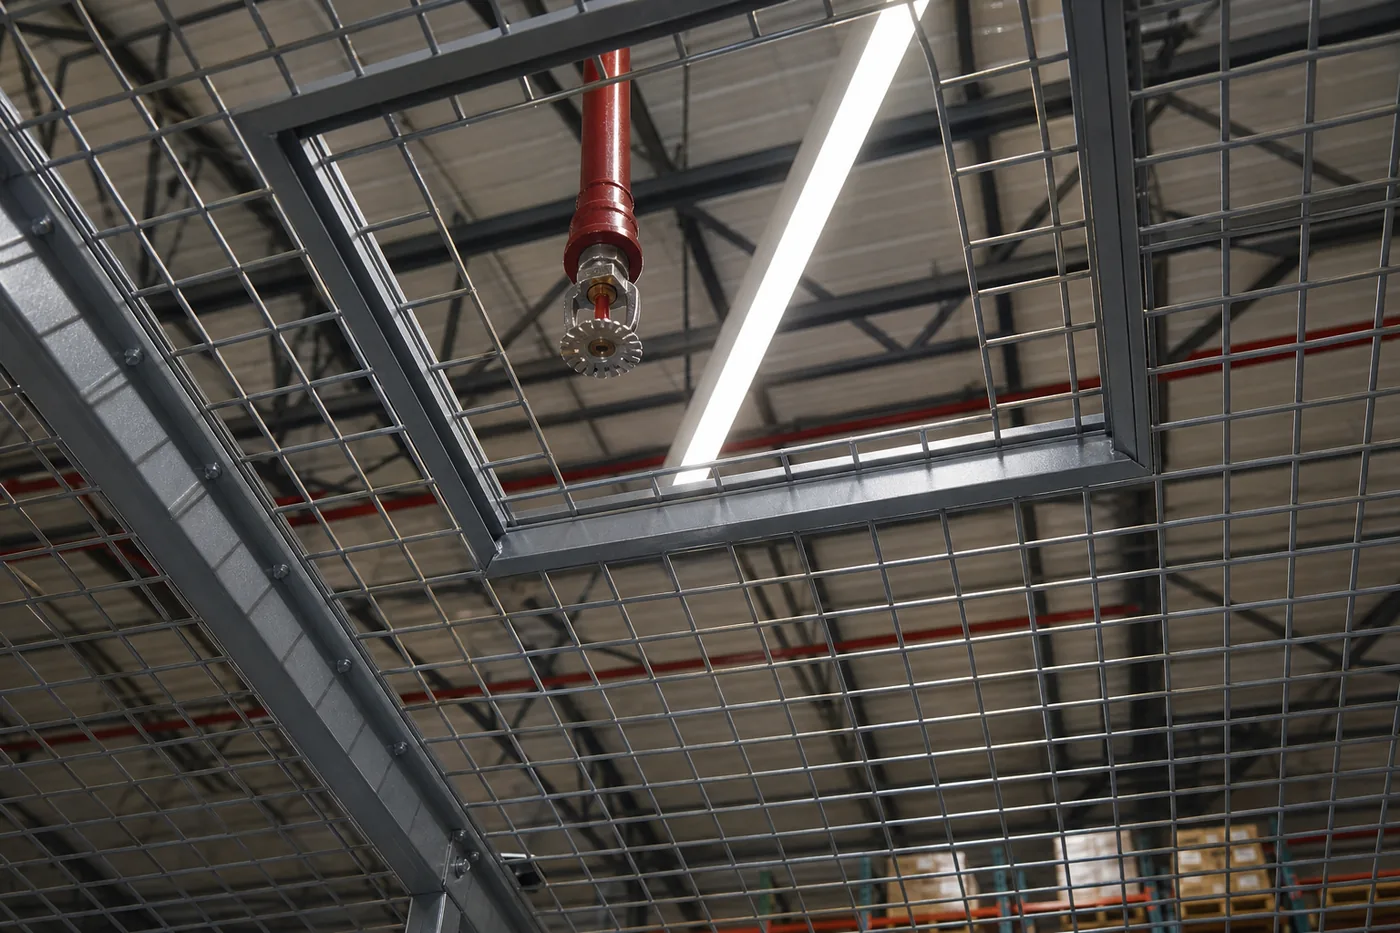
Why the 18 inch number needs context
OSHA’s sprinkler standard includes an 18 inch minimum vertical clearance between sprinklers and material below. That rule should not be turned into a blanket statement that every cage top is approved when it sits 18 inches below a deflector. A wire mesh panel, ceiling, rack, light, beam, duct, storage load, and sprinkler head can interact in ways that require a project-specific review.
Open mesh does not automatically prove that water distribution or heat movement will work as intended. Sprinkler type, obstruction geometry, storage height, ceiling construction, and the adopted fire code all matter. Have the responsible fire protection professional and the authority having jurisdiction review the final cage top, sprinkler arrangement, and any panels above or below the enclosure. Review the security cage regulations and compliance guide as a planning resource, not as a substitute for approval.
Check exit routes and material-handling paths
- Exit routes: OSHA requires exit routes to remain free and unobstructed. The gate, panel, stored goods, and access-control hardware must not narrow or block the route. See OSHA 1910.37.
- Aisles and passageways: Mechanical handling equipment needs sufficient safe clearance, and aisles must remain clear and in good repair. See OSHA 1910.176.
- Sprinkler conditions: Review the sprinkler standard and the fire protection design, not only the distance from the nearest head. See OSHA 1910.159.
- Building conditions: Confirm slab condition, anchors, seismic needs, utility access, lighting, electrical work, accessibility, and permits with the project team.
Keep the approved floor plan, sprinkler measurements, anchoring notes, equipment clearances, authority comments, and inspection records with the quote and installation documents.
Build Access Control Into the Daily Workflow
The most secure door is not useful if the team cannot use it during a normal shift. Trace the product path and choose access controls that fit the number of users, the frequency of entry, and the record the operation needs.

Match the control to the process
- Keyed or padlock access: May fit a small group with simple permissions and a clear key-control procedure.
- Badge access: Can assign entry to individuals and create an event record when the facility has compatible infrastructure.
- Cameras and alarms: Place the view around the face, gate, hands, and transfer point. Do not let stored goods or rack uprights hide the handoff.
- Inventory records: Where practical, connect the access event to the inventory or WMS process. Assign someone to review exceptions.
- Emergency and urgent access: Define supervisor approval, visitor escort, temporary access, door release, and log review before installation.
Review the security cage locks and access control guide before specifying hardware. Power, data, conduit, alarm contacts, and release behavior belong on the project drawings, along with who maintains each component.
For a project example, see the pallet rack security cage case study. The point is not to copy that layout. Use it to think through the relationship between storage, access, and warehouse movement.
Common Warehouse Security Cage Design Mistakes
Most cage problems begin as small layout omissions. A field review should look at the entire boundary and the work that happens around it.
- Choosing a catalog size first: Start with measured clear space and operating paths. Standard panels may still require a custom arrangement around columns, racks, walls, or services.
- Putting the gate at a blind corner: Move the opening so authorized handoffs can be seen and visitors do not cross active equipment paths.
- Ignoring the top edge: Decide whether the risk requires an open top, a ceiling, or a connection to the deck. Coordinate any top with fire protection and service access.
- Leaving a perimeter gap: Check the floor, wall, column, corner, and deck connections. A gap can create a bypass or pry point.
- Assuming open mesh equals sprinkler compliance: Open grid does not remove the need to review obstruction and spray conditions with the responsible professional.
- Forgetting the busiest shift: Test carts, pallet jacks, forklifts, pedestrian movement, inspection, and returns at the same time the cage must operate.
- Adding electronics without infrastructure: Confirm power, data, conduit, emergency operation, and maintenance access before choosing readers, cameras, or alarms.
- Skipping closeout: Keep the approved plan, hardware list, inspection notes, access procedure, and changes in the project file.
After installation, walk the perimeter from every side. Check corners, floor gaps, fasteners, hinges, latch engagement, ceiling edges, camera views, and the normal handling route. Document any change before the cage enters daily use.
Cost Drivers and the Next Step
Exact pricing requires a project layout. Square footage is only one input. Scope can change with mesh opening, wire and frame approach, panel height, door type, top treatment, anchors, floor and wall conditions, access controls, cameras, alarms, engineering, permits, freight, and installation.
| Scope item | What changes the design review |
|---|---|
| Footprint and height | Columns, walls, racks, utilities, floor to deck height, and whether the top must close a climb-over path. |
| Door and handoff | Pedestrian or equipment traffic, swing clearance, sliding track, service window, latch, lock, and emergency operation. |
| Security level | Stored item size, reach-through risk, impact exposure, user count, access record, camera view, and alarm needs. |
| Building coordination | Sprinkler review, egress, slab and anchoring, electrical and data work, seismic needs, permits, and operating-hour limits. |
| Installation scope | Site access, offloading, assembly, anchoring, controls, testing, documentation, and training or handoff. |
Use the security cage specifications guide and security cage cost guide to organize the request. Then send the measured plan through the Security Cage Designer or request a quote. Lead time depends on the final scope, availability, engineering, permits, and installation schedule, so it should be confirmed for the specific project rather than assumed.
Material Handling USA can help review the layout, enclosure components, workflow, and installation scope. Call (800) 326-4403 or email Sales@MH-USA.com with the dimensions, photos, stored goods, door needs, and site conditions.
Warehouse Security Cage Design FAQ
What is warehouse security cage design?
It is the planning of the enclosure footprint, panels, doors, locks, top treatment, anchoring, workflow, and approval checks for a restricted warehouse area.
How do I size a warehouse security cage?
Measure the clear length, width, floor to deck height, overhead services, access path, storage volume, door clearance, and anchoring locations. Then compare the layout with your handling equipment, egress routes, and access process.
What mesh opening and wire size should I choose?
There is no single mesh specification for every cage. Choose the opening based on reach-through risk, smallest item stored, visibility, airflow, and handling needs. Choose wire, frame, joints, and anchoring as a complete system with the supplier.
Does a warehouse security cage need a ceiling?
Not every application uses a ceiling. A top can close a climb-over path or meet a buyer security requirement, but it must be coordinated with the structural deck, utilities, sprinkler layout, and approval authority.
Is 18 inches below a sprinkler enough for a cage?
No. OSHA uses an 18 inch minimum vertical clearance rule for material below sprinkler deflectors, but that number does not by itself approve a cage ceiling or open mesh panel. A fire protection professional and the authority having jurisdiction should review the final condition.
Should I use a hinged or sliding cage door?
Use the door that fits the traffic and available clearance. Hinged doors need a clear swing and safe egress. Sliding doors can avoid swing space but need overhead support, a clear travel path, and an emergency access plan.
How do I request a security cage quote?
Use the Security Cage Designer to outline the footprint and features, then send the plan to Material Handling USA for review. You can also request a quote or call (800) 326-4403 with your dimensions, stored goods, door needs, and site conditions.
Plan Your Security Cage With MH-USA
A strong design connects the physical boundary to the way your warehouse receives, stores, inspects, and releases goods. Start with the Security Cage Designer, send the measured layout for review, or request a security cage quote. For direct help, call (800) 326-4403.
Explore the full security cage systems category for warehouse enclosures, tool cribs, doors, locks, ceilings, wire mesh panels, and installation support.